
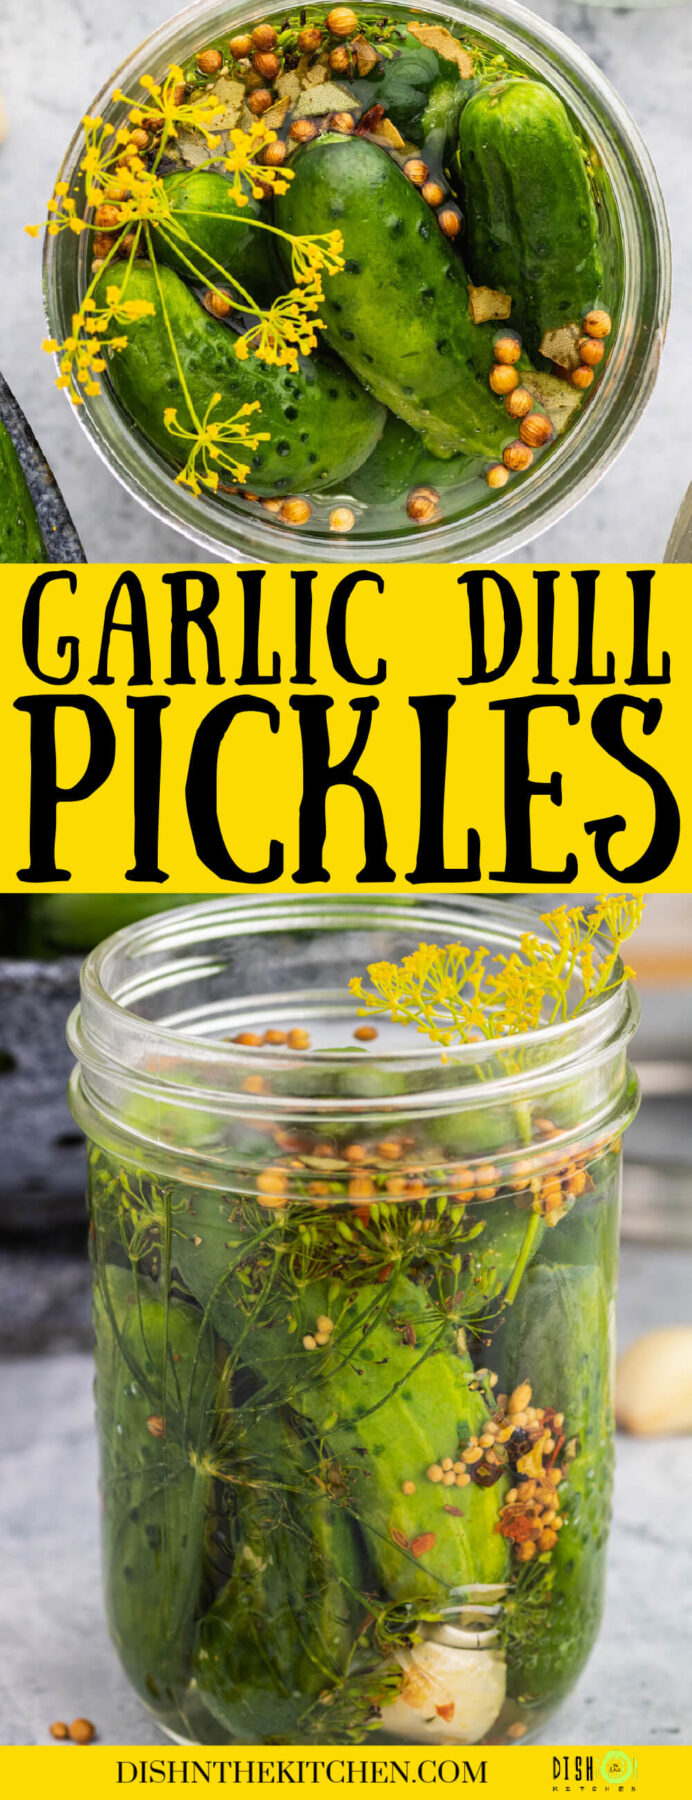
These Garlic Dill Pickles are just like the ones grandma used to make. They’re salty sour and full of pucker power! Homemade pickles are far superior to any store bought pickles and making them yourself is so satisfying. Learn how to make a batch of homemade pickles with this easy guide.
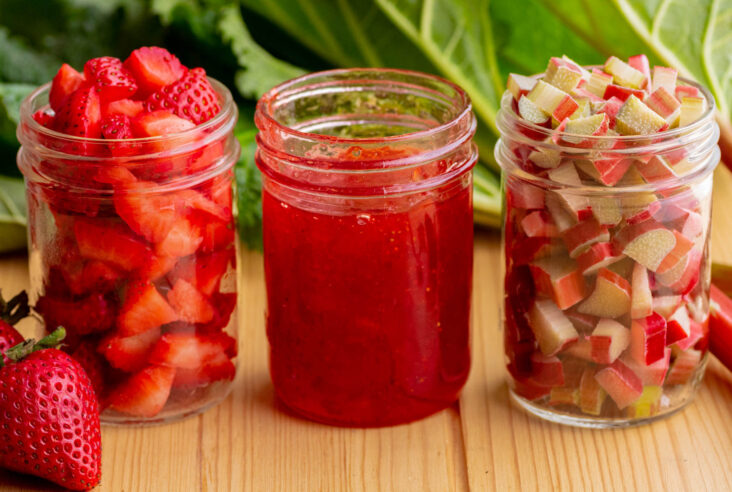
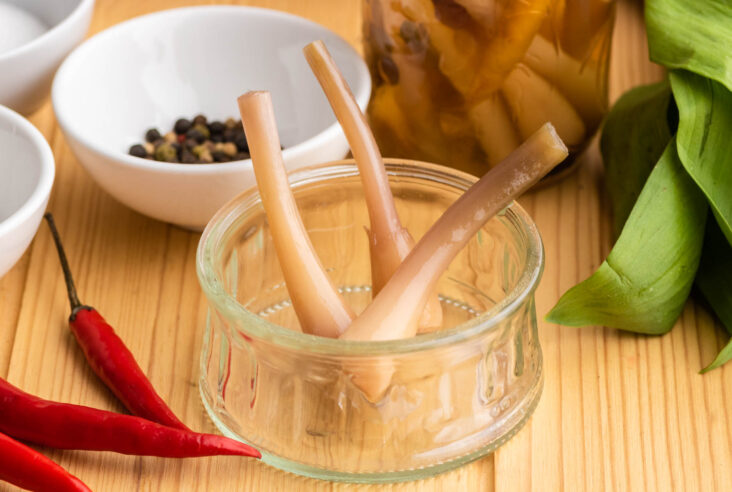
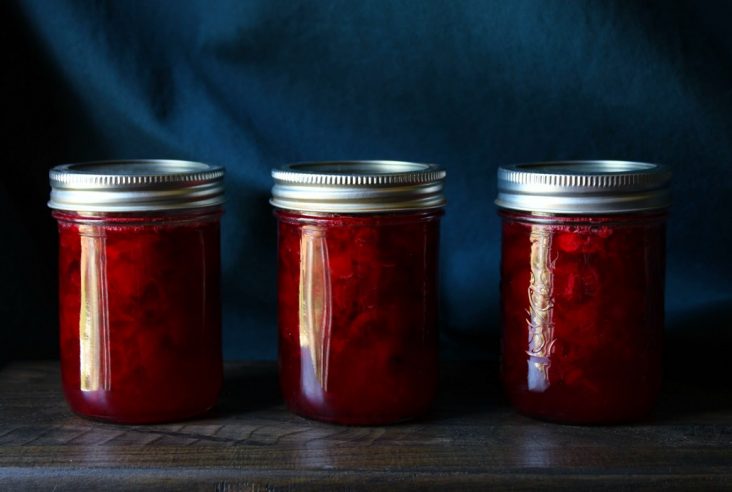
Small batch preserving is the easiest way to preserve seasonal fresh fruit and vegetables. In the summer I am always whipping up small batches of Strawberry Rhubarb Jam or Pickled Garlic Dill Carrots so we can enjoy them all year long. In the middle of a cold winter, we are thankful for tasty homemade jams and pickles!
Want to save this recipe?
Enter your email below and get this post sent straight to your inbox. Plus, I’ll send you my weekly newsletter featuring the newest and best Dish ‘n’ the Kitchen recipes every week!
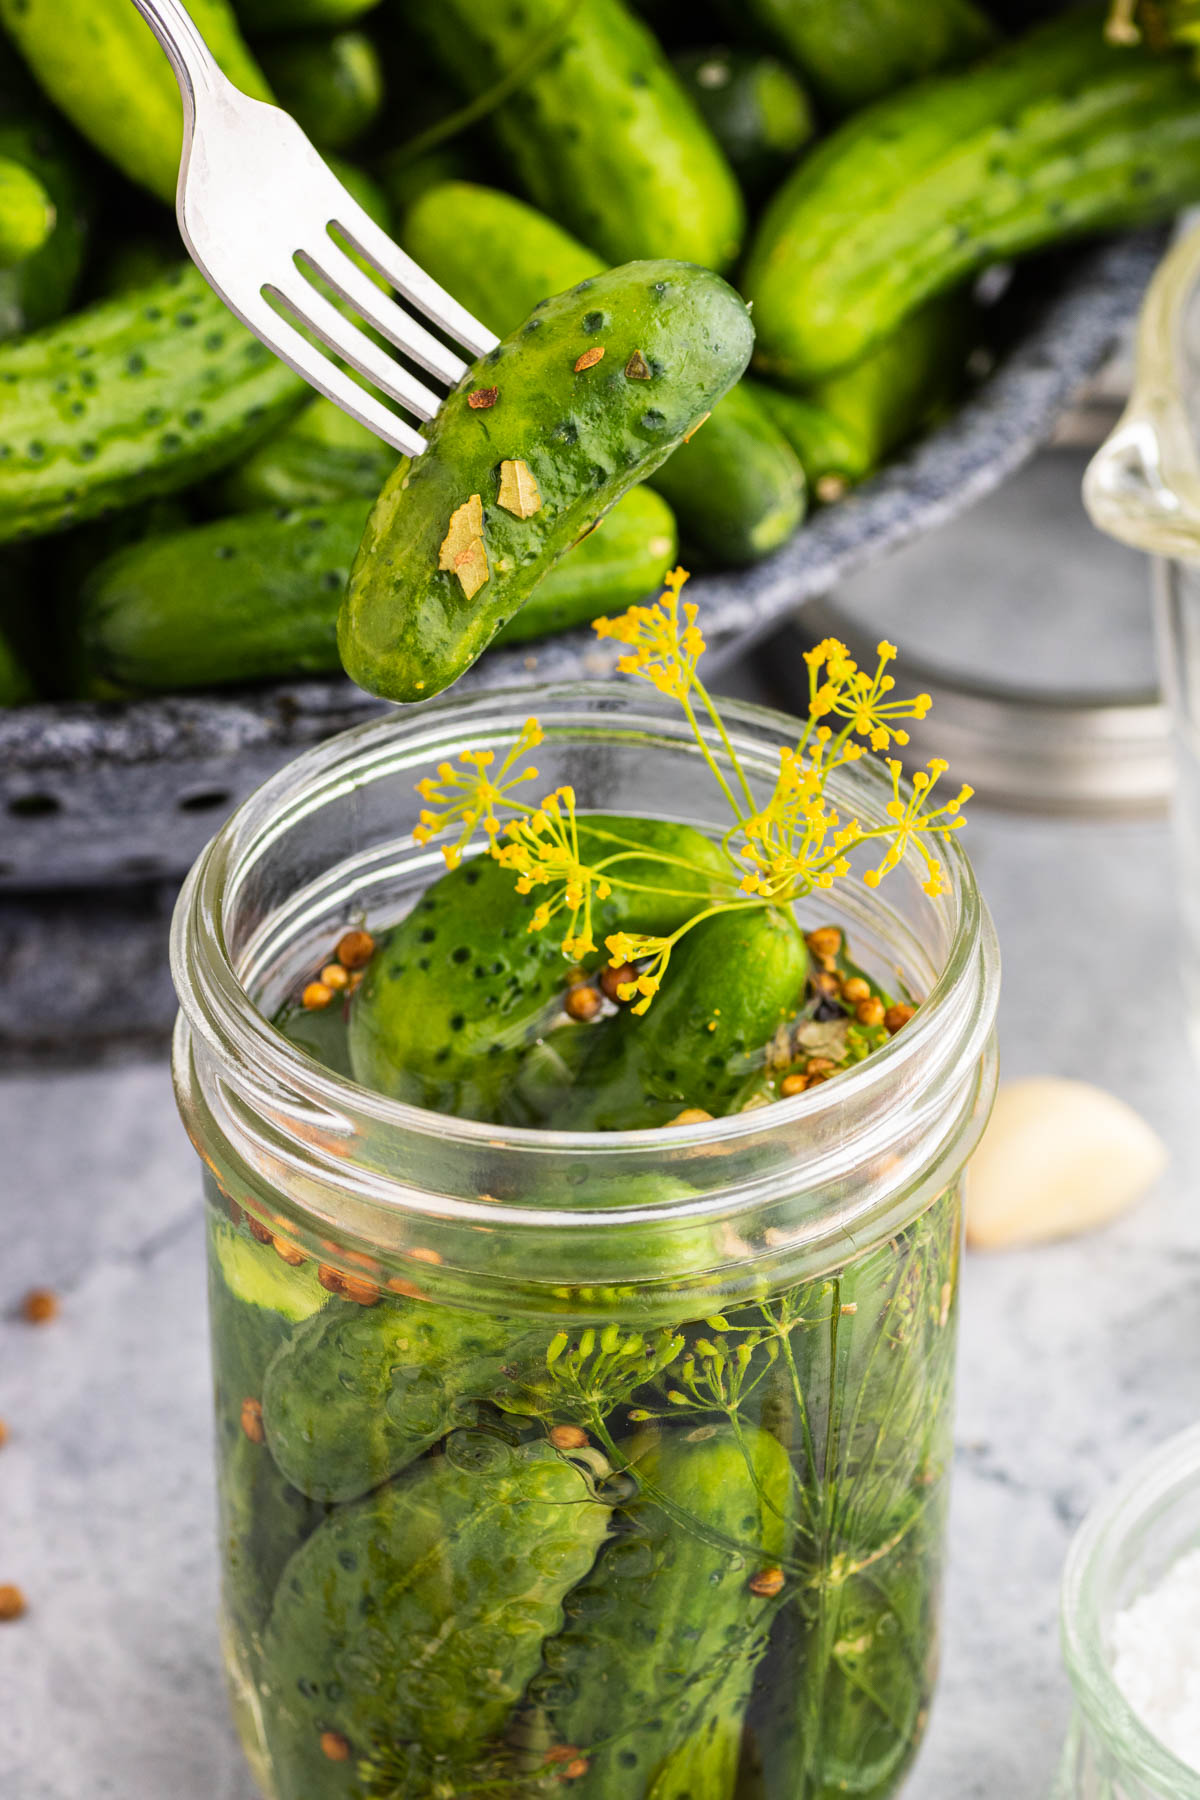
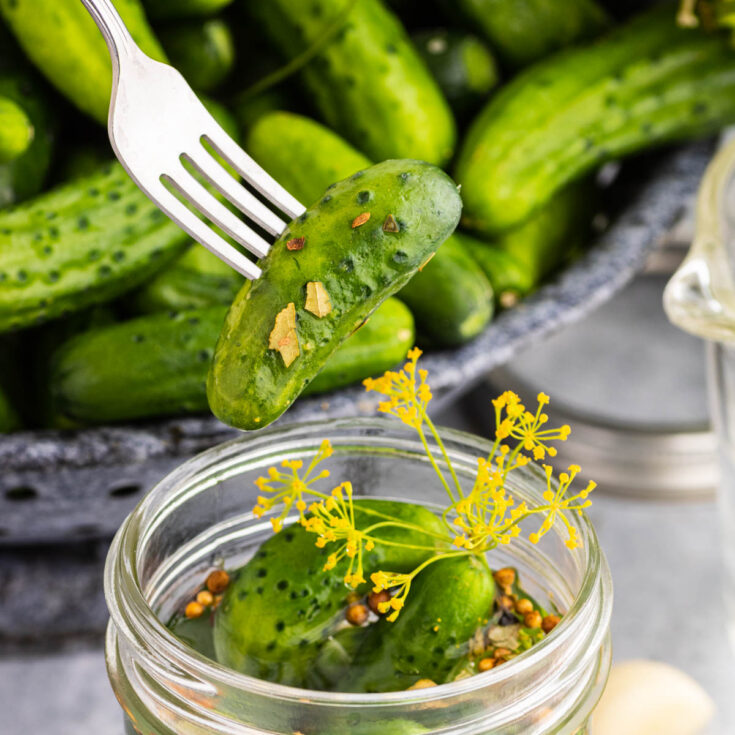
Homemade Garlic Dill Pickles
I don’t know about you but for me the ultimate pickle must be crispy, salty, and sour. It also has to have tang from the dill and plenty of zip from garlic. These pickles really deliver what I like to call ‘pickle power’.
This dill pickle recipe is near and dear to my heart because I grew up helping my Grandma make them every year. My job was to stuff the jars with cucumbers and make sure they all had garlic, dill, and pickling spices. Then Grandma would pour the brine and place the jars into the steaming canner.
I think of those memories every time I make (and eat!) a jar of pickles. This recipe isn’t difficult (an 8 year old can stuff the jars) and has stood the test of time. I’ve been making them for 40 years now! Oh, and just so you know, you can also use this brine to pickle asparagus, carrots, or green beans.
However, making pickles is not foolproof, even with this great recipe. Read the recipe over a few times before you begin. Then, follow my tips and tricks to ensure you make the best pickles for your family and friends.
How to Select Cucumbers For Pickling
Back in the day my grandma would pick the smallest cucumbers from her garden and save them up until she had enough for a batch of pickles. She would use the larger ones to make sliced refrigerator pickles and the smaller ones for garlic dills.
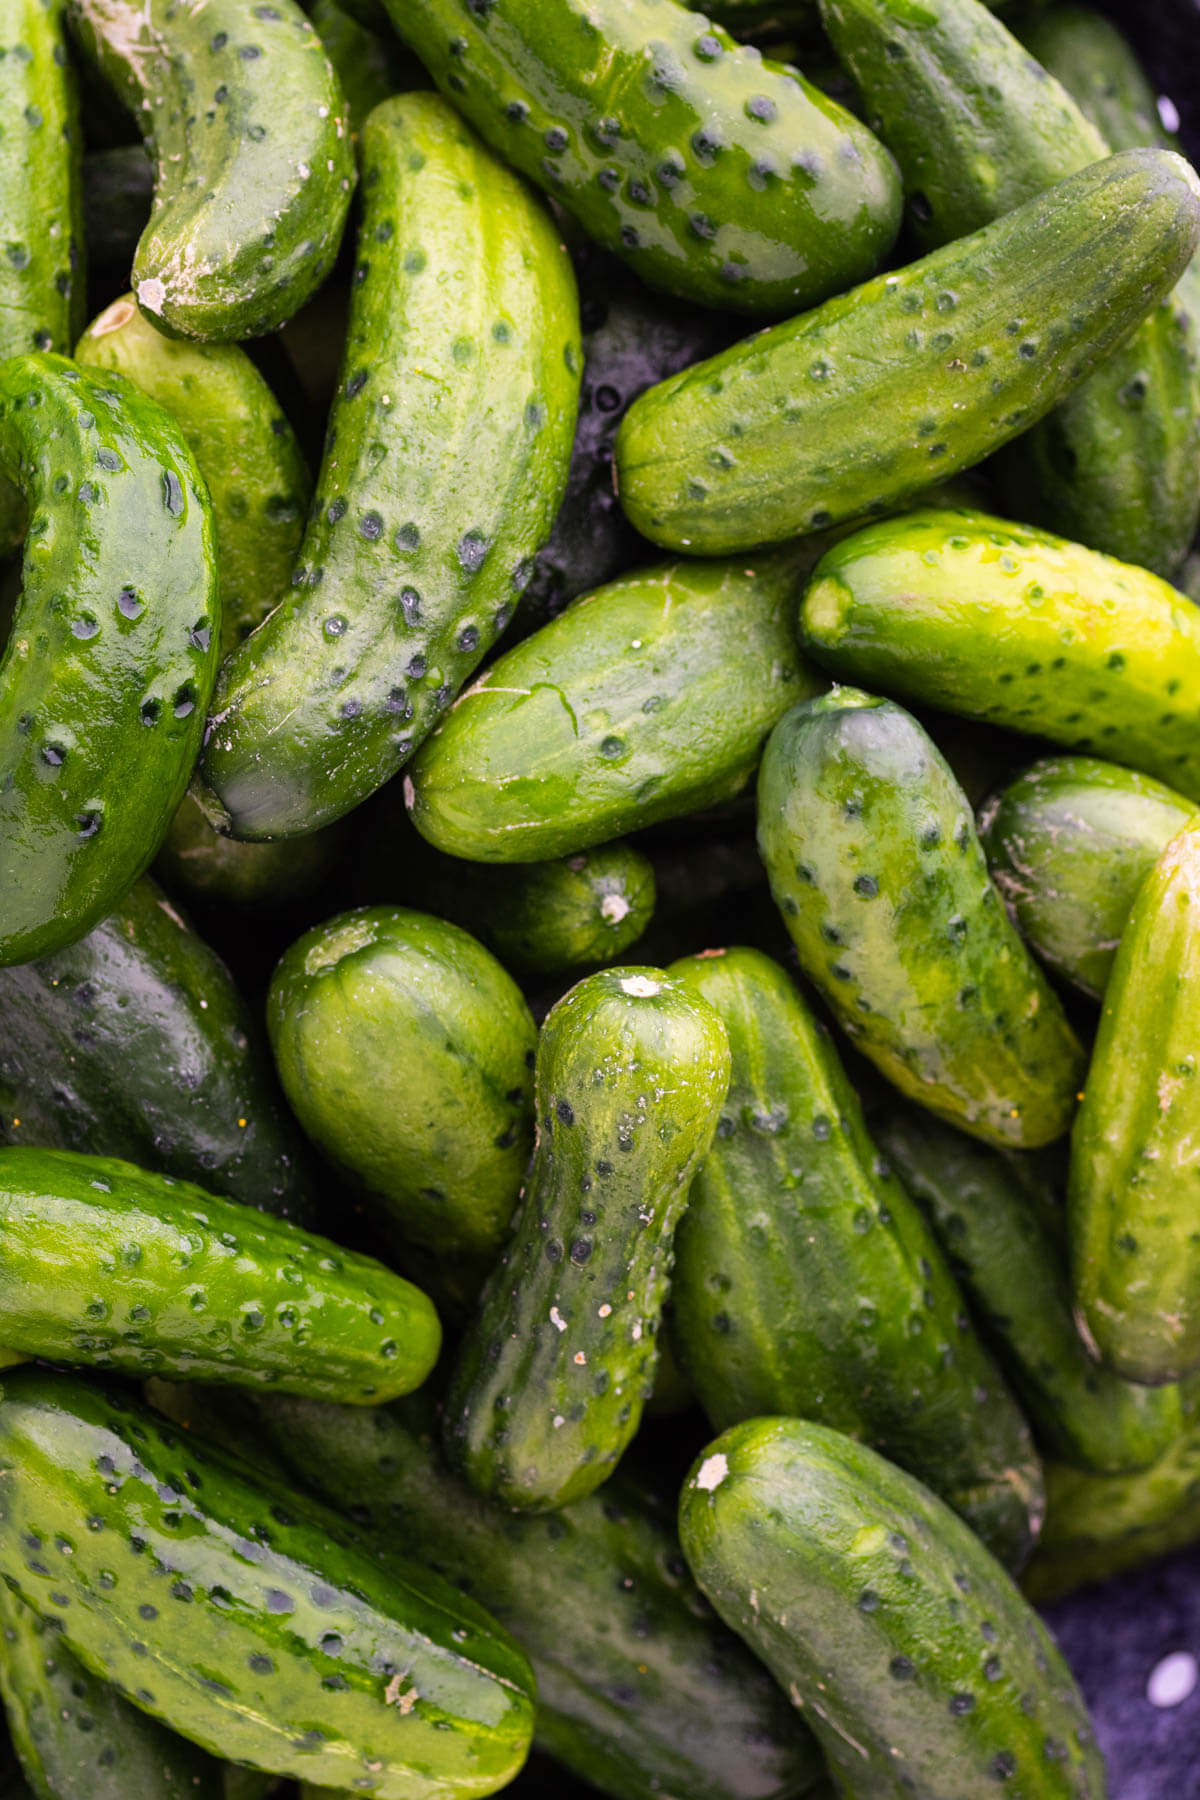
These days, there are several specific ‘pickling cuke’ varieties that you can grow or buy at Farmers Markets. They have thinner skin and crisper, crunchier flesh than most slicers. They were bred to stay small so they are the perfect size for stuffing into pint jars.
- Choose firm pickling cucumbers that are heavy for their size. There should be no signs of wrinkling or puckering at either end.
- Select those with a dry skin with even, dark green colouring. Streaks of yellow mean the cucumber is too mature and will go soft after pickling.
- Cucumbers 2-3 inches in length (the size of your thumb) are best. Don’t buy any that are longer than 4 inches.
- Look for green stems or flower ends still attached. This means they were picked recently and haven’t been in storage for too long.
- If you are harvesting cucumbers from your garden, pick in the morning for best flavour.
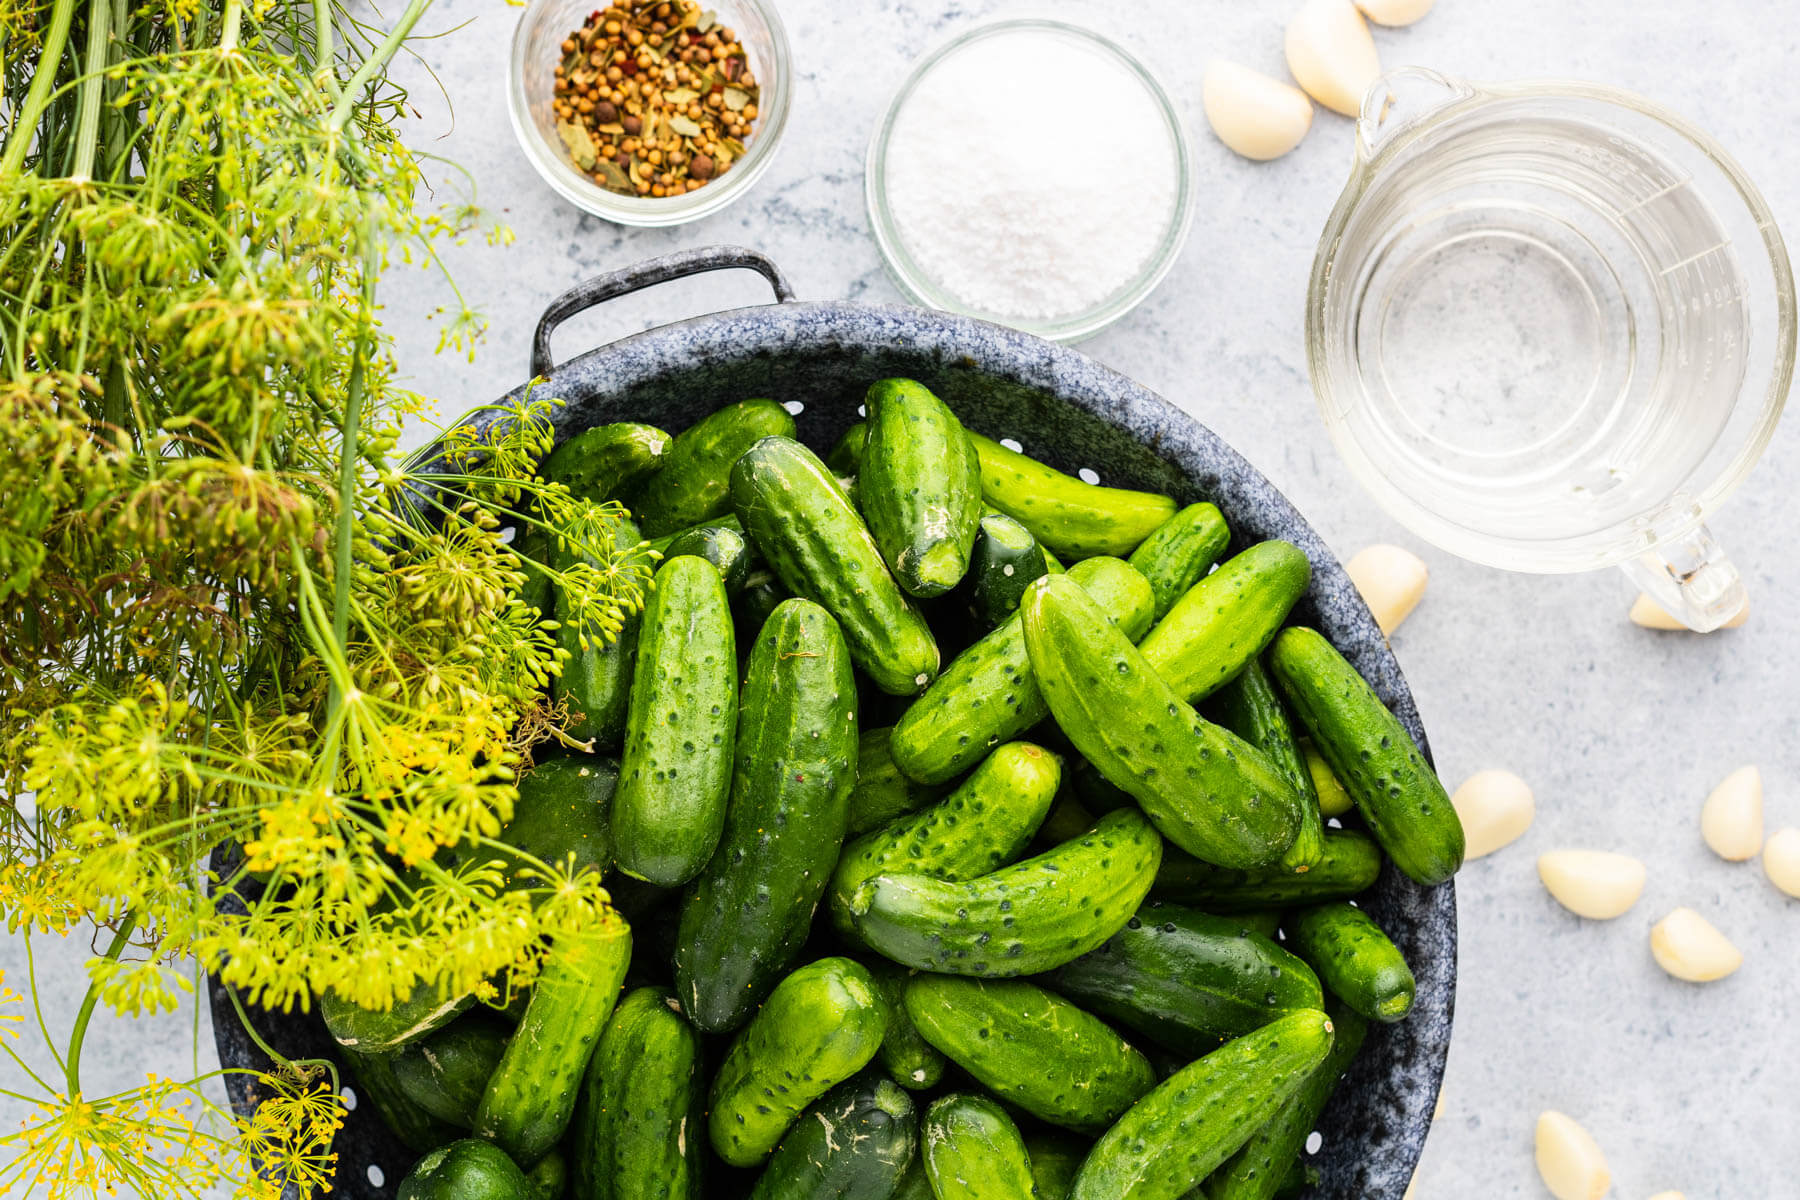
Ingredients for Garlic Dill Pickles
Now that you know how to select the perfect pickling cucumbers, here are the other ingredients you’ll need to make a batch of Garlic Dill Pickles.
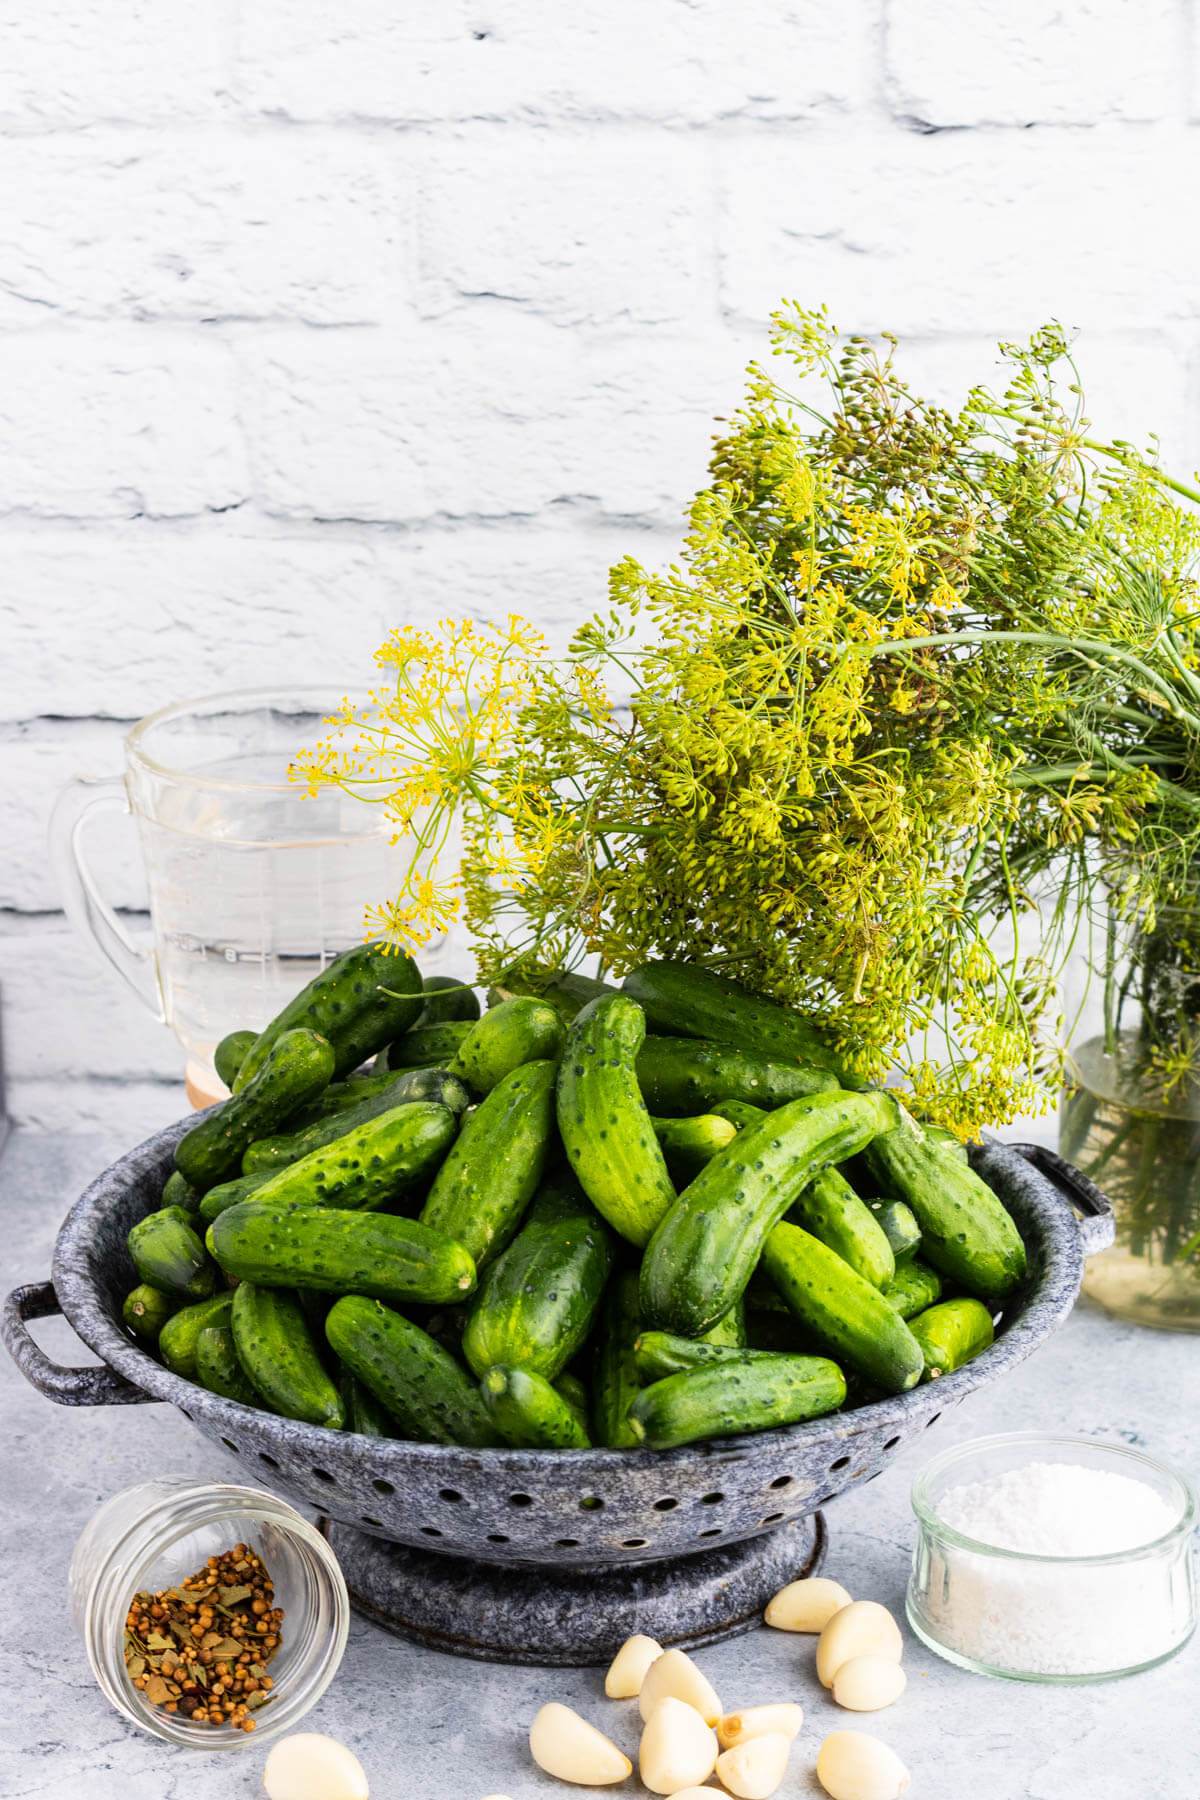
- Cucumbers
- Fresh Dill
- Pickling Salt
- Vinegar
- Garlic Cloves
- Pickling Spices
For maximum flavour it is best to use flowering dill heads instead of ‘baby dill’. Once dill goes to seed, it has a more pronounced pungent flavour that is perfect for pickling. You can use the early flowering head or a more mature one when it develops dill seeds. Or just add dill seeds if you can’t source it fresh.
Pickling salt is the best salt to use when creating a brine for pickles. It is very fine (so it dissolves quicker) and contains no additives such as anti-caking agents which sometimes turn a brine cloudy.
You can also use kosher salt as long as it does not contain additives. It will just take longer to dissolve due to the larger granules. Note that you will need roughly 50% more kosher salt to replace the amount of pickling salt (3/4 cup to replace 1/2 cup pickling salt).
This pickle recipe calls for distilled white vinegar with at least 5% acetic acid. This is the minimum amount acetic acid needed to preserve the pickles properly. White vinegar is clear and does not contain any other flavours but you can use any vinegar as long as it contains at least 5% acetic acid.
NOTE: If you prefer less pucker power, you can add 1 teaspoon of granulated sugar to the brine.
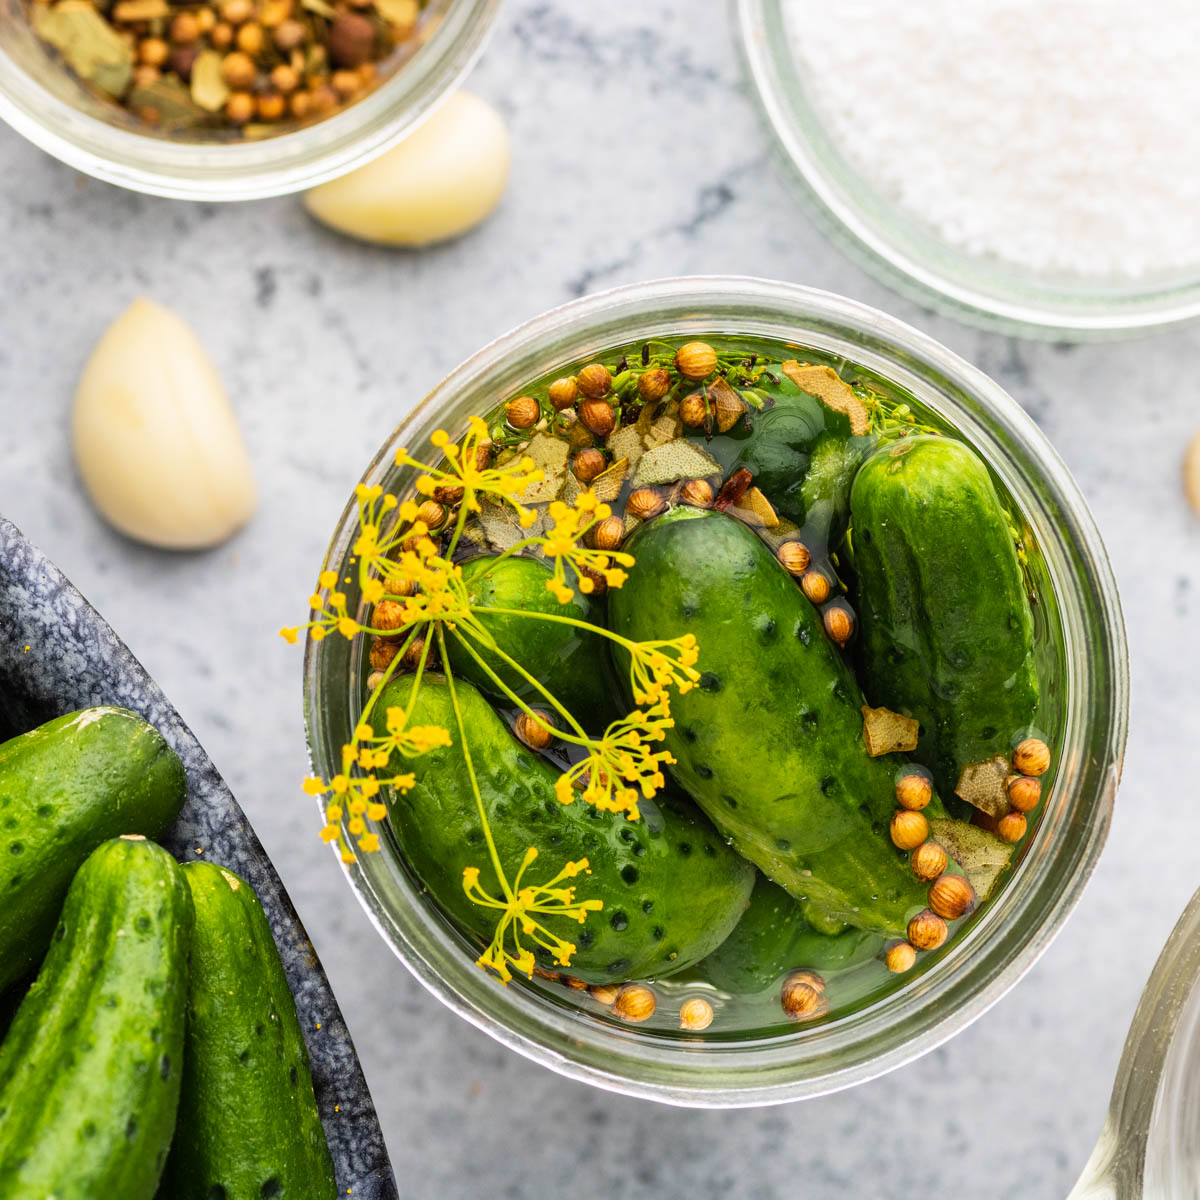
Use fresh garlic cloves and a new bag of pickling spices. Common spices in a pickling blend are coriander seeds, mustard seed, bay leaf, dill seed, black peppercorns, fenugreek, cloves, cinnamon, ginger, and allspice berries. You can add red chili flakes if you want your pickles to be spicy.
How to Make Garlic Dill Pickles
CANNING PREPARATION
Fill a hot water bath canner (with a canning rack) with water and bring to a boil while you scrub and trim pickling cucumbers. Trim 1/16 inch off the stem end and leave the cucumbers in a sink of cold water until you are ready to pack the jars.
Wash and inspect 6 pint sized mason jars (I always do an extra jar just in case) and their lids. Be sure there are no chips on the jar rims and that there’s no rust or dents on the lids. Set the jars upside down in a large cake pan, add an inch or two of water.
Place the cake pan (with jars and water) in a 250 F oven for ten minutes and keep warm until you are ready to fill them. Put the lids and lid rings into a large saucepan and fill with water. Set the saucepan on the stove and heat until they just begin to boil. Fill a kettle with water and bring to a boil.
To make the brine, add the water, vinegar, and salt to a medium pot. Add sugar, if using. Bring to a boil and stir a few times so that the sugar and salt dissolve.
Lastly, clean and prep the garlic and dill. Don’t forget the pickling spices!
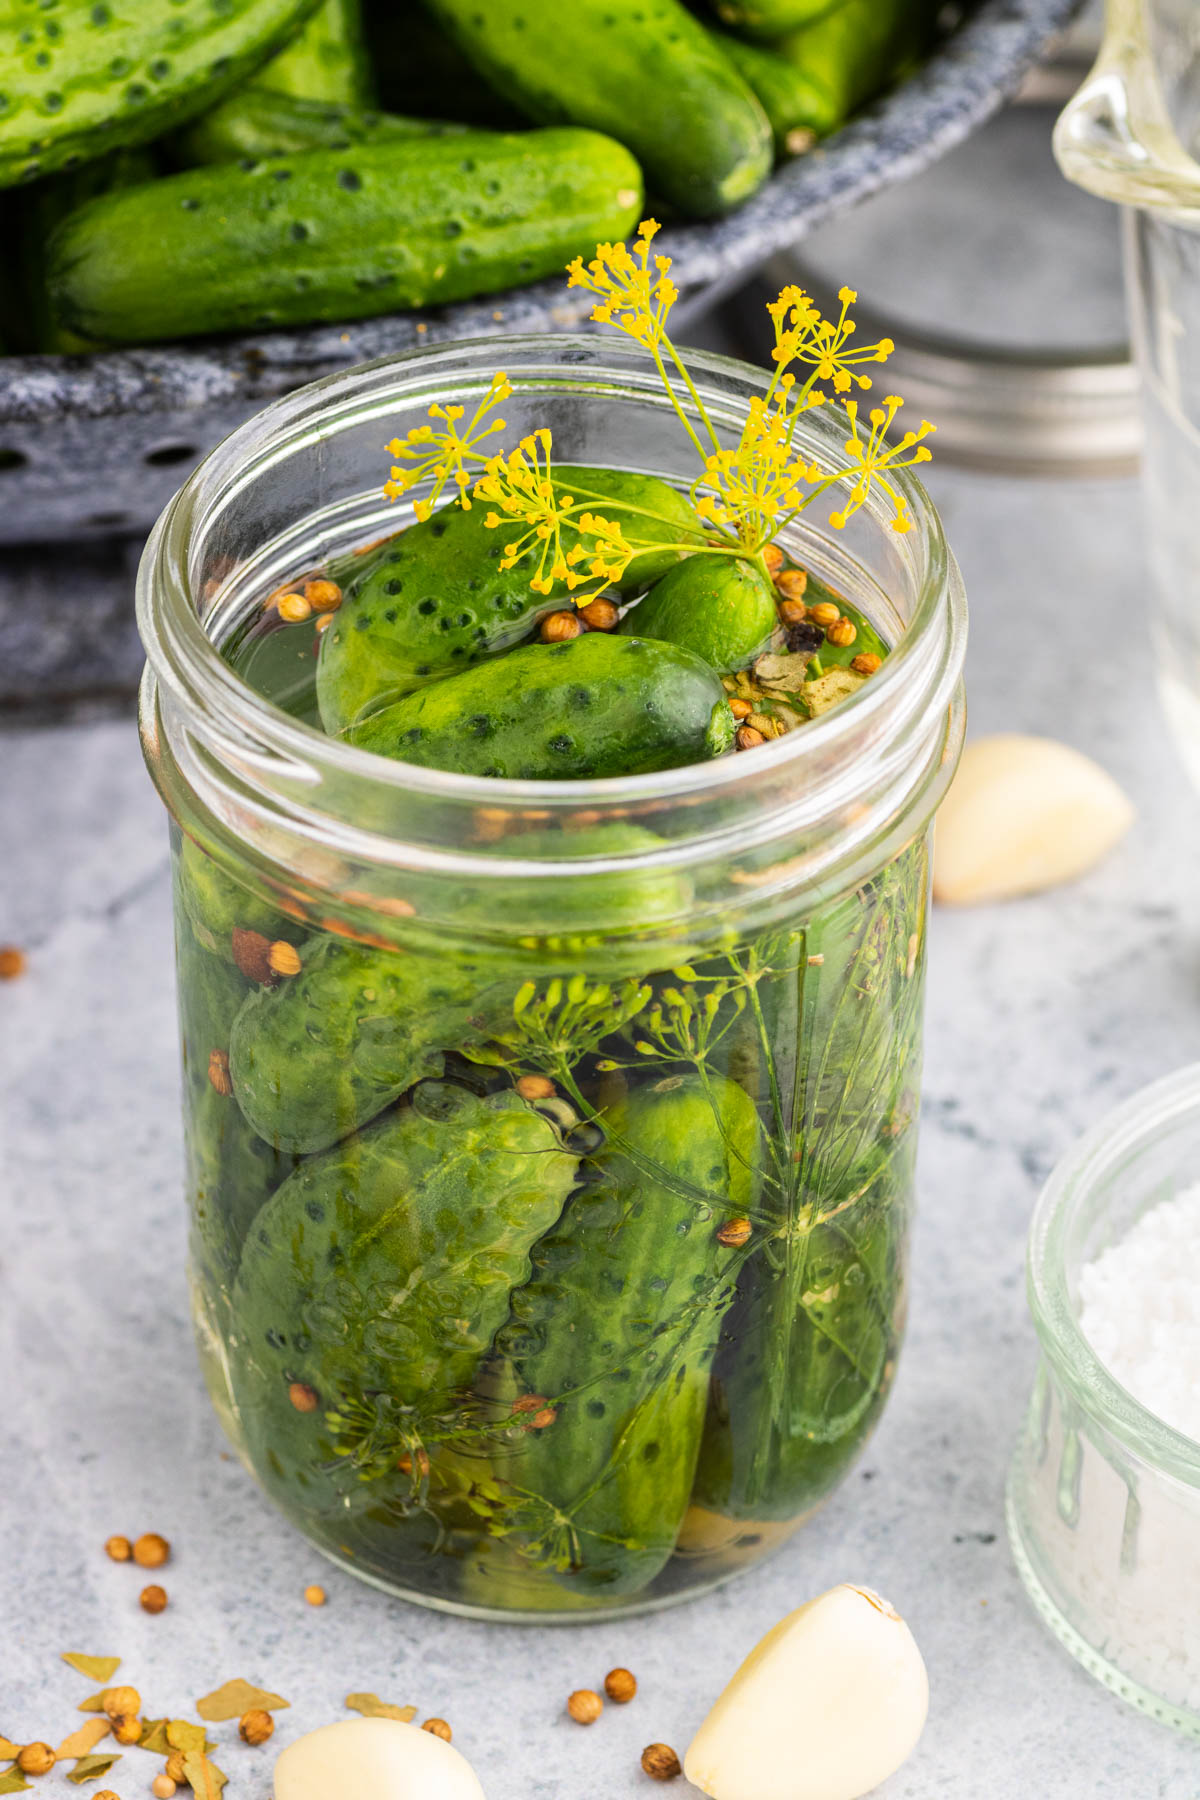
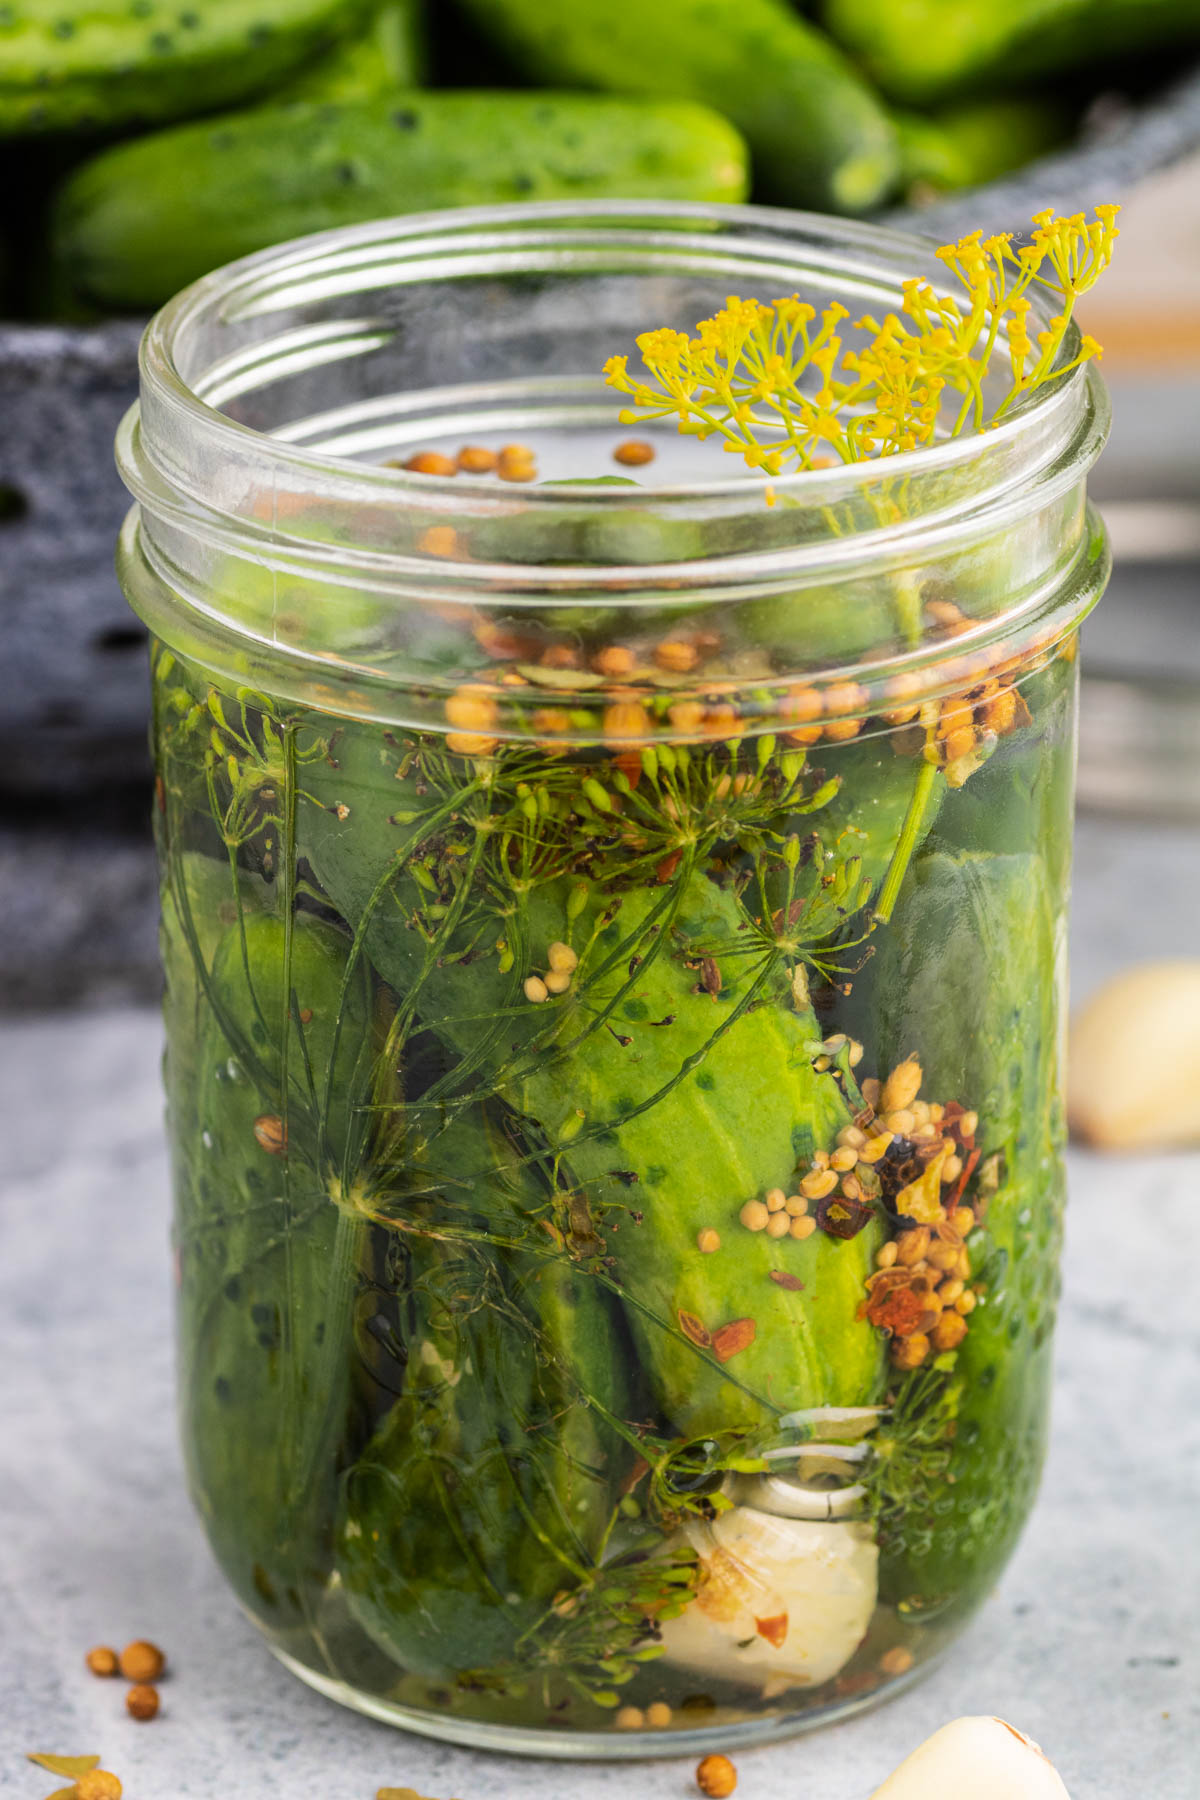
FILLING THE JARS
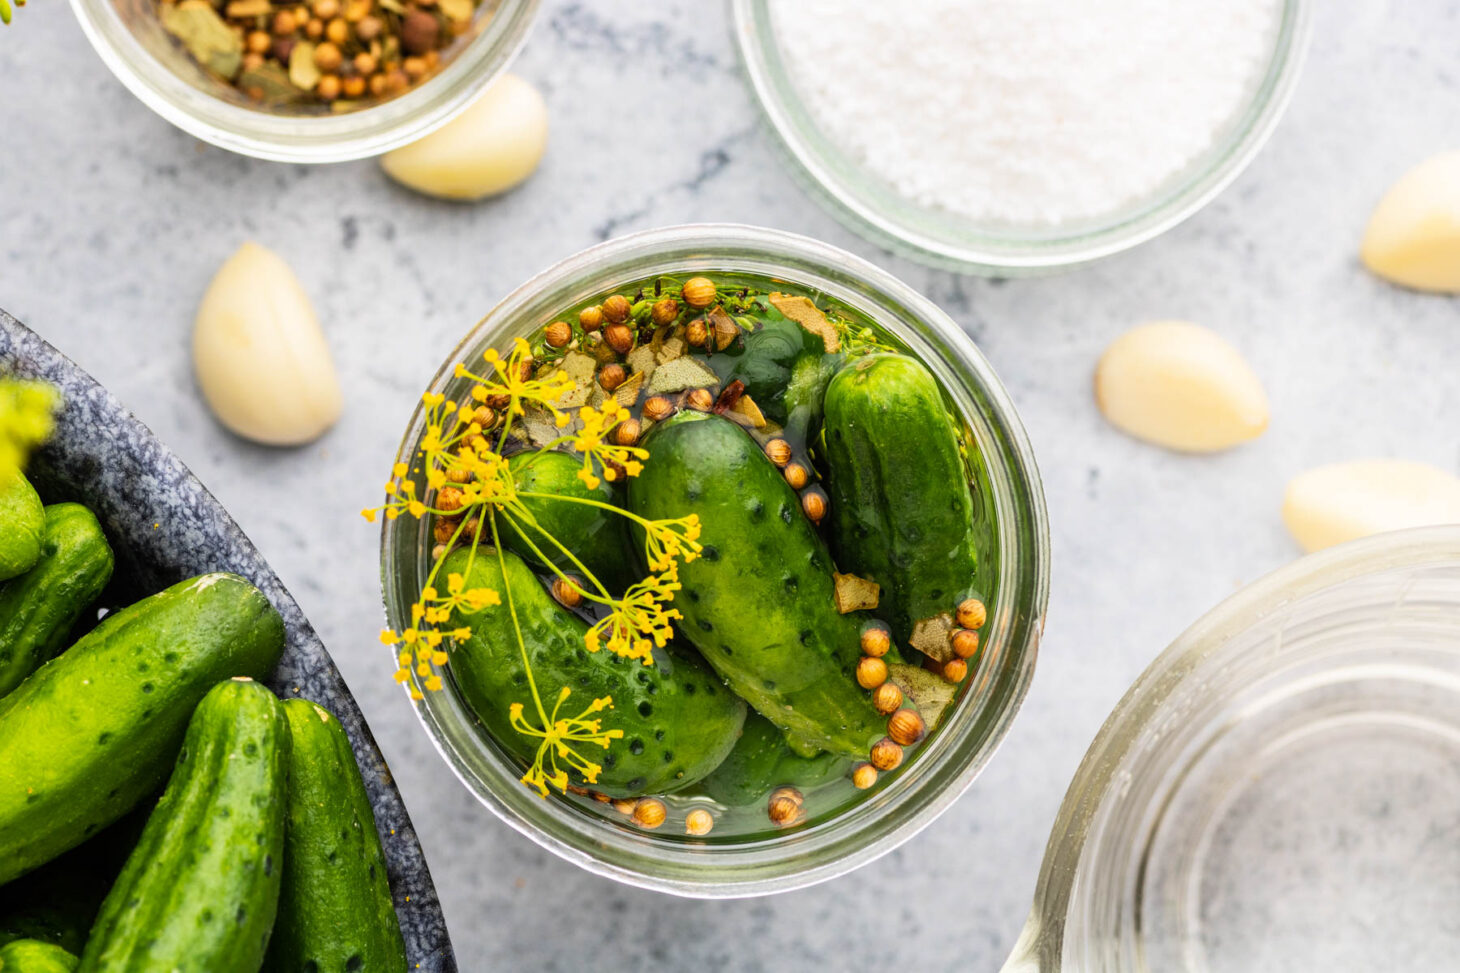
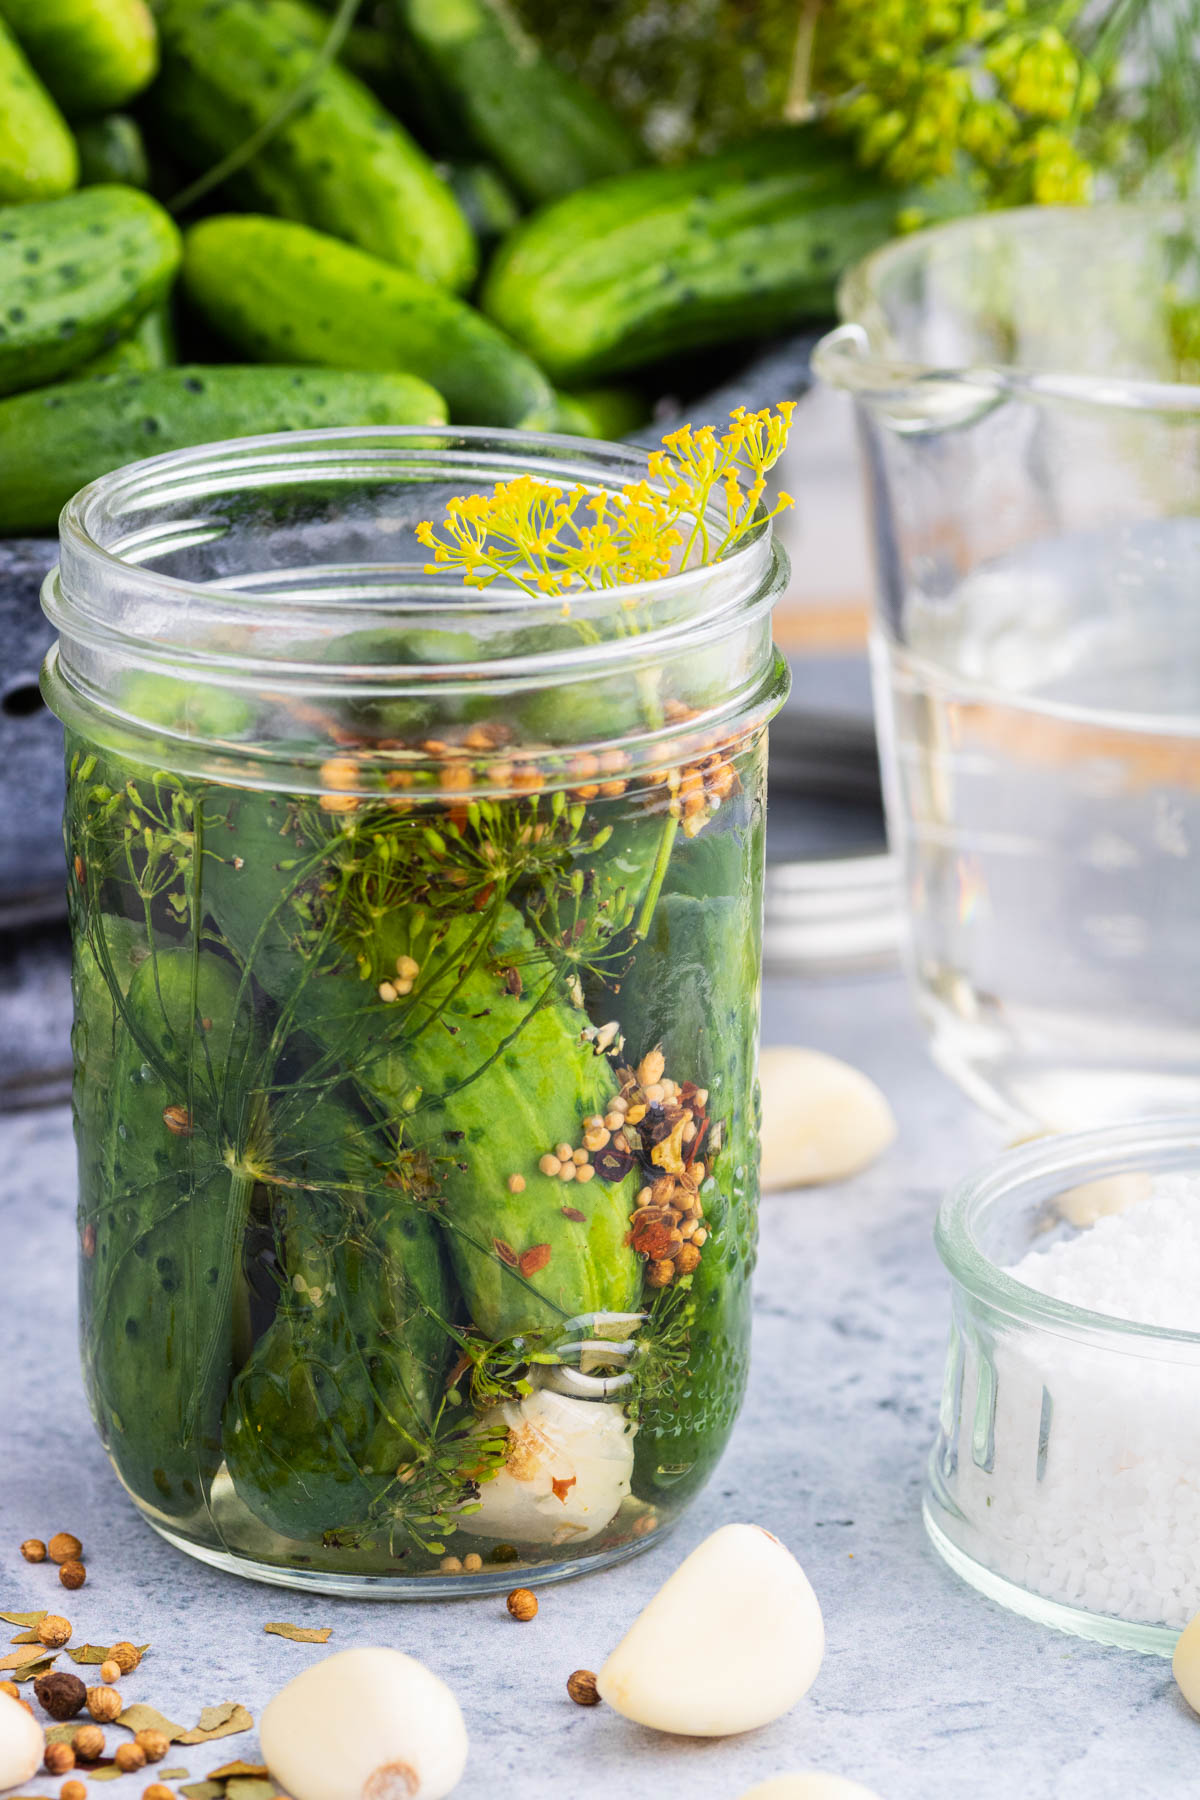
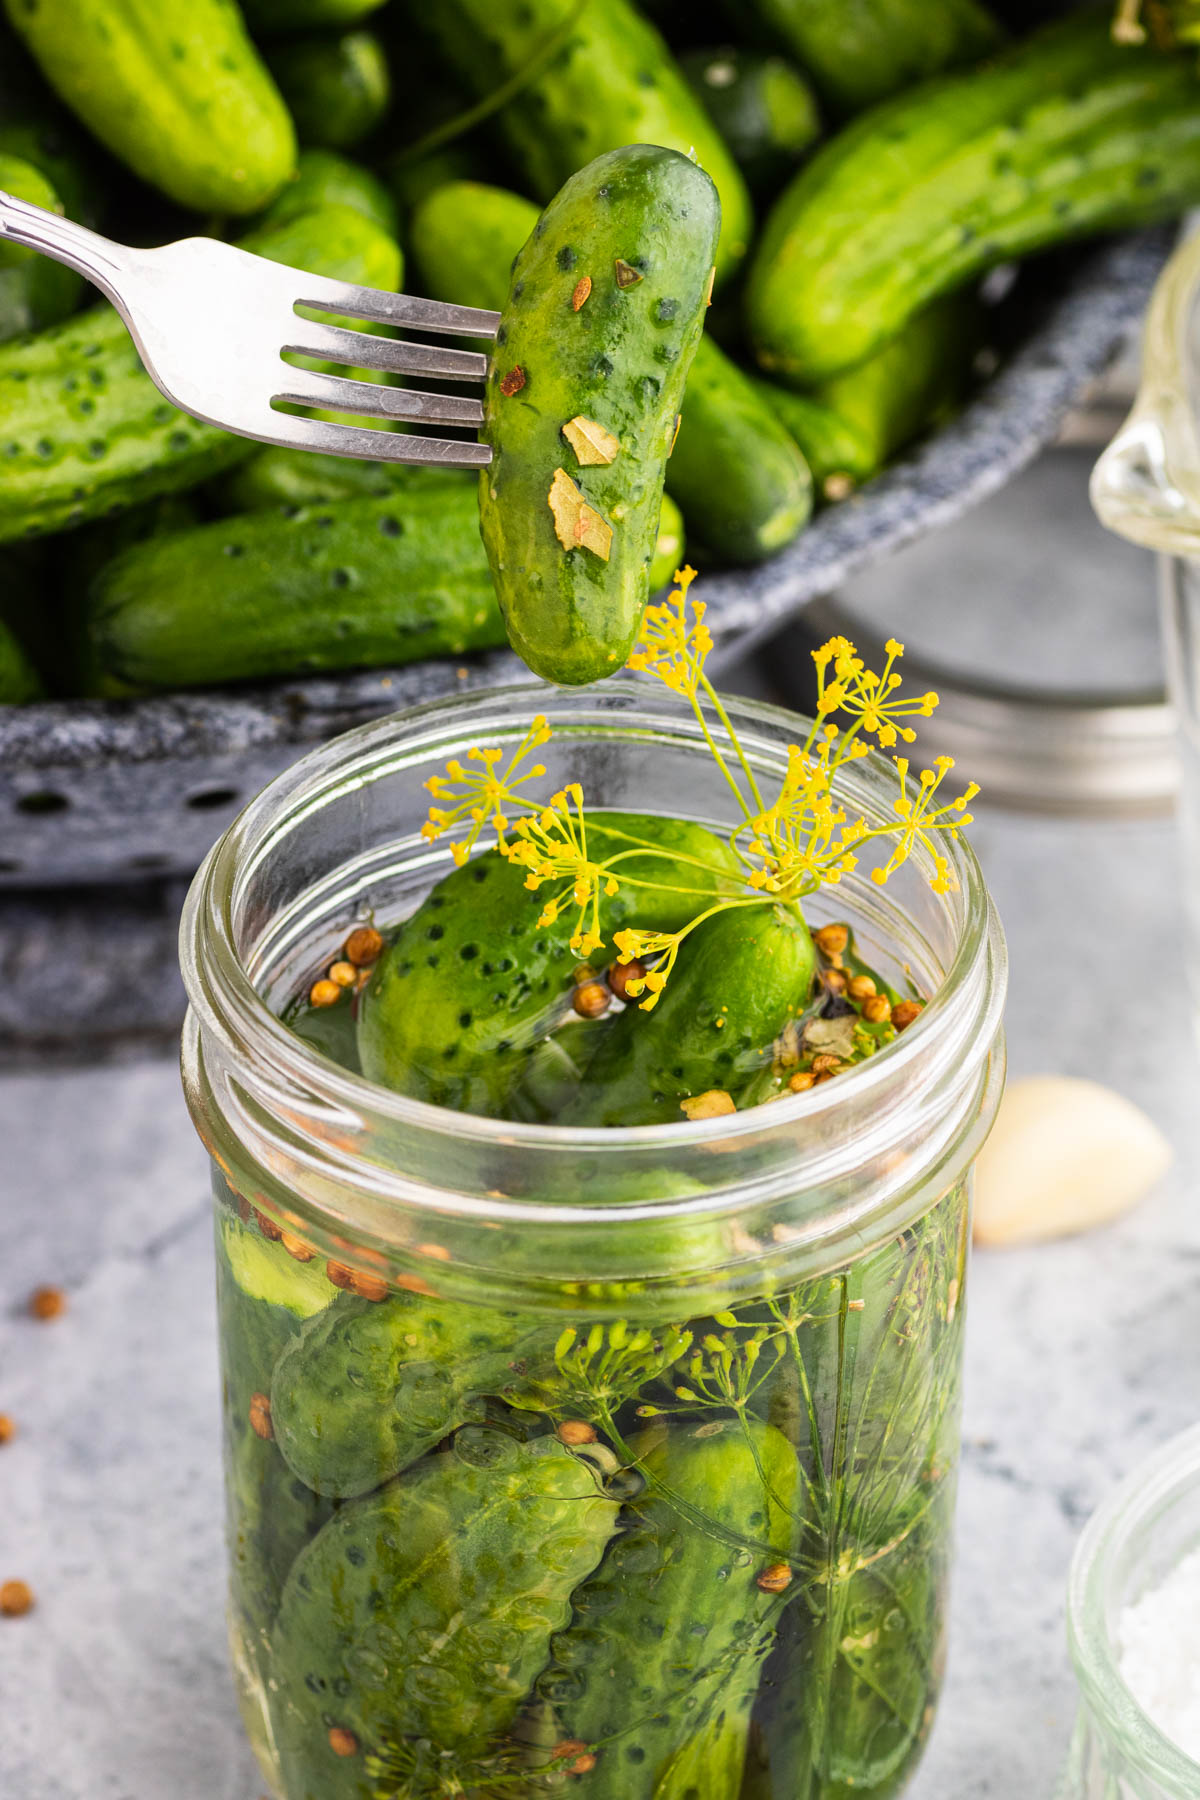
Use a jar grabber to take the hot jars out of the oven one at a time. Add one half of garlic clove and a flowering dill head to the jar. Next, quickly but purposefully arrange the cucumbers in the pint jar until the are so tightly packed you can’t add any more.
Ram another garlic half into the jar, then add a 1/2 teaspoon of pickling spices. Top with hot brine, leaving 1 cm head space.
Quickly cover the jar with a hot lid and screw on the sealing ring until it’s just tight, but not over tight.
HOT WATER PROCESSING
Bring the canning rack up so that it fits along the top of the canner above the boiling water. Place each filled jar in the canning rack until all your jars are finished. Lower the canning rack into the canner. Make sure there’s an inch of water above the pint jars. Add water from the boiling kettle or remove water as needed.
Cover the canner and allow the water to come to a rolling boil. Process jars for 10 minutes at sea level or 20 minutes at over 3000 ft altitude (or see hot water processing chart HERE), adding boiling water as needed to make sure the jars are covered.
Remove jars and allow them to cool to room temperature on the counter overnight before moving. Check to make sure all jars have sealed (the lids should be depressed in their centres) and refrigerate any that have not sealed.
Allow pickles to sit in the brine for a few weeks. Enjoy!
If you make these Homemade Garlic Dill Pickles please be sure to leave a comment and/or give this recipe a rating! Be sure to follow me on Facebook and Pinterest for my latest recipes. Also, if you do make this recipe please tag me on Instagram, I’d love to see what you guys are making! Thank you so much for reading my blog.
Homemade Garlic Dill Pickles
These Garlic Dill Pickles are just like grandma used to make. They're sour salty and full of pucker power! Learn how to make a batch of homemade pickles with this easy step by step guide. There's nothing as satisfying as small batch preserving.
Ingredients
- 5 lbs pickling cucumbers
- 5 cloves garlic; peeled and cut in half lengthwise
- 2 1/2 teaspoons pickling spices
- 5 heads of flowering fresh dill
FOR THE BRINE
- 4 cups water
- 4 cups white vinegar
- 1/2 cup pickling salt (or sea salt)
Instructions
- Fill a hot water bath canner (with a canning rack) with water and bring to a boil while you:
- Scrub and trim pickling cucumbers. Leave cucumbers in a sink of cold water until you are ready to pack the jars.
- Wash and inspect 6 pint jars (I always do an extra jar just in case) and their lids. Be sure there are no chips on the jar rims and that there's no rust or dents on the lids.
- Set jars upside down in a large cake pan, add an inch or two of water. Place in a 250 F oven for ten minutes and keep warm until you are ready to fill them.
- Place lids and lid rings into a pot and fill with water. Set on stove and heat until they just begin to boil.
- Fill a kettle with water and bring to a boil.
- Add water, vinegar, and salt to a medium pot. Bring to a boil so that the salt dissolves.
- Clean and prep garlic and dill.
STUFF THE JARS
- Take jars out of the oven one at a time and add one half of garlic followed by a flowering dill head.
- Quickly but purposefully arrange the cucumbers in the pint jar until the are so tightly packed you can't add any more.
- Ram another garlic half into the jar, then add a 1/2 teaspoon pickling spices. Top with hot brine, leaving 1 cm head space.
- Quickly cover with hot lid and screw on the sealing ring until it's just tight, but not crazy tight.
HOT WATER PROCESSING
- Place jar in canning rack and repeat until all your jars are finished. If your hot water canner looks too full of boiling water, remove some. If you need more, take it from the kettle.
- Lower the canning rack into the canner. Make sure there's an inch of water above the jars.
- Process at a rolling boil for 10 minutes at sea level or 20 minutes at over 3000 ft altitude (or see hot water processing chart HERE), adding boiling water as needed to make sure the jars are covered.
- Remove and let sit on counter overnight before moving. Check to make sure all jars have sealed (the lids should be depressed in their centres) and refrigerate any that have not sealed.
- Allow pickles to sit in the brine for a few weeks. Enjoy!
Notes
*If you prefer less pucker power, you can add 1 teaspoon of granulated sugar to the brine.
Nutrition Information:
Yield:
20Serving Size:
1Amount Per Serving: Calories: 11Total Fat: 0gSaturated Fat: 0gTrans Fat: 0gUnsaturated Fat: 0gCholesterol: 0mgSodium: 32mgCarbohydrates: 1gFiber: 0gSugar: 0gProtein: 0g
Nutritional calculation was provided by Nutritionix and is an estimation only. For special diets or medical issues please use your preferred calculator.
Made!🥰 can’t wait for 3 weeks to come… how long are they good for unopened?
Hi Sandra! I’m excited FOR you. I just learned a quirky new phrase recently… the pickle point is when the cucumber turns from cucumber to pickle. LOL Anyway, these pickles don’t last too long in our house but I would say they are good for up to a year and beyond. If the brine turns cloudy or fizzy, has mold or smells odd it’s always best to discard.
Simple and delicious recipe! Garlic dill pickles are the best. I used up all my fresh dill so I’ll try a batch with dill seed. Very helpful to have a recipe written for a smaller batch. Thank you!
Awesome! So great to hear you loved this recipe Amy. Thanks for stopping by.
I cannot find pickling salt in my area. You said its ok to sub sea salt but I read that this is not a good substitute. Would kosher salt be better?
Yes, I have heard there is a salt shortage! What next. Kosher salt will be fine. You’re basically looking for a coarse grained salt with no additives.
My daughter and I are fond of eating pickles! I think it will be fun to make these delicious pickles together! Yay!
Good idea. When I was a kid it was my job to stuff the jars. I hope you have fun together!
Homemade garlic dill pickles looks delicious. My daughter will love this.
I know she will… all of my kids do!
These are awesome pickles. Incredibly easy to make – you can’t miss with these detailed instructions.
I have always wanted to try this, but I was intimidated. And I didn’t want a big batch commitment. Thanks for this is recipe and simple instructions- it’s totally doable now!
Small batch preserving is where it’s at!
These were delicious
Wonderful! So glad you enjoyed them Maren.
I haven’t used flowering dill heads before, do you find them with the vegetables at the store?
Finding them is hit or miss. They should be in season now but your best option would be to check your local green market or farmer’s market
I love homemade pickles and I love the flavors in the pickle. The dill and garlic are sure winner.
I agree! The are the best combo for pickling!
wow these baby dill pickles are amazing. i love it on its own and in salads. totally lifts and brightens my day! can’t believe it was SO easy to make!
My daughter LOVED pickles and this is a great way to use up the cucumbers in the garden!
Homemade pickles are always so delicious. These remind me of the ones my memere use to make.
I always have garlic dill pickles at home. But have never made them myself! Thanks for the great recipe! With your recipe I will try it out myself!
Pickle perfection! Thanks for your very detailed instructions and tips. So helpful!
Thanks for all the tips, I will be adding extra sugar. Im new to canning and your steps will surely help me a lot
Note that these are meant to be garlic dill pickles, not sweet pickles. The small amount of sugar suggested just takes the edge off of the sourness if you prefer it that way.
I had never thought about making my own pickles but your recipe was so simple that I’ll never buy them again!
Great to hear! Happy pickling Freya!
Wow, you didn’t leave anything out in the instructions. I inherited all my Mom’s canning stuff, but haven’t felt confidant enough to try. I think I can do this! Thanks.
That is exactly why I like to provide as much detail as I can…canning can be intimidating for first timers. I hope you give it a try Mary.