
How to Make a Mini Sourdough Starter is a step by step guide to creating your very own Sourdough Starter from scratch. This method creates an active mini starter using only flour, water, and time.
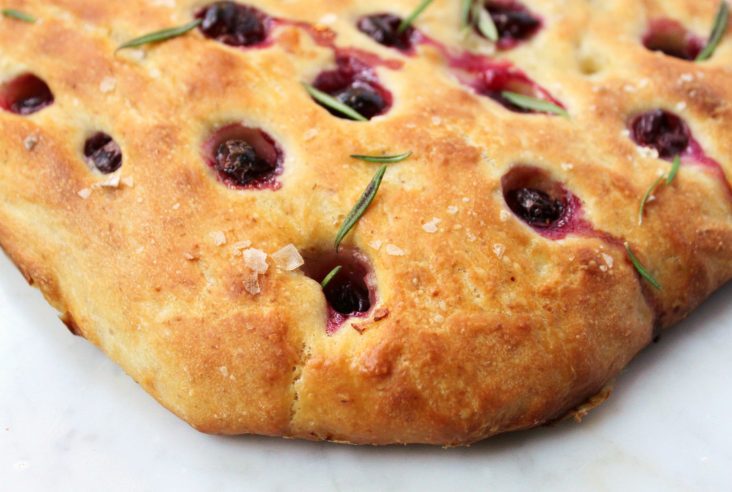
The first step towards learning how to bake your own sourdough bread at home is creating your very own mini sourdough starter. If you have the time, flour, and patience to do this, then sourdough is for you. Once you have your own active starter you can use it to make bread and many other recipes such as Cinnamon Rolls and Super Easy Sourdough Focaccia.
What is a Sourdough Starter?
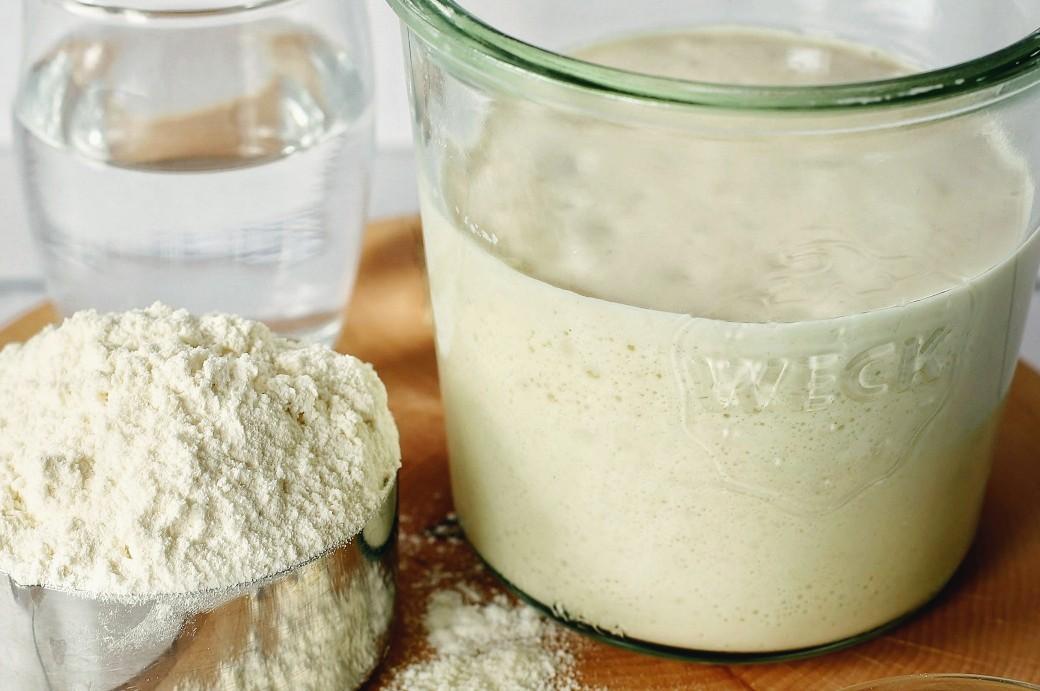
A sourdough starter is a mixture of flour and water that is left to ferment at room temperature. Though the amount of flour and water may vary among starters, this post will provide you with an active basic mini starter using only unbleached (preferably organic) flour and water in equal proportions.
Throughout the process, wild yeasts from your environment will gradually become a part of your starter giving it character and flavour. These yeasts are responsible for breaking down gluten in the flour during the sourdough process. Additionally, it’s important to note that as your starter ages, it will contain more and more yeasts and thus, become more active. A strong bubbly starter makes the best bread!

Want to save this recipe?
Enter your email below and get this post sent straight to your inbox. Plus, I’ll send you my weekly newsletter featuring the newest and best Dish ‘n’ the Kitchen recipes every week!
Sourdough Bread Has Been Around For A While
Sourdough bread is the OG naturally leavened bread. It was baked at it’s most basic form for thousands of years before cultured baker’s yeast became available. Initially, bakers would keep a starter or use a bit of dough from the previous bake for leavening. Later, in the middle ages, bakers would often use barm, a product left over from brewing.

Before You Start Your Sourdough Starter
Before you create your very own mini starter, lets talk about the basic ingredients. While other recipes may add other ingredients such as apples, honey, or cultured yeast all you really need are flour, water, and time. You also need a clean jar with a lid that is large enough for the starter to more than double (but not too large). I use a wide top Weck jar and lid combination without the rubber seal and metal clips.
Many starters contain mixtures of flours in various proportions. Often, many include a portion of rye flour to give it a bit of a ‘push’ (see recipe notes). This recipe is for a very basic starter so all you really need is unbleached flour.

How well do you know your water? If your water source is city water, it is important to find out if it is treated with chlorine or chloramine. These treatments will have a negative effect on fermentation. In this case you must use filtered, bottled, or distilled water to begin a starter. Once the starter is strong, divide it and experiment using your tap water on one part while keeping the other ‘pure’. You may find that the starter will have become active enough to use plain tap water.
Time is the most difficult part of the sourdough starter equation. For new starters it can take a week or two to become active enough to bake with. During that time you’ll go through a wide range of emotions and that’s okay. I know you’re eager to get baking but patience is the first lesson in sourdough baking.
Consistent daily feeding of your starter is so important. Try to do it at the same time each day so that you get into a routine. Eventually, your starter will too!

How to Make a Mini Sourdough Starter from Scratch
To make a mini sourdough starter, weigh 50 grams of unbleached flour in a clean, wide topped glass jar. Add 50 grams of cool water (distilled, bottled, filtered, or tap) and mix well with a clean spoon or spatula. Scrape down the sides of the jar and place a rubber band at the same level as the top of the mixture. Cover with a lid and allow it to sit on your kitchen counter.
The next day, discard half of the starter and repeat the feeding of 50 grams flour to 50 grams water. Do this roughly at the same time each day and within 7-10 days the starter should be active enough to bake with.

How to Know When Sourdough Starter is Ready to Use
Though you’ll likely start seeing bubble action in the starter within a few days, it needs to be VERY active to be used for baking. The time it takes to become active is related to the ambient temperature of your home. Please note that if your home is cool, it will take longer for the starter to build. Be patient and stick to the plan!
The elastic band around the jar is a great way to measure the ‘activity’ of the sourdough starter. Use it to gauge the activity of your starter. Once it rises and falls regularly and the starter has at least doubled, it is ready to use for baking

How to Take Care of Your Sourdough Starter
How you maintain a starter is based on how often you plan on baking. If you plan on a daily bake, maintain the schedule as outlined above. If you plan on baking one or two times a week you can skip feedings and keep the starter in the fridge. Finally, if you don’t plan on baking for a while, keep the starter in the fridge and take it out to feed every 7-10 days. However, if it’s longer than that don’t be too worried, sourdough starter is more resilient than you think!
After a long period of inactivity, it may take a few feedings to wake it up. Take it out a few days before your planned bake and feed it a few times to get it going again.

Trouble Shooting Guide
Sometimes issues arise while you are waiting for your starter to mature. Here are a few of the most common issues and how to solve them.
- Inactive starter even after feeding for 14 days. This could be an issue with the water or cleanliness of the jar. The jar should be clean and sterilized so that there is no soap residue to interfere with fermentation.
- A thin layer of grey liquid (hooch) forms on top of the starter. Don’t panic, this just means that your starter is hungry. Skim off the hooch as it might add off flavours to the starter, then feed it!
- Molds of any colour. This is just not good. Throw out the starter and make a new one. You may need a smaller jar with less air space. More air space equals more room for bad yeasts to take over. Mold may also result from not scraping down the sides of the jar after feeding.
- Starter Slow Down.The new starter is at first quite active, then appears to die down. It is not dead! Just be patient and allow the good yeasts to settle in.
- This is Taking Forever Yes, it does. Get used to it. Seriously though, starter activity is loosely based on the temperature of your kitchen. You can speed things up a bit by keeping it in a warmer location such as beside the stove. Don’t keep it in the stove! I’ve heard horror stories about roasted starters resulting from bakers (or baker’s families) not checking the oven before pre-heating it.

Simple Mini Sourdough Starter
A step by step guide to creating your very own mini Sourdough Starter from scratch. This method creates an active starter using only flour, water, and time.
Ingredients
- 50 grams unbleached flour (preferably organic but not necessary)
- 50 grams water (filtered, bottled, distilled, or tap if not treated)
Instructions
- Weigh 50 grams of unbleached flour in a clean, wide topped glass jar.
- Add 50 grams of water (distilled, bottled, filtered, or tap) and mix well with a clean spoon or spatula.
- Scrape down the sides of the jar and place a rubber band at the same level as the top of the mixture.
- Cover with a lid and allow it to sit on your kitchen counter.
- The next day, discard half of the starter and repeat the feeding of 50 grams flour to 50 grams water.
- Do this roughly at the same time each day for 7-10 days.
- Once it rises and falls regularly and the starter has at least doubled, it is ready to use for baking.
Notes
To 'kick start' a starter. Feed using 25 grams unbleached flour, 25 grams rye flour and 50 grams water. Repeat until it rises and falls regularly and the starter has at least doubled. Return to feeding using only unbleached flour once this happens.
Nutrition Information:
Yield:
1Serving Size:
1Amount Per Serving: Calories: 182Total Fat: 0gSaturated Fat: 0gTrans Fat: 0gUnsaturated Fat: 0gCholesterol: 0mgSodium: 3mgCarbohydrates: 38gFiber: 1gSugar: 0gProtein: 5g
Nutritional calculation was provided by Nutritionix and is an estimation only. For special diets or medical issues please use your preferred calculator.
Roughly how much baking per week can you do with this starter once it is ready? I’m trying to determine if it’s too mini for me.
You can do 1-2 boules a day, depending on their sizes. If it’s too ‘mini’, double it to begin with.
I am getting a few bubbles, a little foamy at 9 days but no where close to doubling. Started with wheat as recommended, but activity in beginning calmed down after 3 days. I have again failed no matter what “recipe” I try
Hi Michael. Don’t give up!! Your starter is active, it just takes time. In the meantime, be sure your flour is not too old and use room temperature water for feeding. The activity in the first three days is all the bacteria and yeast (good and bad), then your atmospheric yeast begins to take hold. It takes a long time to build it up.
Thanks for sharing this! I definitely need this for my covid baking !! Can i order some from you? haha
I’ve definitely been sharing a lot of my starter…it is much easier and quicker than starting your own.
This recipe came in really handy now with so much time at home! thank you, it was really easy to follow! Lets see how the bread tastes 😊
Great to hear Laura! I’m currently working on a follow up bread post as well.
I started baking sourdough after Christmas and I wish I had this post when I started! Love all of the detailed info. A great resource!
I wish you did too, lol. I’ve been baking sourdough for two years now. Not sure why I avoided doing posts about it but glad that it finally happened!
I follow the exact steps with my sourdough starter! I never fails. This is the ultimate guide to make sourdough starter! So many useful tips. thank you for sharing!
Thank you so very much Jo. Happy baking!
Well written tutorial! So, you leave the jar uncovered? I’m always puzzled whether to keep the jar open or closed for the starter. I like how little flour it takes to start this starter. We don’t go through that much bread with 4 people.
No…I don’t leave the jar uncovered. It does need to have a lid but gasses should also be allowed to escape so I don’t use the clips or rubber sealing ring.
Since everyone is in the kitchen baking breads and rolls now, this is a great thing to have on hand for them. With ingredients like yeast being so hard to find, this is a great go-to ingredient to use for breads! Thanks so much for sharing!
You are welcome Lori. You’ll find as you use it more and more for baking, you’ll become quite addicted!
I am so ready to try this recipe. I have a menu that only needs a good starter. And this one does look like the perfect one for what I need. Yum!
Good luck Elaine, let me know if you need any help in the future.
I LOVE sourdough bread but never had much luck with it myself, so I usually end up buying it but haven’t been able to get a loaf in a while do to the lockdown and restrictions. Needless to say, I really do miss it! This is such a great post and easy to follow, you’ve inspired me to give it another go. Thank you so much!!
Good luck Tammy…and please do let me know if you have any questions.
You have so many wonderful, helpful tips in this post. I loved the tip about your water! I would have never known that would affect the process. Thanks for sharing!
Right? It’s pretty much the same with any fermentation though. Gotta keep things natural!
This is such a great tutorial! Although I LOVE sourdough bread, I still haven’t tried baking it yet. I definitely plan to add this to my baking to-do list. So interesting about the type of water to use. Thanks for sharing!
Yes…I wanted to include a trouble shooting guide as so many things can affect the starter. Good luck!
I enjoyed your post so much, Bernice! And I learned a lot about sourdough! Very clear, it makes it easy to follow and just makes me want to start right away!
I bet you would be a natural Nicoletta! Hope you are well.
Like many, we have jumped on the Sourdough bandwagon and are having fun with our sourdough adventures. This is very useful information as I feel so wasteful throwing out significant amounts of starter when I feed mine. I think I will adjust it to a smaller starter when I’m not using it daily. Thanks!
Yes! I always feel guilty throwing it out too. I love this size of starter it’s just enough to make one or two boules.
Through this entire lock down, this is one of the things I said I was going to do and haven’t yet! It’s so fantastic and I just might be inspired to do it after reading through your post Bernice. Thanks for sharing.
Haha better get on it Julia!! Give it a try…a loaf recipe is in the making too.
A great tutorial and troubleshooting tips! Thanks for this Bernice!
You’re welcome Sabrina, happy baking!
Since everyone has turned into a baker lately, this is great. Most recipes make a huge batch. This is certainly a little more reasonable. Especially if you are only baking for a couple.
Exactly! I love that it is just enough for one or two boules.