
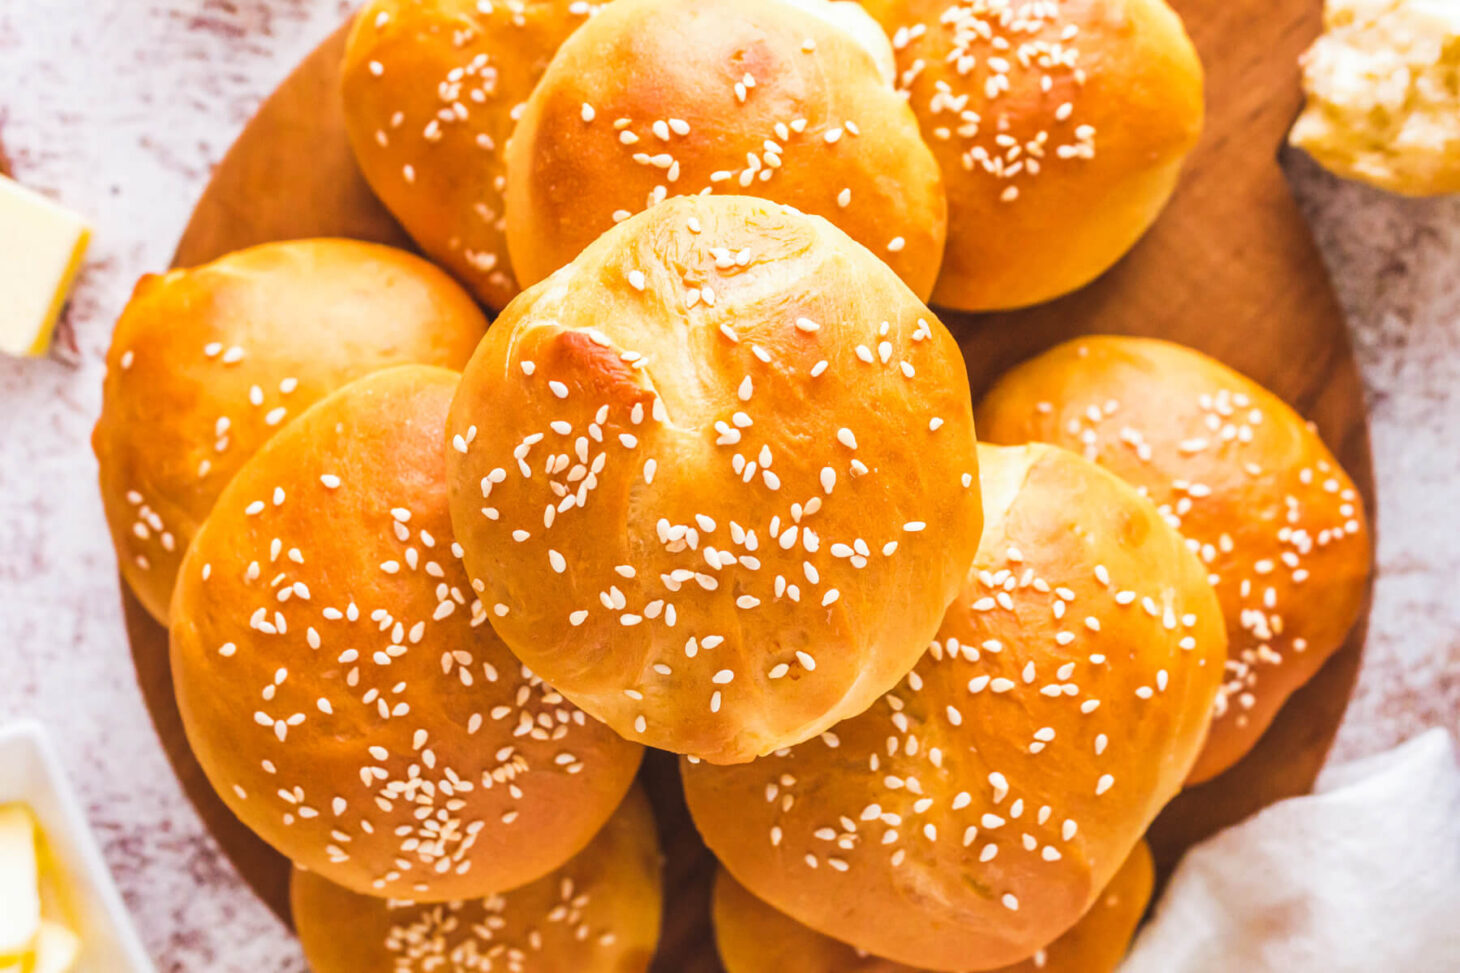
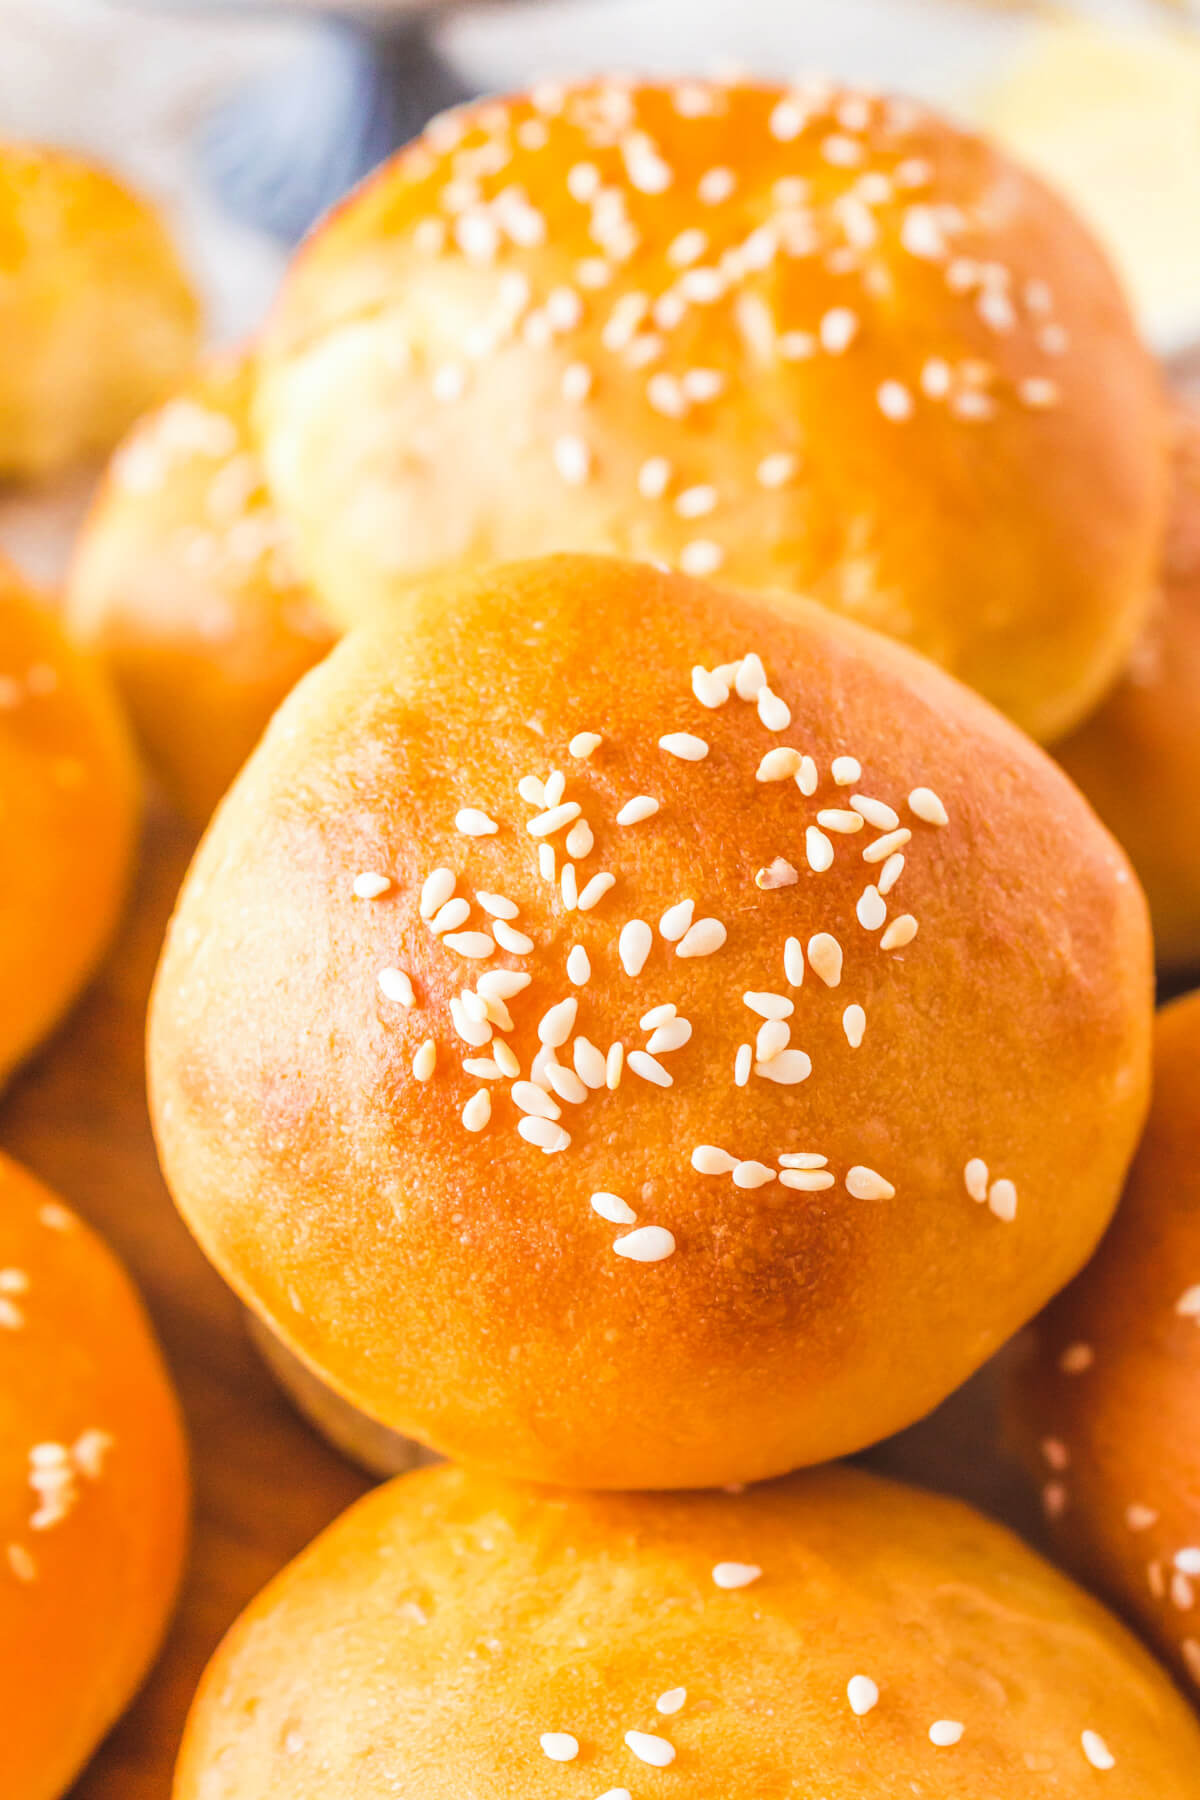
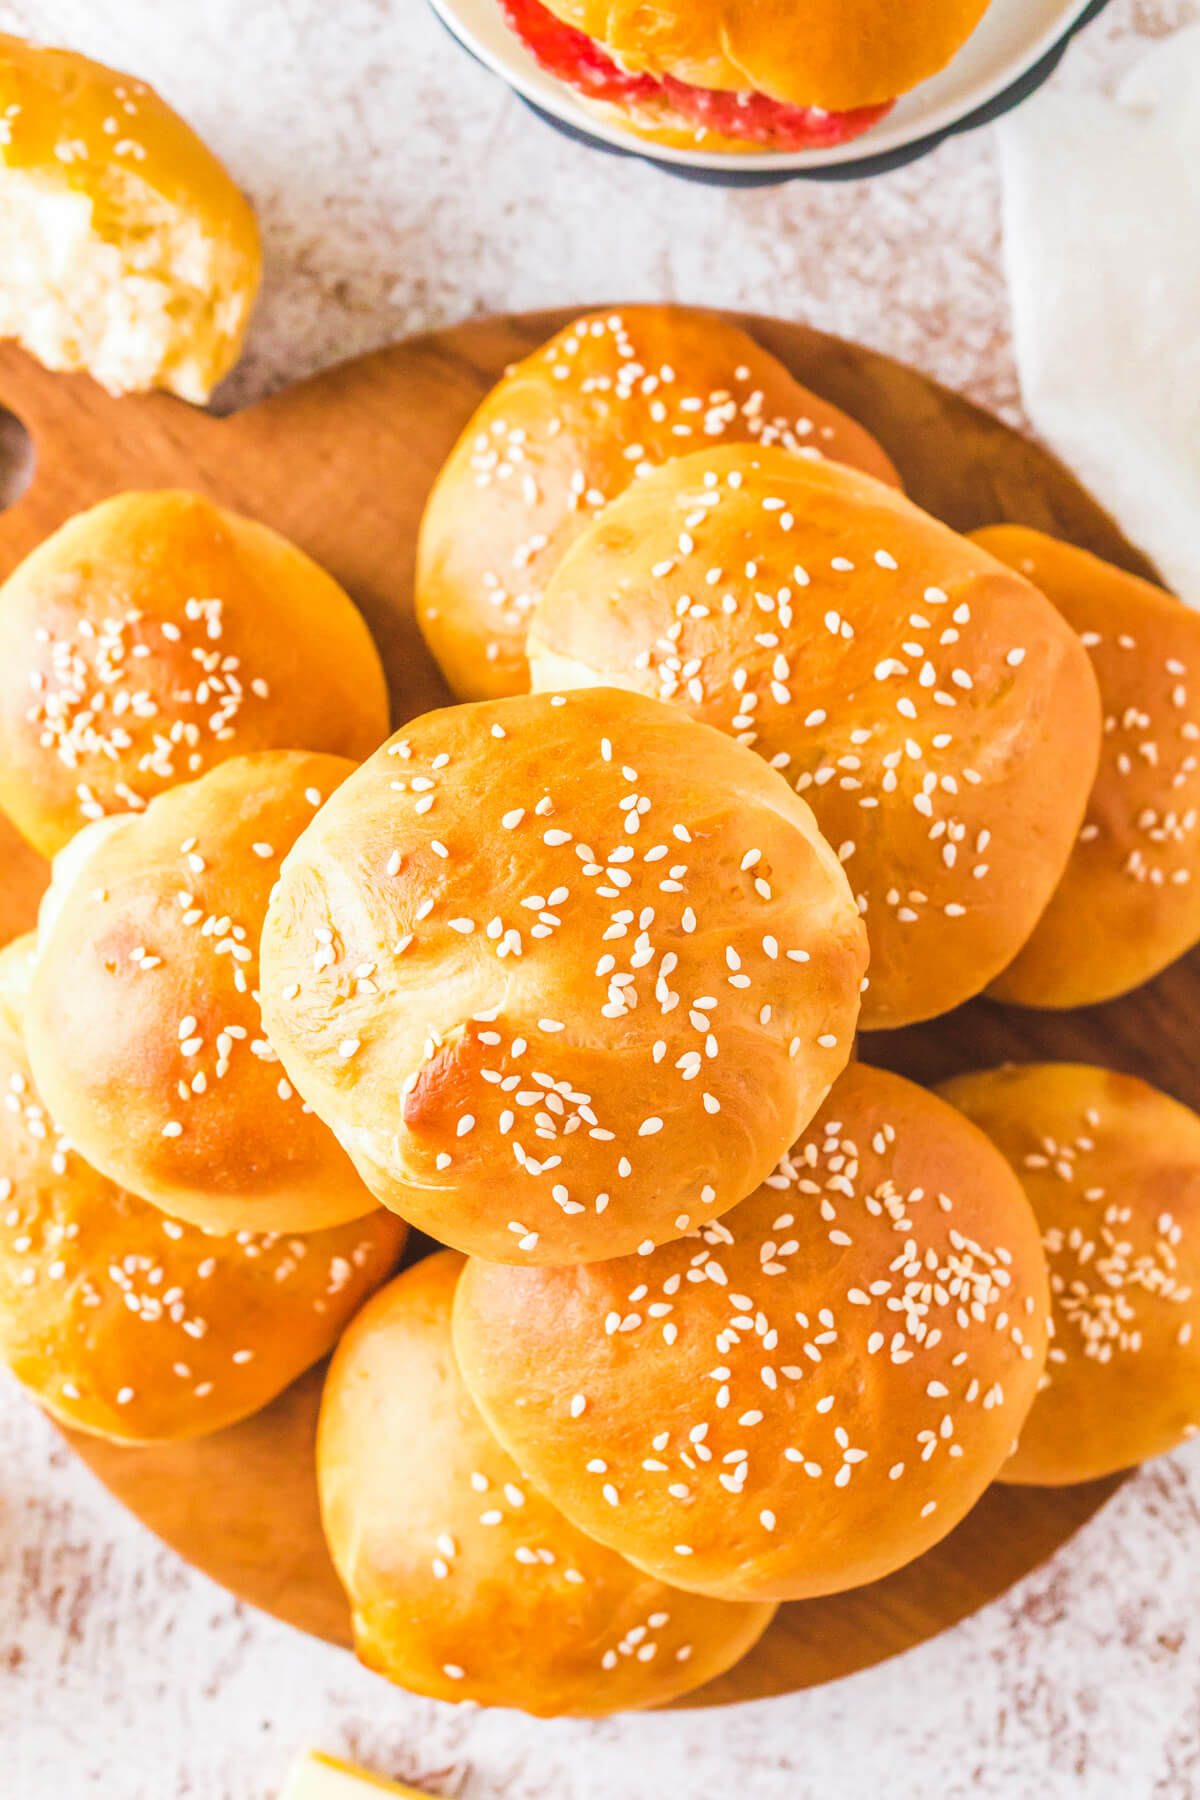
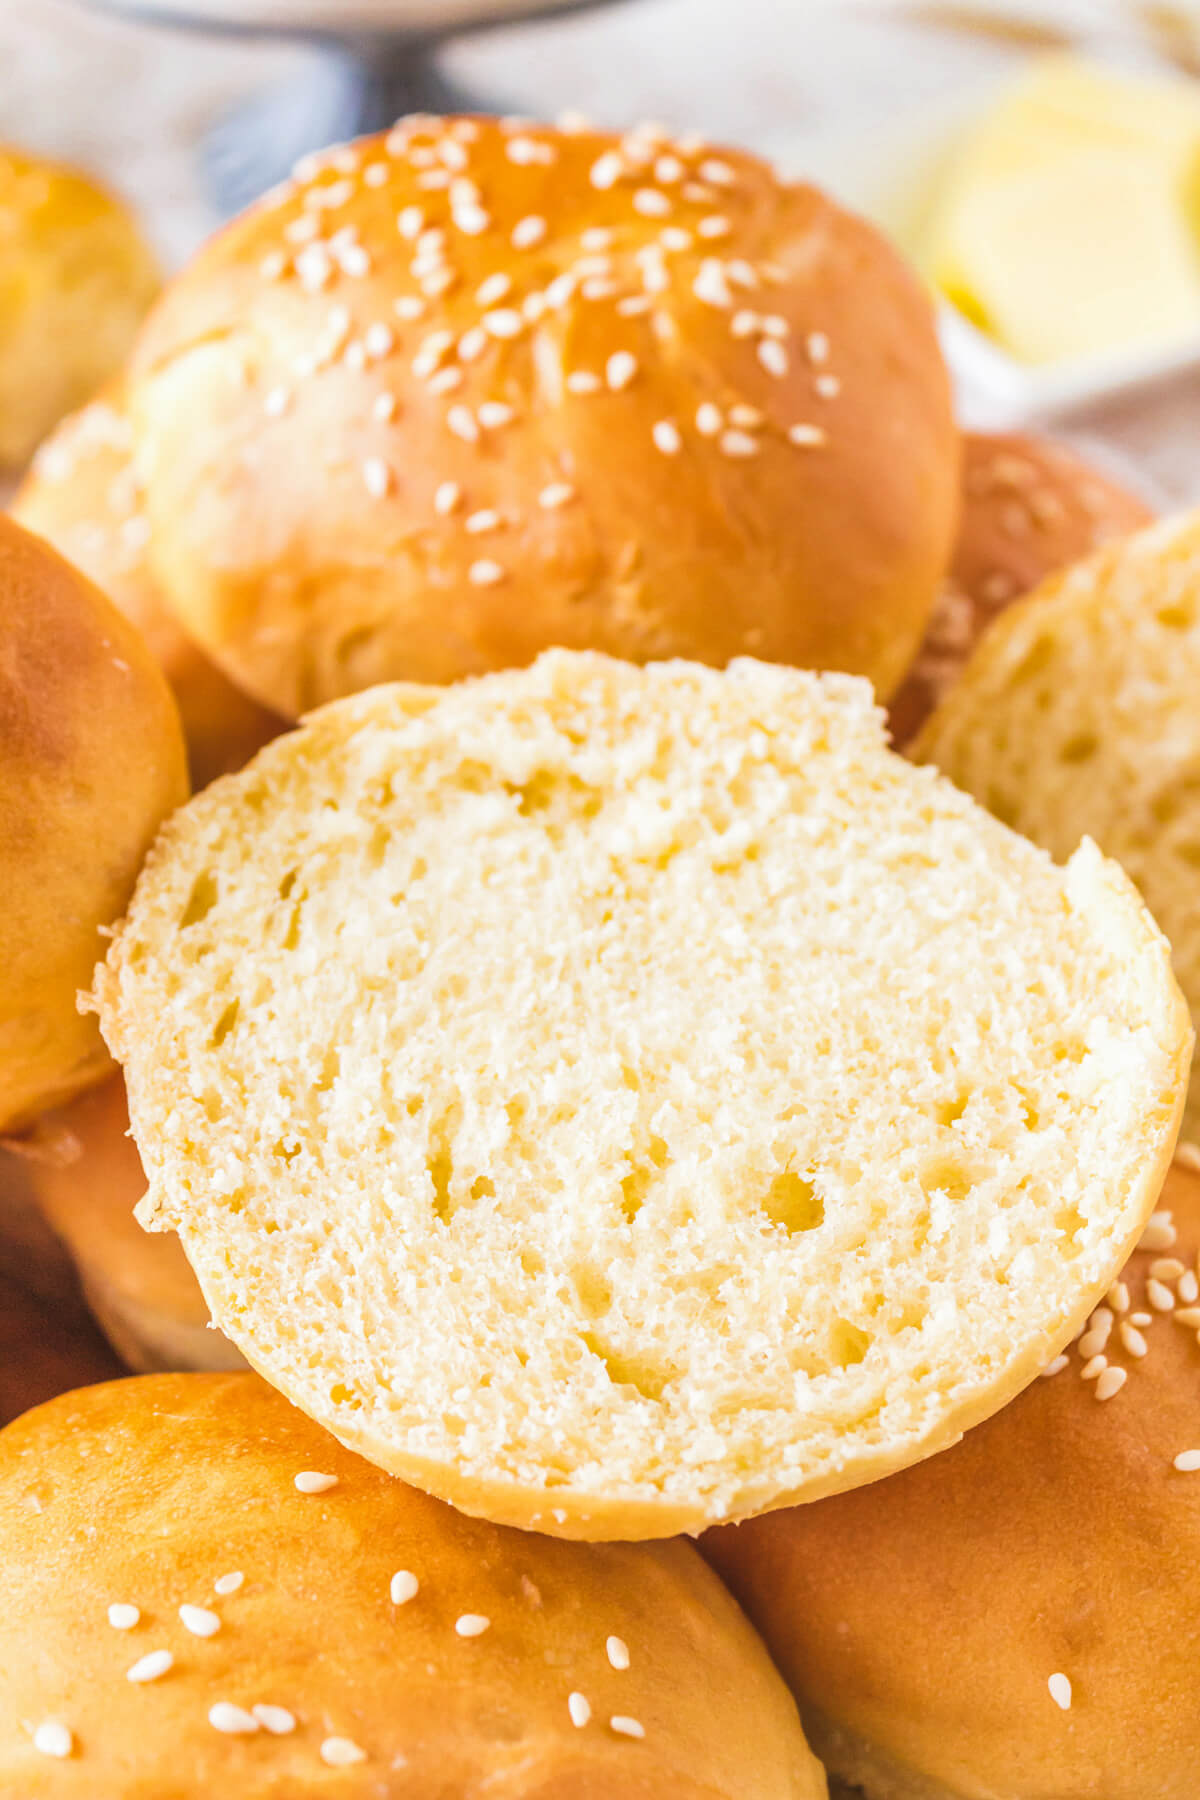
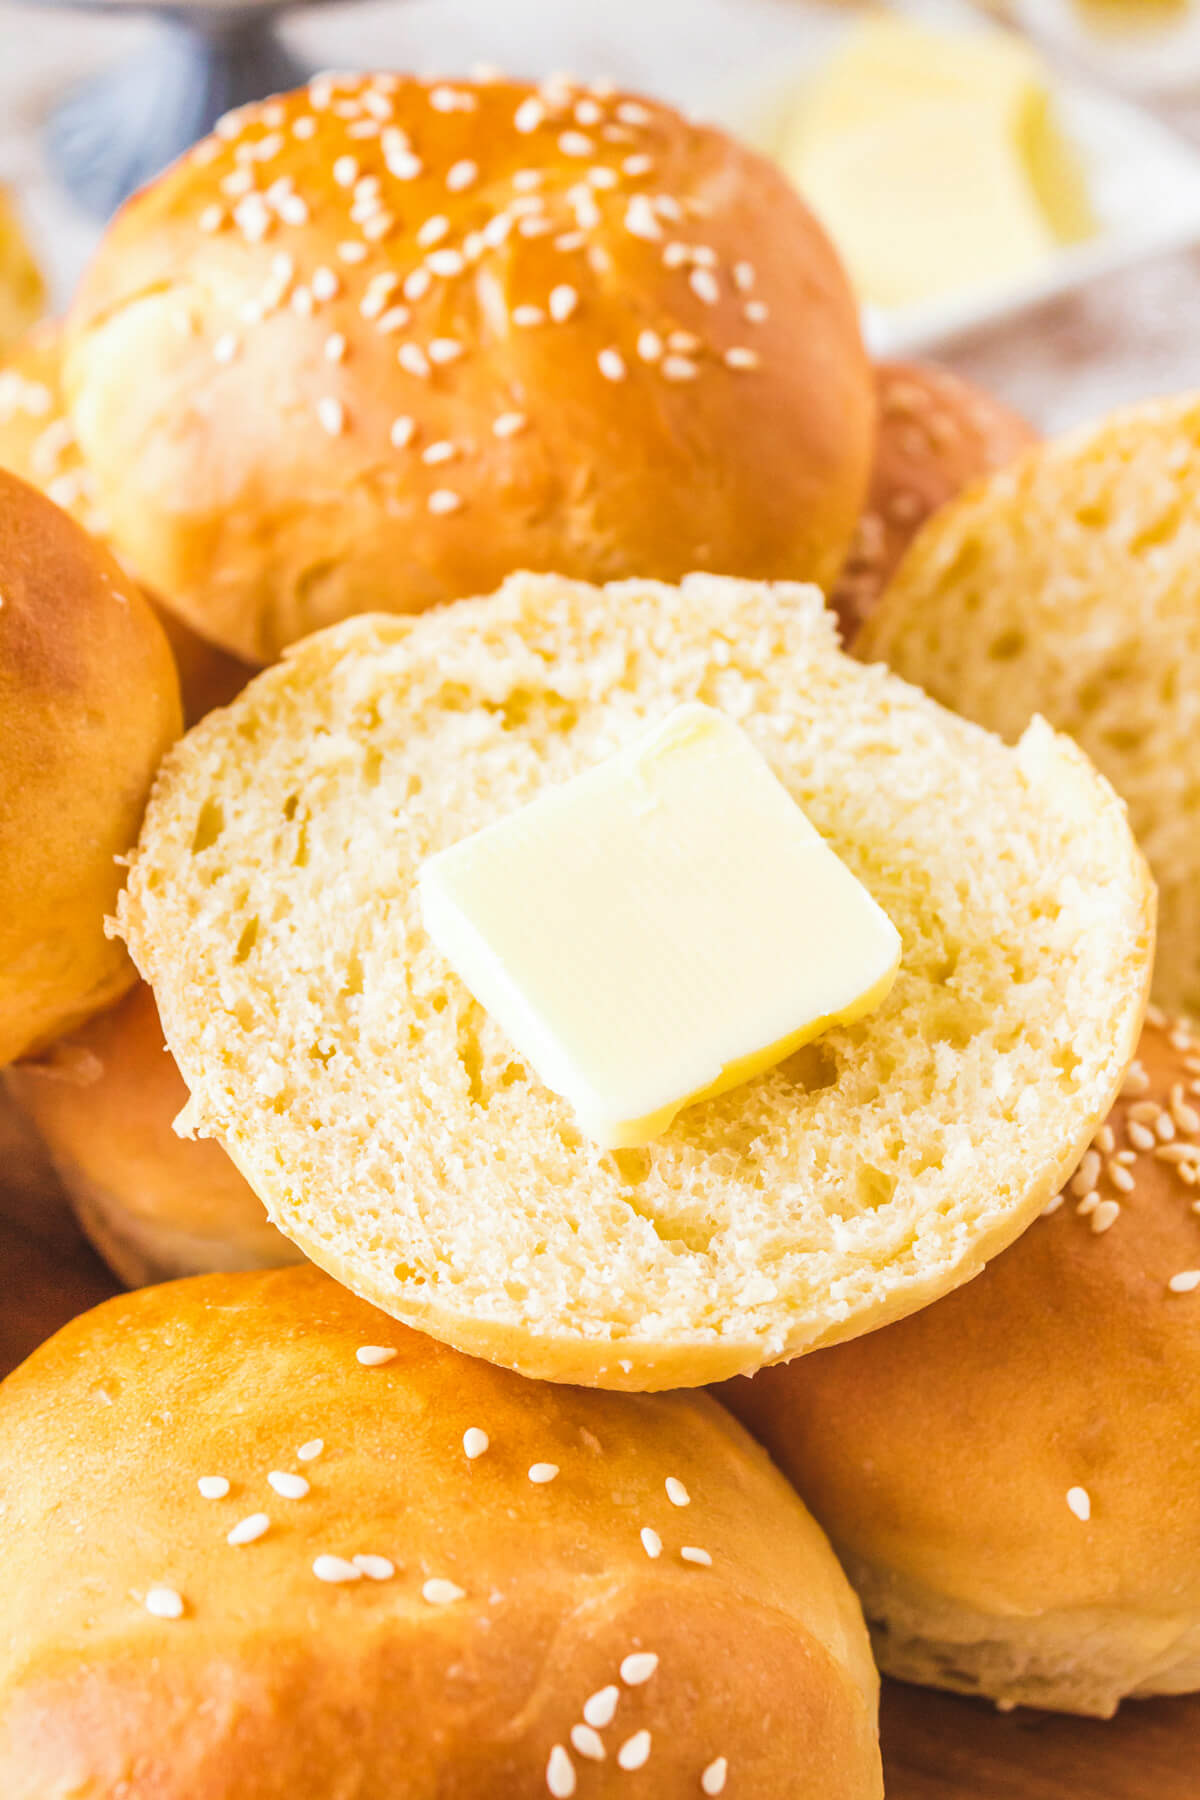
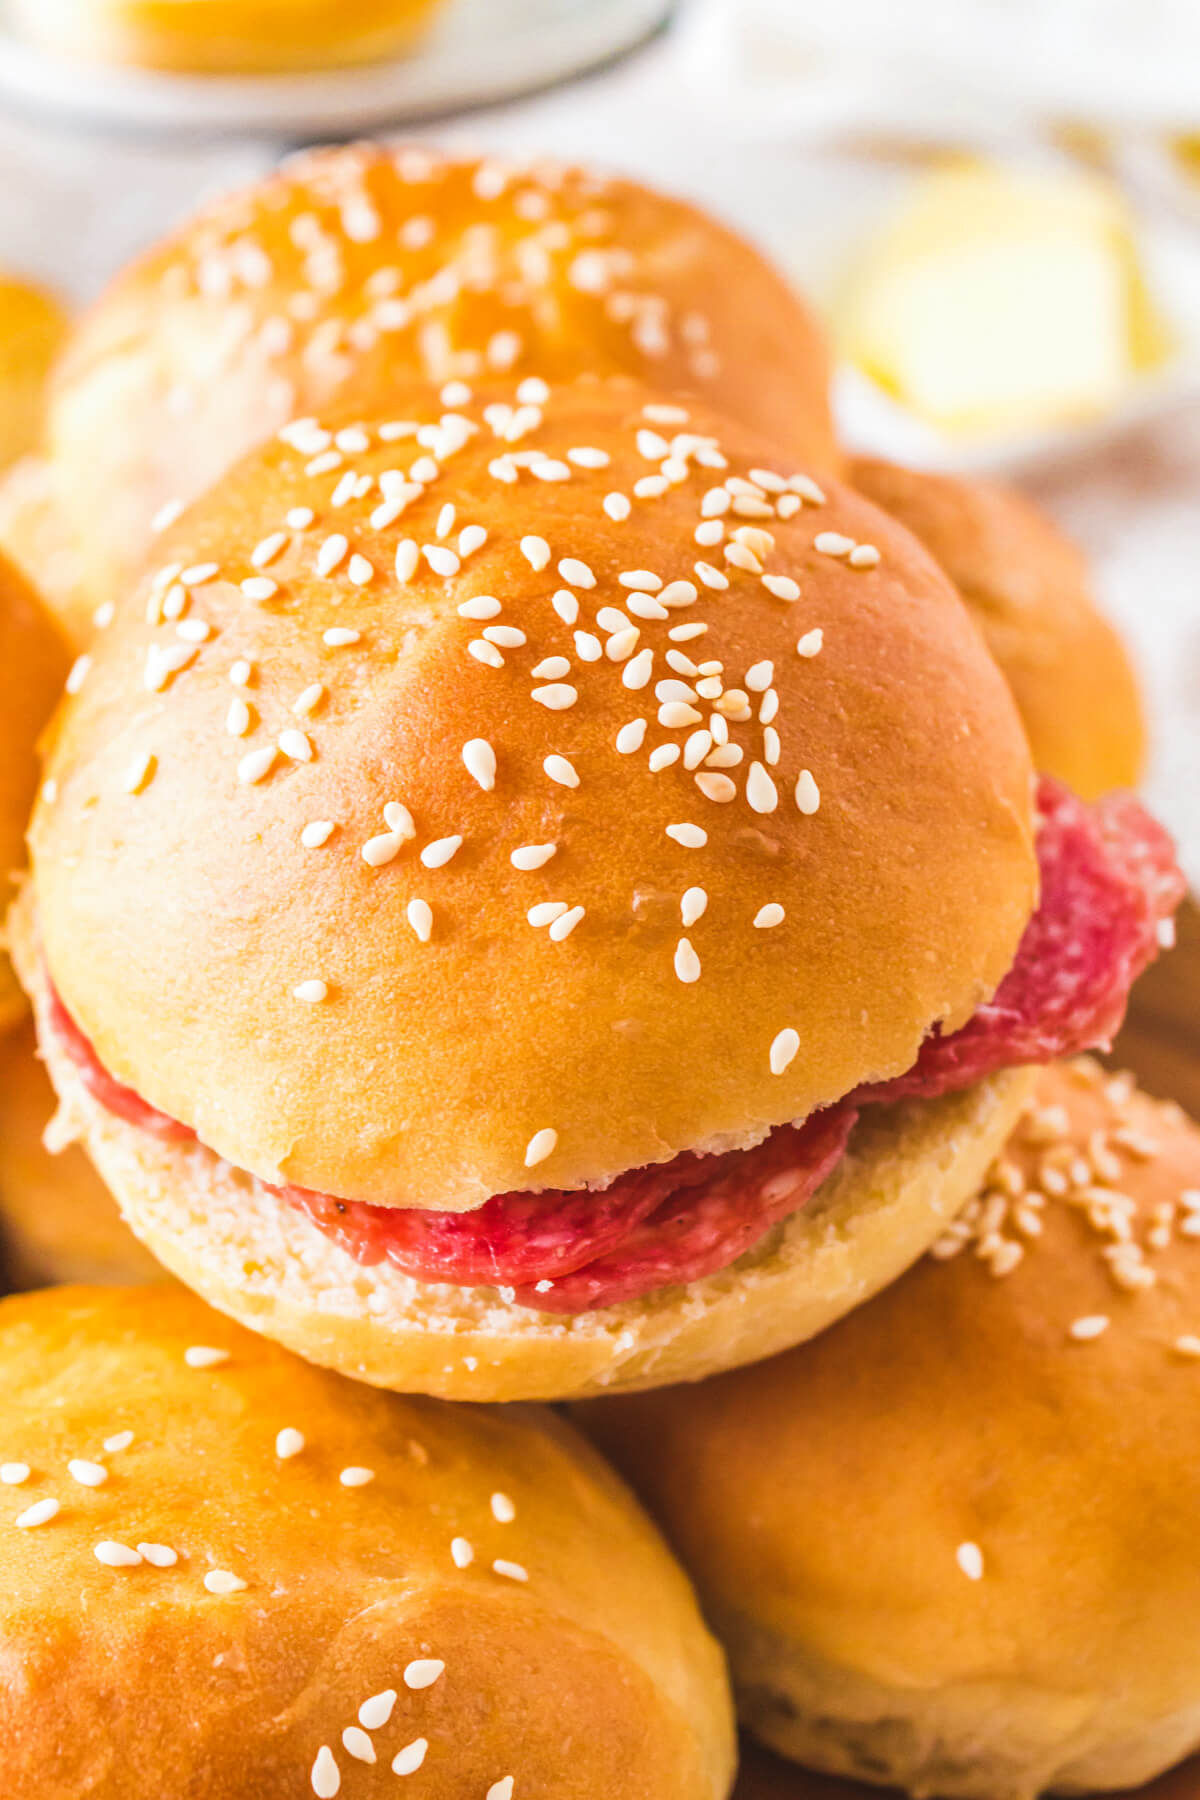
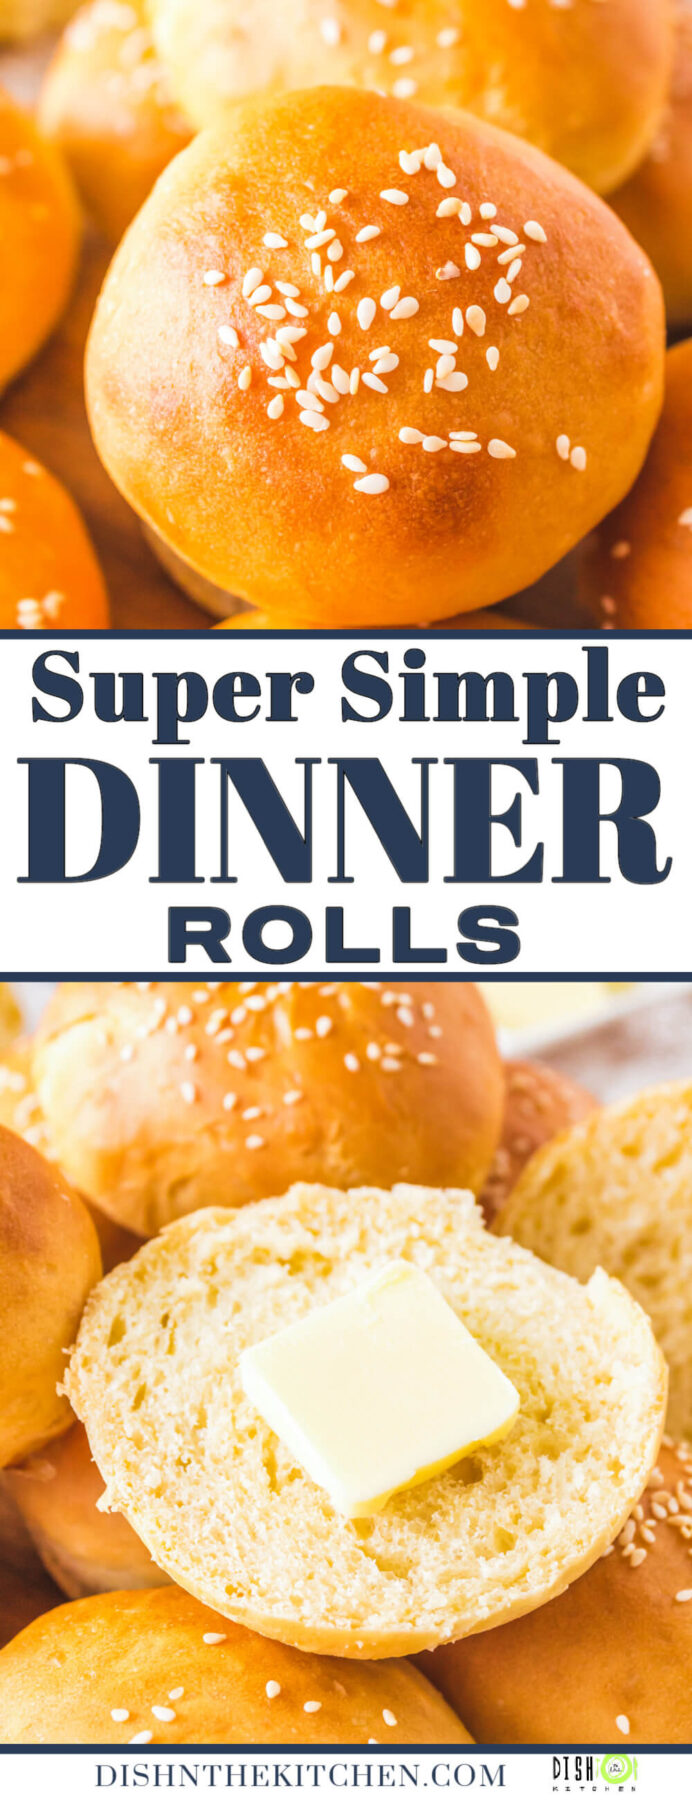
Whip up these Easy Dinner Rolls for any holiday meal or Sunday roast. They bake up soft and fluffy with a thin outer crust and are perfect for picnic sandwiches or alongside your favourite soup.
There’s nothing like the smell bread baking in the oven and these dinner rolls are great in so many ways. I’m thinking BBQ Pulled Chicken sandwiches, Teriyaki Pork Burgers, or game day Mississippi Pork Roast sliders. I always bake up a batch for holiday dinners because leftover turkey or leftover ham sandwiches are the best!
Want to save this recipe?
Enter your email below and get this post sent straight to your inbox. Plus, I’ll send you my weekly newsletter featuring the newest and best Dish ‘n’ the Kitchen recipes every week!
Easy Dinner Rolls
I think so many people are nervous around dough and never try to bake their own bread or buns. As a home baker and self proclaimed ‘food pusher’, this makes me really sad. I would love everyone to experience the joy of freshly baked homemade dinner rolls. The aroma is just so warm and comforting!
So, when I tell you that these Easy Dinner Rolls are easy…I mean it! I’m here to hold your hand every step of the way so that you can experience baking success. Follow this simple step by step dinner roll recipe and you’ll have perfect golden rolls with a thin exterior crust and fluffy interior.
This recipe makes 16 dinner rolls. However, if that sounds like a lot, you can follow the recipe up to the point where you shape the buns and then freeze them. The next time you want fresh dinner rolls, you just have to thaw and bake!
Ingredients
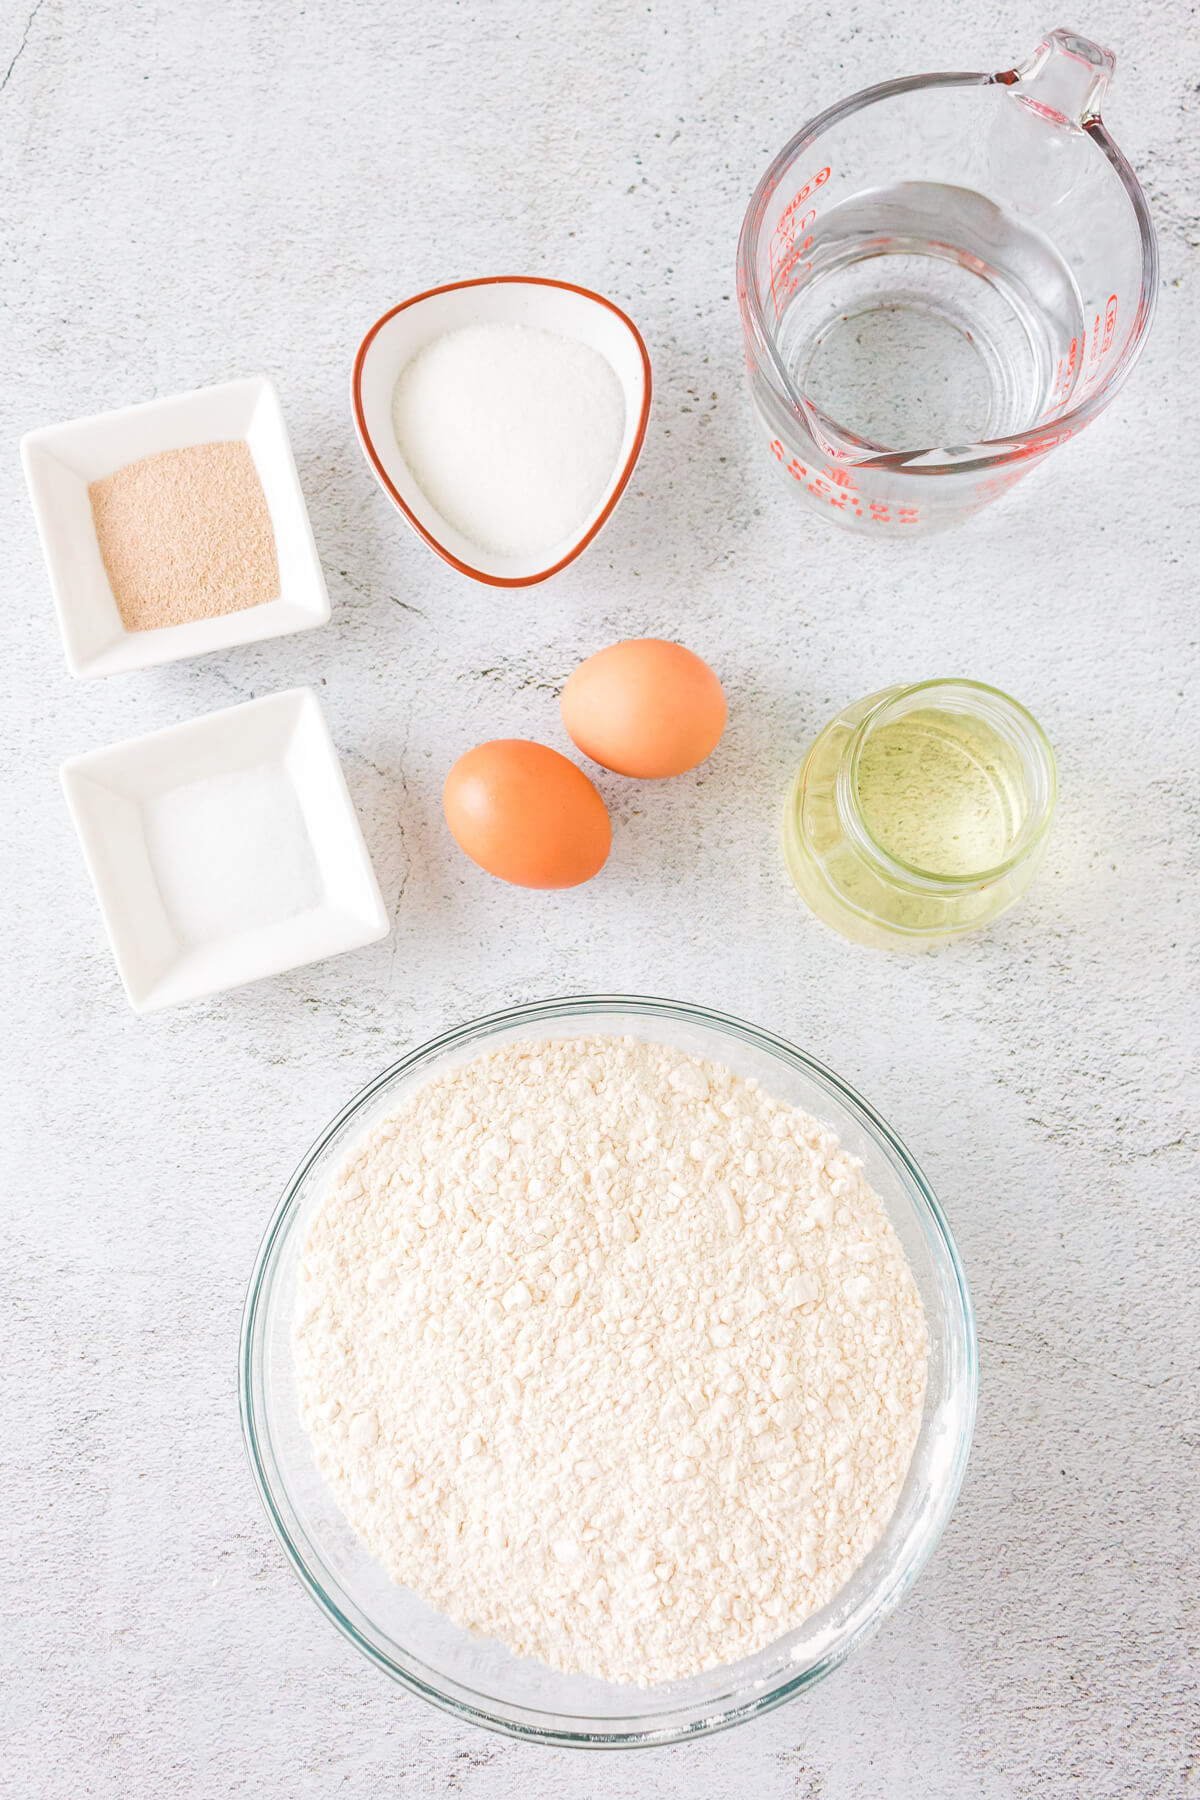
There are no surprise ingredients here, only the standard baking ingredients that everyone has in their pantry/fridge.
- Sugar
- Yeast
- Water
- Salt
- Flour
- Eggs
- Olive oil
Like I said, these ingredients are pretty commonplace. Granulated sugar, regular table salt, unbleached all purpose flour, and oil. You can use extra virgin olive oil (not the fancy stuff!) or any other vegetable oil, if you prefer. You can even use melted butter for an extra rich dinner roll.
Purchasing yeast might be a little daunting for first time bakers because there are so many kinds available. The best yeast for this roll recipe is Active Dry Yeast. It has larger granules than instant yeast and remains dormant until it is dissolved in a warm liquid.
It must be proofed, or active before you add it to the rest of the ingredients. I like using it because I can physically see that the yeast is active when I begin making the dough.
How to Store and Use Yeast
It is important to always check the ‘best by’ date on the yeast package. If the yeast has expired, there’s a good chance it will not be powerful enough to rise the dough. My mom has been baking bread for over 40 years and she just went through a long period of flat bread because she was using old yeast. Of course, she was too stubborn to check or buy a new jar…
Speaking of yeast in jars…please keep your yeast in the fridge when you aren’t using it. Yeast is a live organism that goes dormant in cold temperatures. Keeping it in the fridge will extend its lifespan, allowing it to last for much longer.
Yeast is happiest when you add it to a warm liquid between 100°-110°F. Any cooler and the yeast will be sluggish and take longer to start pushing out gases. If the liquid temperature is over 110°F. the yeast will start to die off and your dough will not rise.
Lastly, yeast has a sweet tooth. You’ll notice that most, if not all, yeast recipes call for a little sugar or honey to be added during activation. Sugar feeds the yeast and gives it extra energy. Extra energy means better lifting power. Happy yeast results in an open, light textured bread or dinner roll.
How to Make Easy Dinner Rolls
Activate the Yeast
As I mentioned, the only way to know if active dry yeast is viable is to activate it in a warm liquid. You can use warm water or warm milk for a richer dough.
To activate the yeast, add warm water (100 °-110 °F.) and sugar to the bowl of a stand mixer. Sprinkle the yeast over the surface and give the mixture a gentle stir. Allow it to sit for 4-5 minutes and proceed if the yeast is foamy and active.
Mix the Dough
Once the yeast has bloomed, add the eggs, oil, and salt to the mixer bowl. Mix gently for a minute until just combined. With the motor running on low, add the flour one cup at a time until most of it becomes incorporated. There might be a little loose flour left in the bottom of the mixer bowl and that’s okay.
Knead the Dough
Once all the ingredients are incorporated into one, the next step is to knead the dough. This period of moving and stretching allows the dough to develop gluten strands. Without them, the dough would have no structure. You can knead the dough in the mixer with the dough hook attachment or by hand as follows:
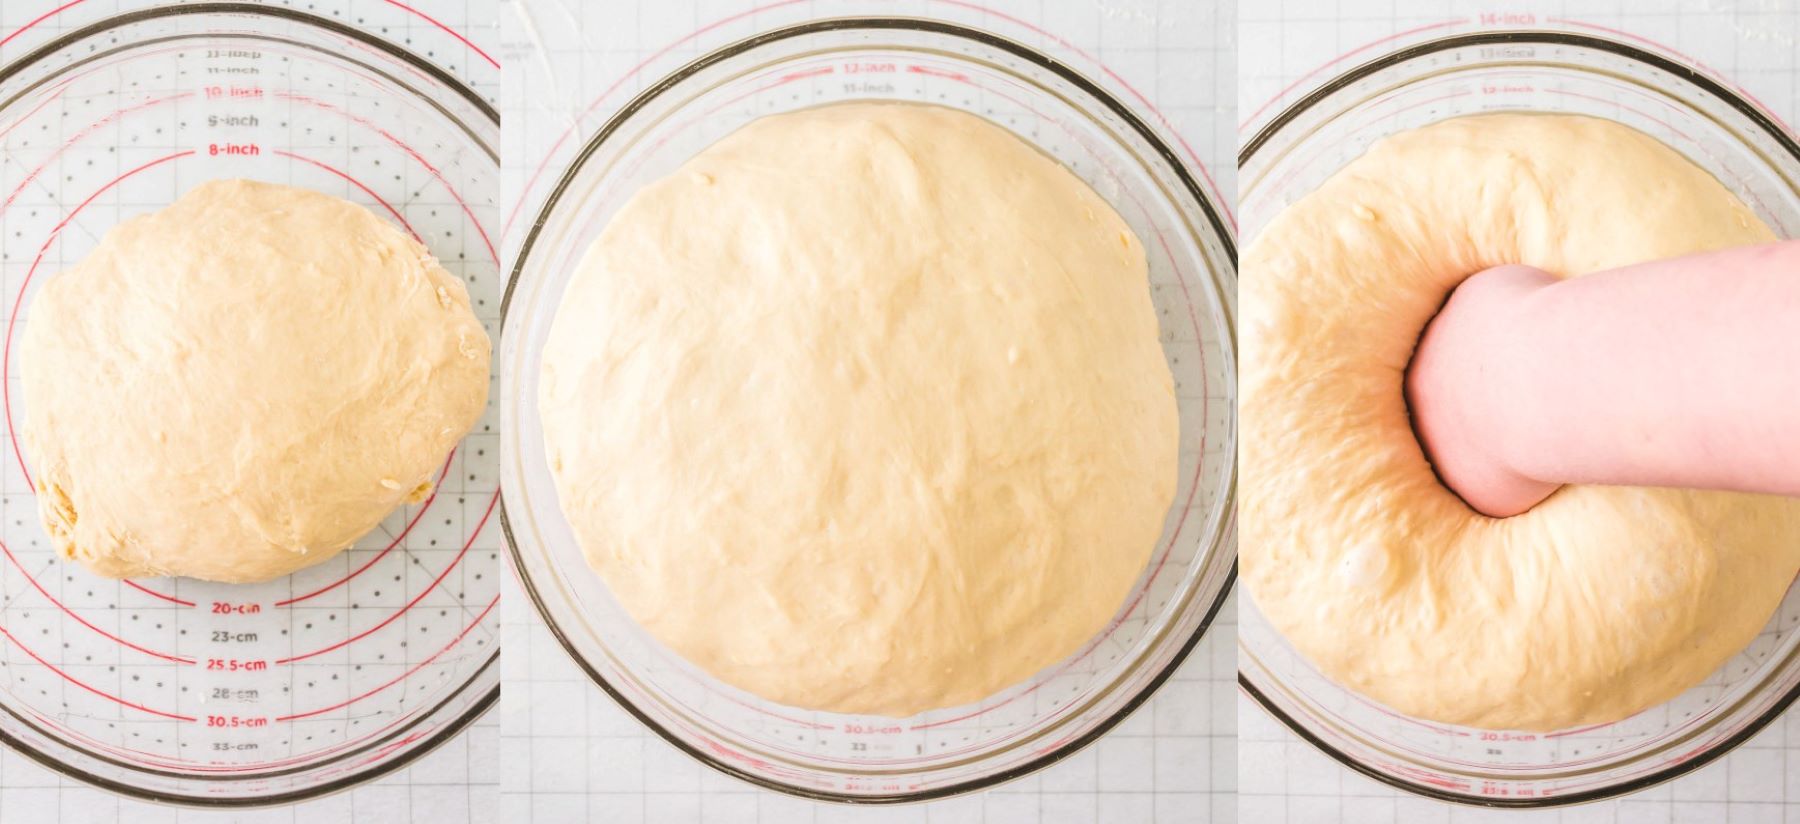
Turn the dough out onto a clean or lightly floured surface. Grab the portion closest to your body and push it down and away. Rotate the dough a quarter turn and repeat. Continue rotating and pushing the dough down and away for 4 to 10 minutes. When you have kneaded the dough enough, it will be smooth and elastic, and tacky rather than sticky.
Test the dough by pressing the heel of your hand firmly and deeply into the dough; hold it there 10 seconds. If your hand comes away clean, the dough is ready for proofing.
Proofing the Dough
Use a bit of oil to grease the bowl before you place the dough ball inside. This will help prevent sticking and tearing when you remove it later on.
Cover the bowl with beeswax or plastic wrap to prevent the dough from drying out and place it in a warm, draft-free space. I sometimes place it in my oven with the light on, though it’s a good idea to tell others so no one accidentally turns the oven on!
There are actually two proofing periods for these easy dinner rolls. The first proof, or rise time, is the longest and allows the dough to double in size. Proofing times are never exact because they vary with room temperature. A cool house will require a longer proofing period and a warm house will require a shorter time.
Therefore, it’s a good idea to use a clear proofing bowl and some kind of measurement, such as this rolling mat, to judge when the dough has doubled in size.

Dividing and Shaping the Dough
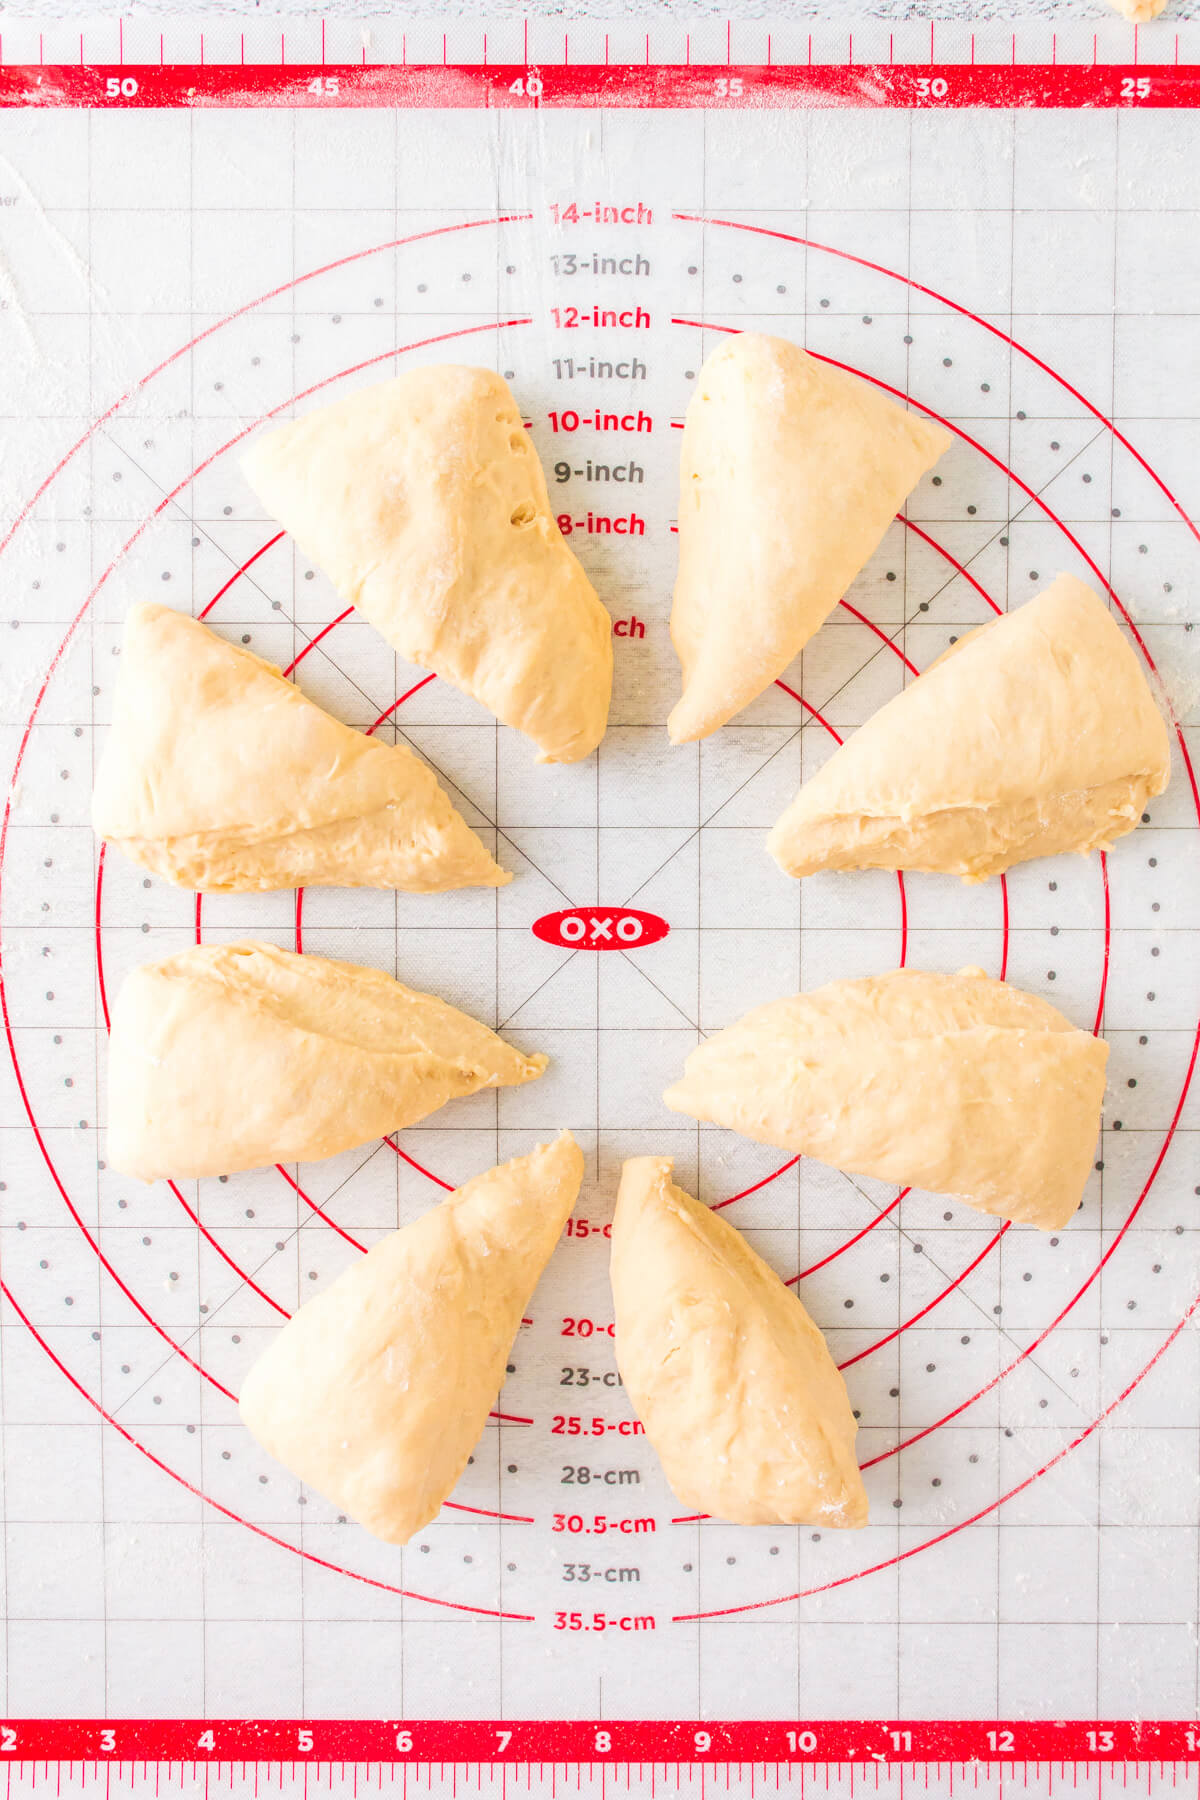
Once the dough has doubled in size, begin with a punch to the center of the dough, then turn it out onto a lightly floured surface (or use a silicone mat). Gently knead it a few times and tidy it back into a ball. This may seem like a strange thing to do as it deflates the dough but it actually redistributes the gases and results in a more even rise.
Divide the dough in half, then divide each half into 8 equal portions. Shape each portion into a roll by stretching the top of the dough over and tucking it under. Roll the dough ball (seams down) slightly on the counter top to achieve a round shape.
Arrange 8 dough balls on a parchment lined baking sheet. Repeat with the rest of the dough balls on another baking sheet. Note: at this point you can place one baking sheet in the freezer to freeze the buns for later.
Cover, and allow the buns to proof a second time; at room temperature for 20-30 minutes.
Let’s Bake Some Dinner Rolls!
Preheat the oven to 350°F.
- If you have room in your oven for two baking sheets, bake both sheets of buns together in a 350°F. oven for 20 minutes, or until golden brown.
- If you have room for one baking sheet only but want to bake all the rolls, place the second baking sheet in your fridge. Take them out of the fridge when the first sheet is halfway through its baking time. Bake as directed.
Cool the dinner rolls on the baking sheets for two minutes, then move them over to finish cooling on a wire rack.
Easy Dinner Roll Make Ahead and Storage
These dinner rolls are nice to have on hand for lunches, dinners and snacks. Of course, they are best when they are freshly baked, or the next day. If you want, you can freeze half of the dough to bake at a later date.
To freeze the dough: Place the shaped rolls on a parchment line baking sheet, making sure they are not touching. Freeze for 30 minutes then transfer to a freezer bag. They will keep in the freezer for up to 30 days.
To bake the rolls: Allow them to thaw in the fridge overnight. In the morning, preheat oven and take the dough out of the fridge. Arrange them on a parchment line baking sheet, apply the egg wash and bake in a preheated oven as directed. So quick and easy!
Hi! I’m Bernice Hill, the heart and soul behind Dish ‘n’ the Kitchen. It is my pleasure to share easy to follow recipes that are delicious, nutritious, and approachable for the whole family.
If you make this Easy Dinner Rolls recipe, please be sure to leave a comment and/or give this recipe a rating! Be sure to follow me on Facebook and Pinterest for my latest recipes. Also, if you do make this recipe, please tag me on Instagram, I’d love to see what you guys are making! Thank you so much for reading my blog.
Easy Dinner Rolls
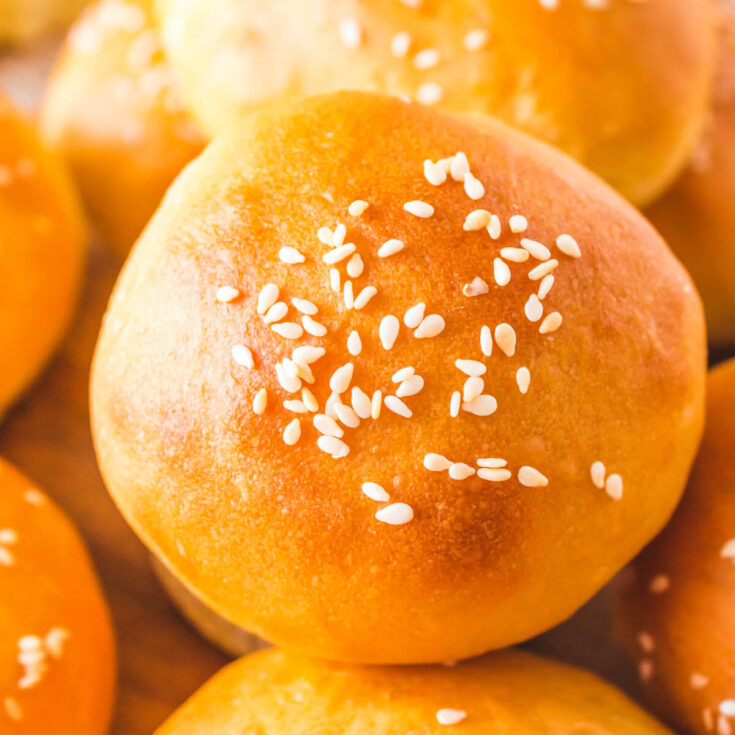
Whip up these Easy Dinner Rolls for any holiday meal or Sunday roast. They bake up soft and fluffy with a thin outer crust and are perfect for picnic sandwiches or alongside your favourite soup.
Ingredients
- 1 1/2 cups warm water
- 4 1/2 teaspoons active dry yeast
- 1/4 cup sugar
- 3 Tablespoons olive oil
- 2 eggs
- 2 teaspoons salt
- 5 cups flour
- 1 egg white + 2 Tablespoons water for egg wash
- 2 Tablespoons sesame seeds (optional)
Instructions
- Add warm water and sugar to the bowl of a stand mixer. Sprinkle the yeast and give the mixture a gentle stir. Allow it to sit for 4-5 minutes and proceed if the yeast is foamy and active.
- Next add in the eggs, oil, and salt. Mix gently for a minute.
- With the motor running on low, add the flour one cup at a time until most is incorporated.
- Turn the dough out onto a clean work surface and knead the dough for 4-5 minutes, or until all the flour is evenly incorporated and the dough is a smooth soft ball. (You can knead until the all the flour is incorporated then return the dough to the mixing bowl and use the dough hook attachment to finish the job)
- Place the dough ball in an oiled bowl, cover with plastic wrap or beeswax cover. Place the dough in a draft free warm area and allow it to proof. until it doubles in size.
- Once the dough has doubled in size, punch it down then remove it onto a lightly floured surface (or use a silicone mat).
- Divide the dough into 16 equal portions, then shape them into buns by stretching the top of the dough over and tucking it under. Roll the ball slightly on the counter top to achieve a round shape.
- Arrange 8 dough balls on a parchment lined baking sheet. Repeat with the rest of the dough balls on another baking sheet*.
- Cover, and allow the buns to proof at room temperature for 20-30 minutes.
- Preheat the oven to 350 F.
- Whisk the egg white with 2 Tablespoons of water until it is well incorporated and foamy.
- Use a pastry brush to gently brush it over the top of each bun. Sprinkle the buns with sesame seeds (if using).
- Bake in a 350 F oven for 20 minutes, or until nice and golden on top. Brush and bake the second batch of buns.
- After removing from the oven, allow buns to cool slightly, then place on a wire rack for further cooling.
Notes
*If you can only fit one sheet in your oven at a time, cover the second baking sheet and place it in the fridge for 15 minutes.
Nutrition Information:
Yield:
16Serving Size:
1Amount Per Serving: Calories: 200Total Fat: 4gSaturated Fat: 1gTrans Fat: 0gUnsaturated Fat: 3gCholesterol: 35mgSodium: 284mgCarbohydrates: 34gFiber: 1gSugar: 3gProtein: 6g
Nutritional calculation was provided by Nutritionix and is an estimation only. For special diets or medical issues please use your preferred calculator.

These rolls are so soft and fluffy! Total comfort food and so easy too.
Fresh out of the oven rolls just can’t be beat!
I really love this easy roll recipe! So often you’d rather have homemade rolls at home, and with your recipe they turn out fantastic! Thank you!
Great to hear Nora. I love having them around for whenever I feel like a bun sandwich.
These look so good AND I actually have all the ingredients required~ Must make these dinner rolls the next time I serve soup for dinner!
Woohoo! Bonus: your house will smell amazing.
these rolls came out amazing! perfect texture and a great side dish to go with our favorite meals!
Glad this recipe worked out for you Andrea.
I LOVE how easy this are and your directions are awesome! Pinned to make very soon!
Wonderful! I hope you enjoy the bake Terri.
The recipe’s great, but the tips are even better. I make a fair bit of bread, but it’s always a little intimidating trying a new recipe and/or shape, so I love that you went the extra mile to talk us through everything. The frozen dough idea is awesome too – I’ve never tried that, but now I’m very curious to give it a go. Just got to make some room in my always-overfilled freezer first. Haha.
Ah, I know…my freezer is jam packed too. Could be worse!
These dinner rolls turned out perfectly and my family loved them with beef stew and then with sandwiches the next day.
Great to hear! It’s such a hand recipe for any type of meal.
i love a good dinner roll to soak up all the sauces to my meal! even butter on top is luxurious !
Mmmm fresh baked rolls with butter….
Easter, Thanksgiving, Christmas, any holiday dinner! These rolls are essential and of course, the favourite part of every kid’s meal!
Agree! My kids loved them in school lunches. So handy.
We are big fans of homemade dinner rolls, nothing is better than freshly baked bread. Your recipe is easy to follow and they turned out delicious.
So great to hear you loved this recipe Silvia.
There is nothing better than freshly made dinner rolls. These were scrumptious and made my house smell amazing!
I love that! It’s like a win-win situation.
These dinner rolls came out so soft, fluffy, and amazing. Love how simple the recipe is and I’ll be making them often.
Thank you so much for letting me know LaKita. Happy baking!
You gave perfect steps to make homemade dinner rolls. This is my first time making them and they turned out great.
Thank you for letting me know Katie. I really want to make it easy for people to learn how to bake their own.
These rolls are indeed so easy to make and so beautiful when they come out of the oven, we just couldn’t get enough of them! I’ll have to double the batch next time
A double batch is always a great idea!! Thanks for letting me know Ksenia.
Wow! These homemade dinner rolls look so delicious and tasty. Plus the best part is it’s easy to prepare and cook and will only take 30mins minimum to have the finished product.
Yes, the baking part is super quick. Thanks for stopping by Amy.
THESE look amazing and I love your close-up shots. I swear I could smell the warm, buttery scent of these freshly baked dinner rolls. Who wouldn’t want these beside ANY meal? DELICIOUS!
Thank you so much Devan.
These dinner rolls were excellent with our homemade sliders! The rolls held together well and my family loved it! Soft and delicious!
That’s great to hear Jamie. I hate it when the buns fall apart with pulled pork too!
I love homemade dinner rolls. The perfect side to any meal. I know these will be a hit with the family for dinner tonight.
Happy baking Gloria!