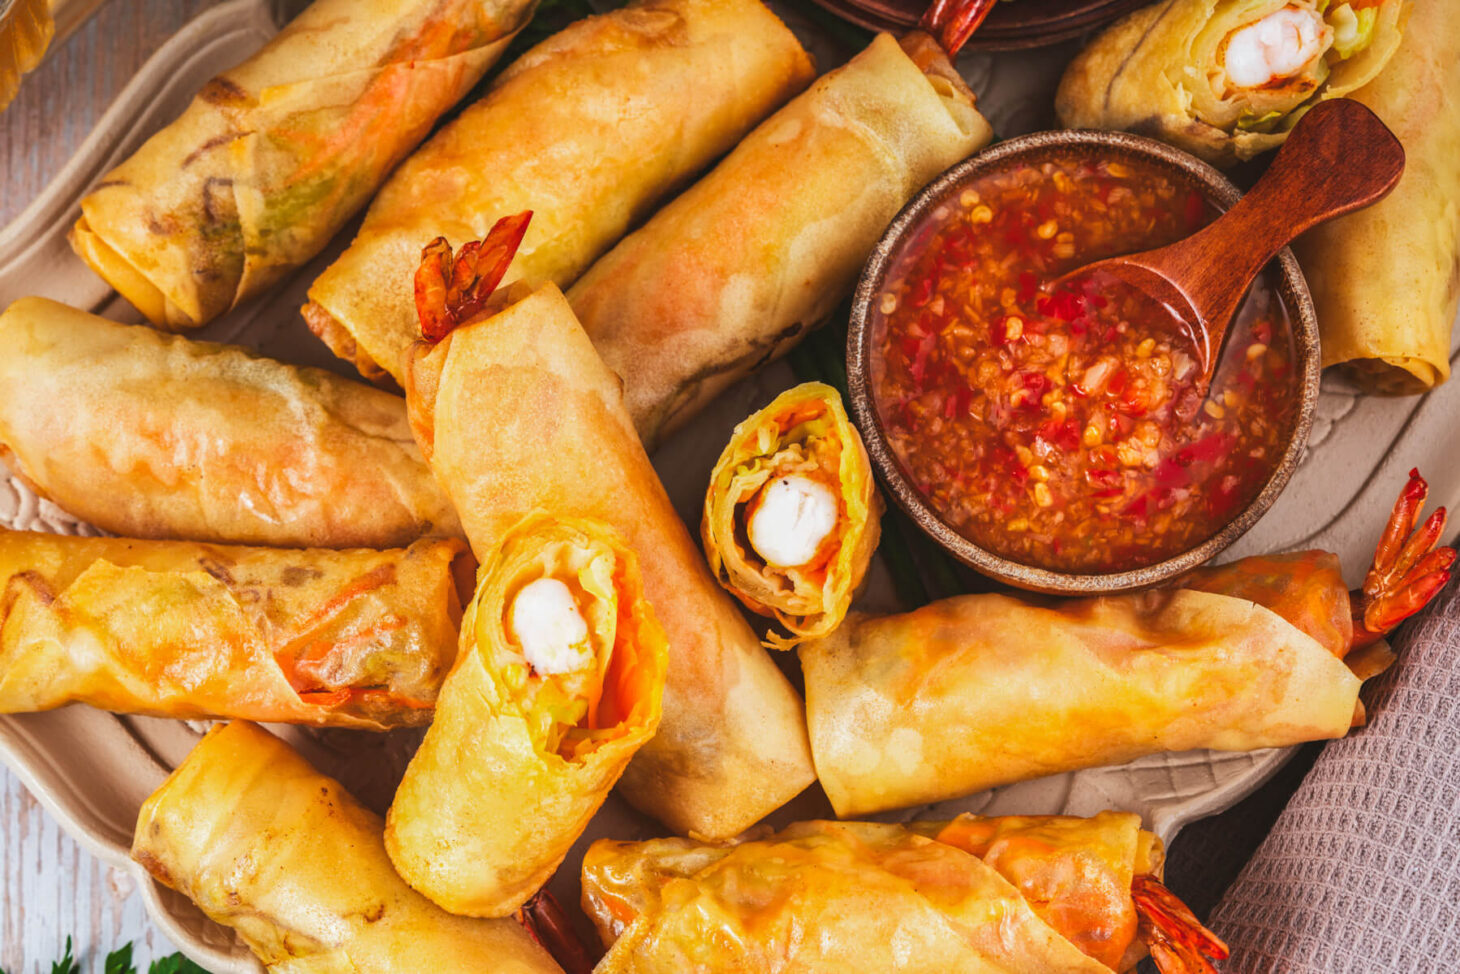
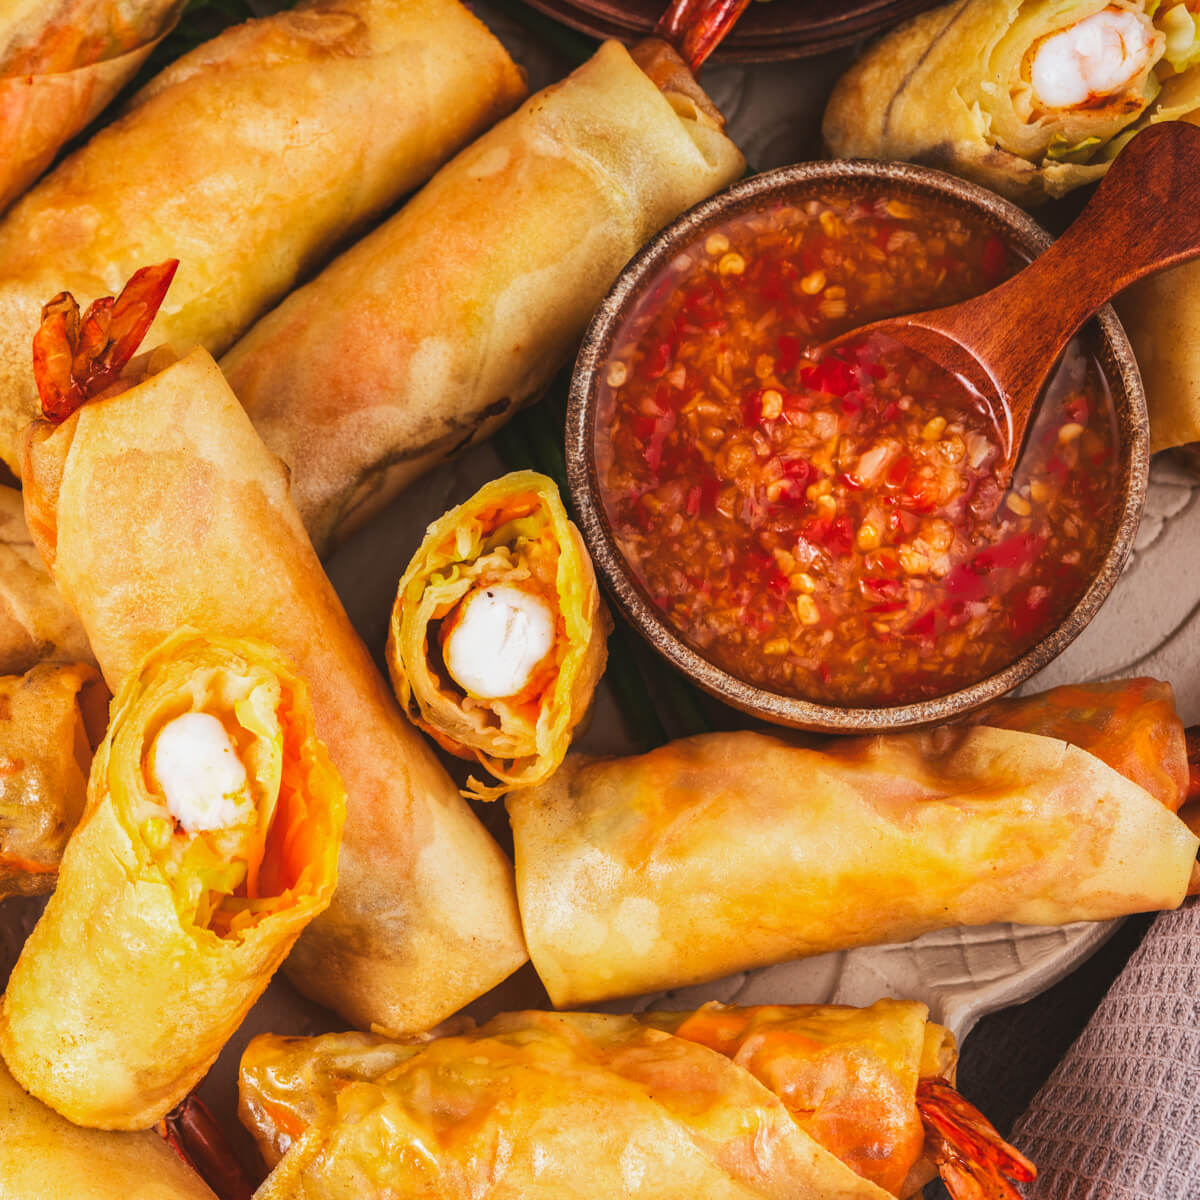
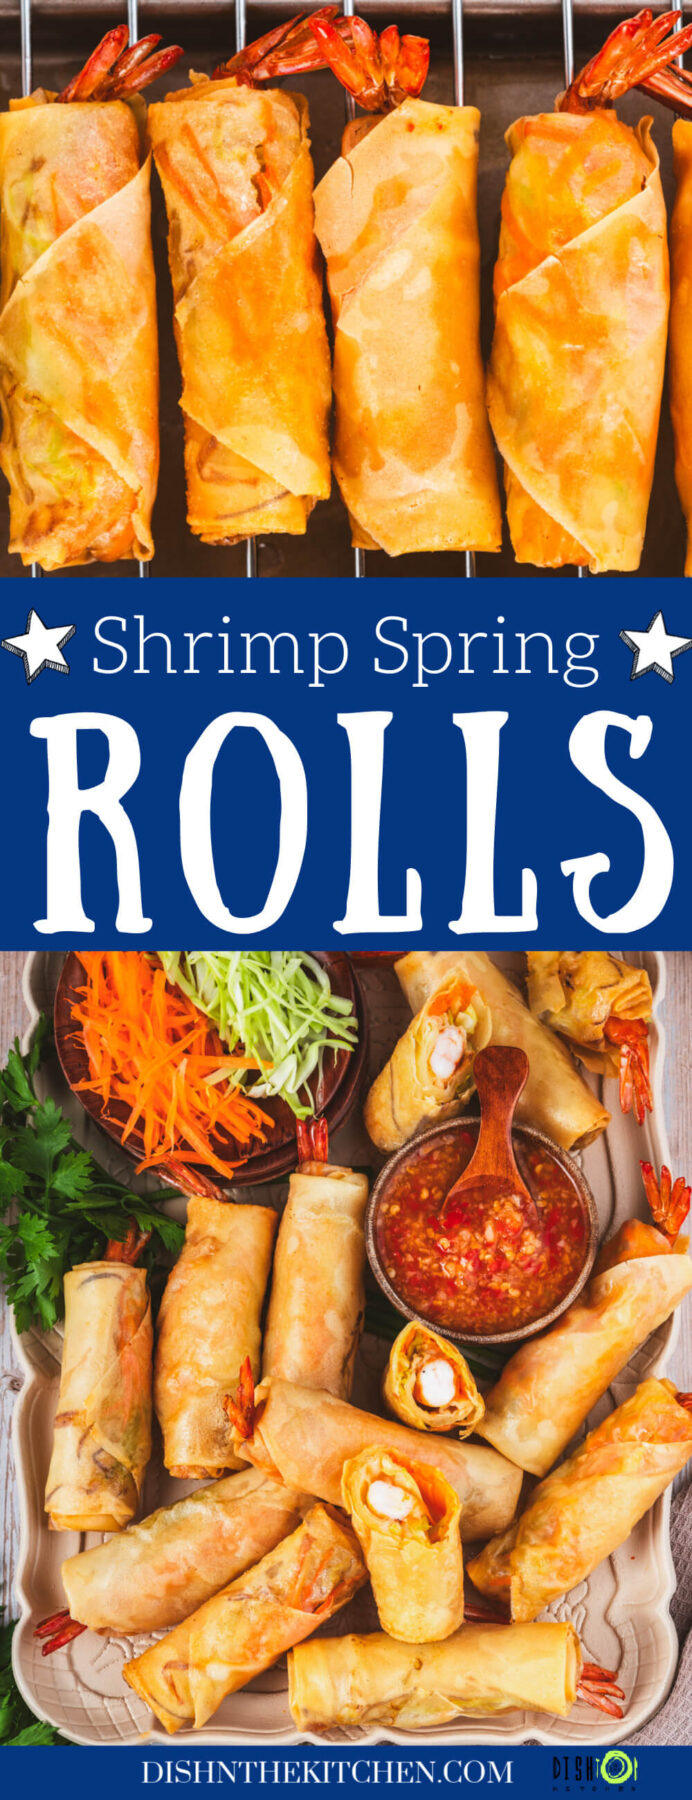
Crispy on the outside, juicy on the inside, these stuffed Shrimp Spring Rolls, or Chả Giò Tôm are the ultimate appetizer. Loaded with plump shrimp and crunchy vegetables, they’re fried to golden perfection. Dip them into homemade Thai chili sauce for the ultimate balance of balance of sweet, spicy, and tangy flavours.
Who can resist a tasty shrimp appetizer? Try these golden Coconut Panko Shrimp on tortillas with Pineapple Salsa for your next taco night or enjoy this extra gooey Cheesy Baked Shrimp Scampi Dip for the ultimate hot appetizer dip experience.
Want to save this recipe?
Enter your email below and get this post sent straight to your inbox. Plus, I’ll send you my weekly newsletter featuring the newest and best Dish ‘n’ the Kitchen recipes every week!
Shrimp Spring Rolls
Besides fresh spring rolls with peanut dipping sauce, my favourite Asian appetizer takeout order is Vietnamese spring rolls with shrimp or Chả Giò Tôm. I love these deep-fried delights stuffed with a variety of tender vegetables and plump whole shrimp. They are salty, savoury, and incredibly addictive, especially when paired with a bright dipping sauce.
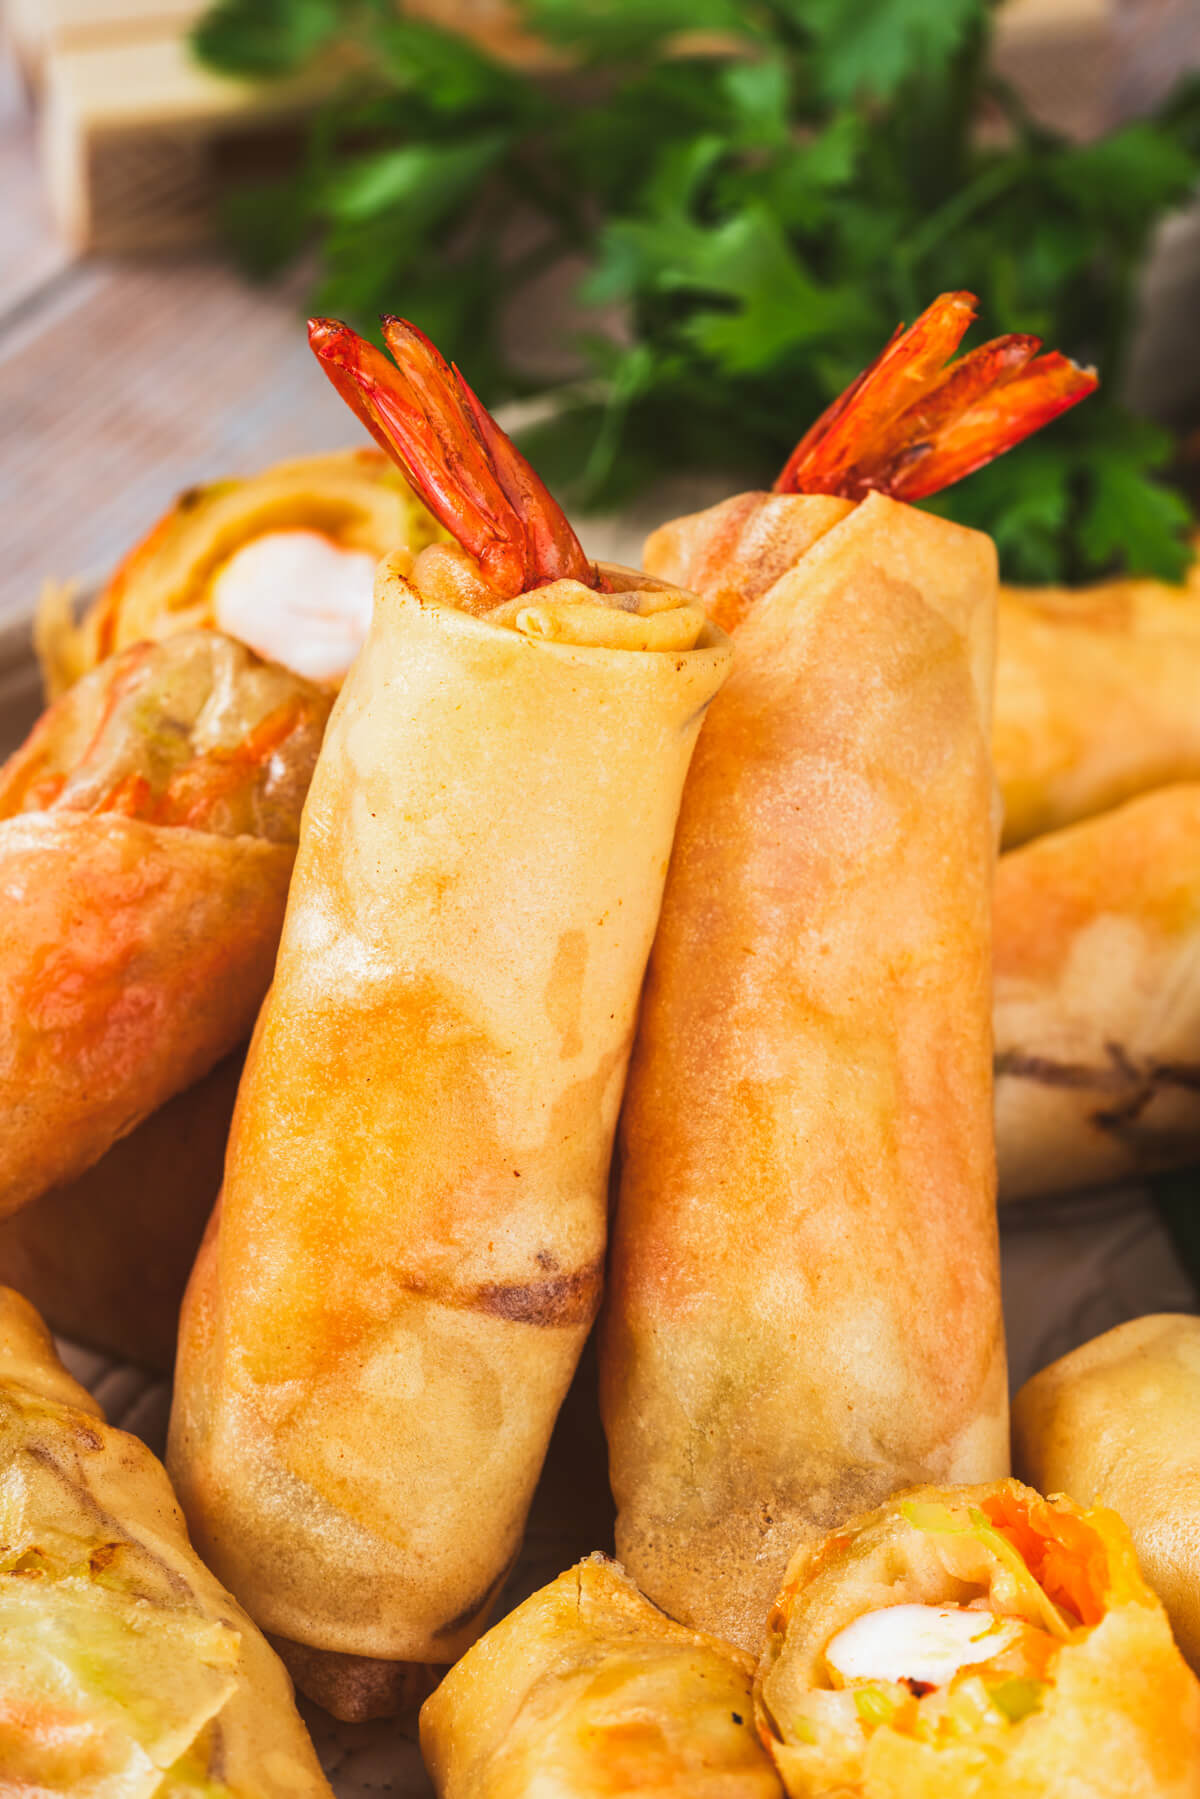
Unlike thicker egg rolls, this Shrimp Spring Rolls recipe is made using thin spring roll pastry (or rice paper) for a lighter, crispier crust. They have the perfect texture that everyone loves, crispy on the outside with juicy plump shrimp and vegetables inside.
Serve this crowd-pleasing party appetizer at your next gathering or pair it with other recipes to make a decadent starter or side dish for a homemade Vietnamese feast. PS. You can roll a large batch and freeze them uncooked, meaning a restaurant-quality snack is only a few minutes of frying away.

Salad Rolls vs. Spring Rolls
The names of these two Vietnamese starters can be very similar… essentially one is fresh and one is fried. Gỏi Cuốn are fresh rolls, summer rolls, fresh spring rolls or salad rolls containing cooked shrimp (or other protein), vermicelli rice noodles, carrots, green onions, bean sprouts, and fresh herbs in gluten free rice paper wrappers. They are usually served with peanut sauce or tương chấm.
Chả giò are Vietnamese fried spring rolls. They often contain minced pork and/or shrimp, vegetables like shredded carrots, plenty of aromatics and can be wrapped in either rice paper or wonton wrappers before they are deep fried and served with nước chấm.
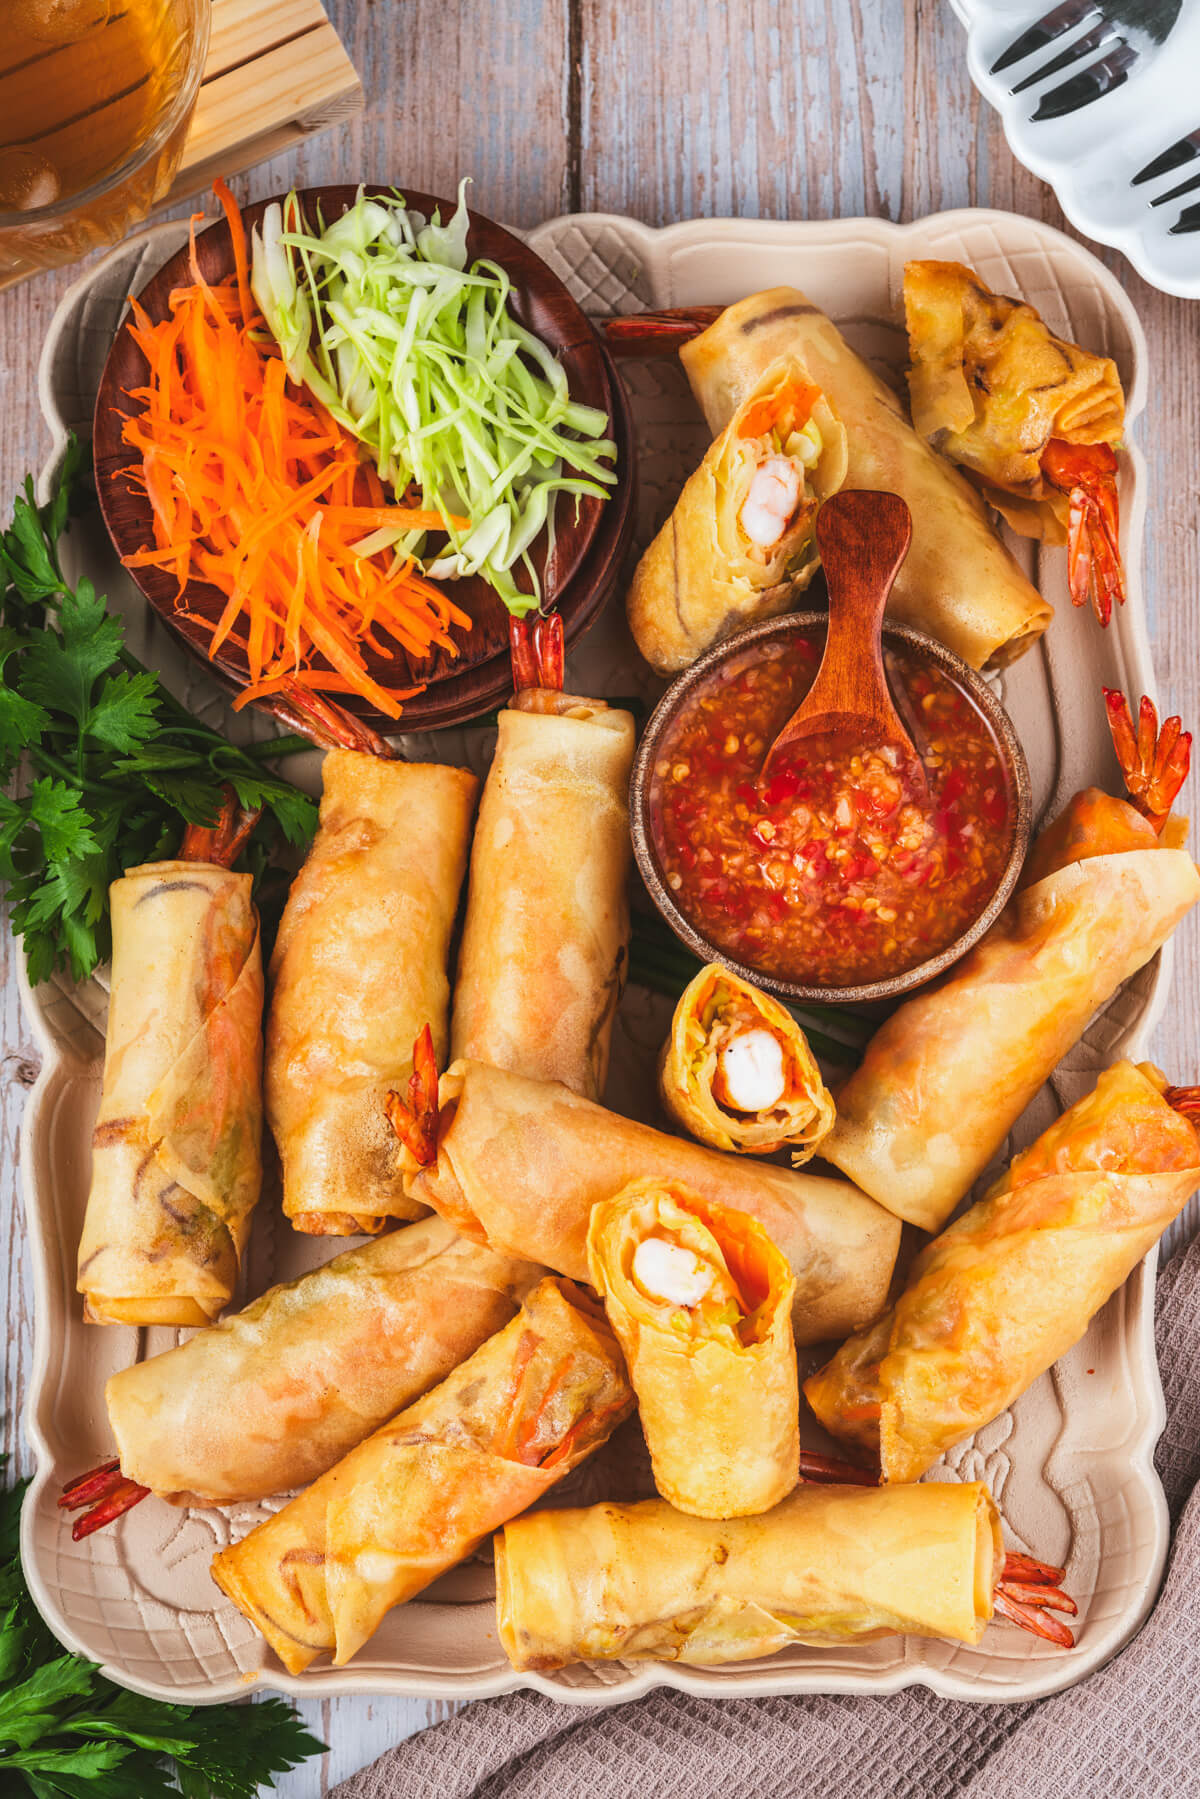
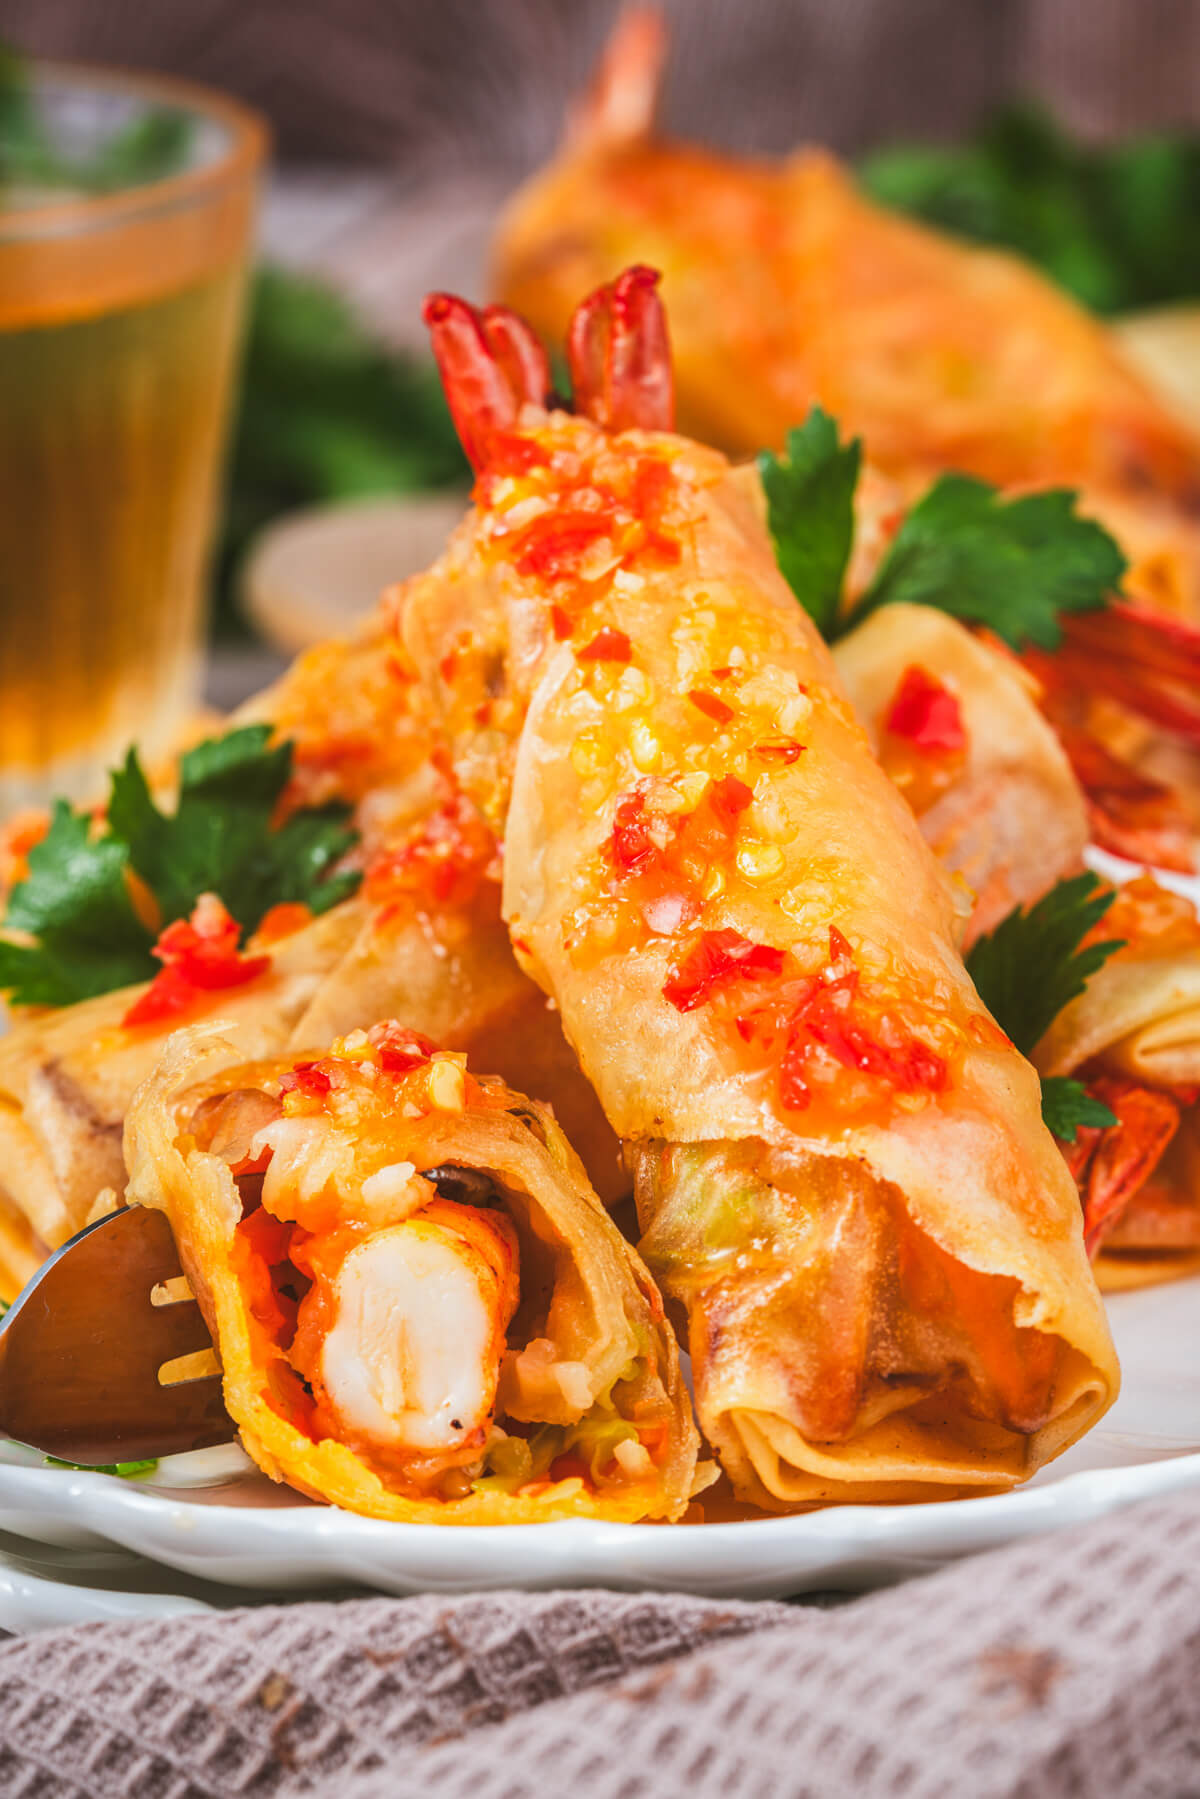
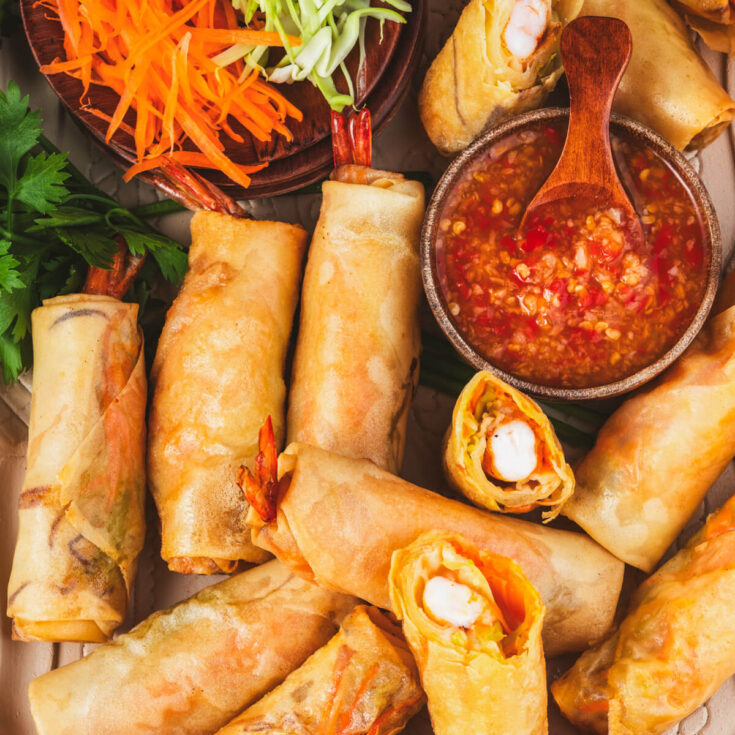
However, this shrimp spring roll (Chả giò tôm) recipe features whole plump shrimp with cabbage and carrot in a spring roll wrapper. They are traditionally served with nước chấm or Thai chili sauce (recipe included).
Ingredients in Shrimp Spring Rolls
Besides this short list of ingredients, you will need frying oil and a large, heavy bottom pan. When deep-frying at high temperatures, it’s important to choose an oil that can handle the heat without breaking down.
The ideal temperature for deep-frying is between 350 F and 375 F (175°C and 190°C). The ideal oil will have a smoke point well above the cooking temperature and ideally above 395 F (200°C). Avocado, Peanut, Canola, and Sunflower oil are all neutral tasting oil with a smoke point above 395 F (200°C).
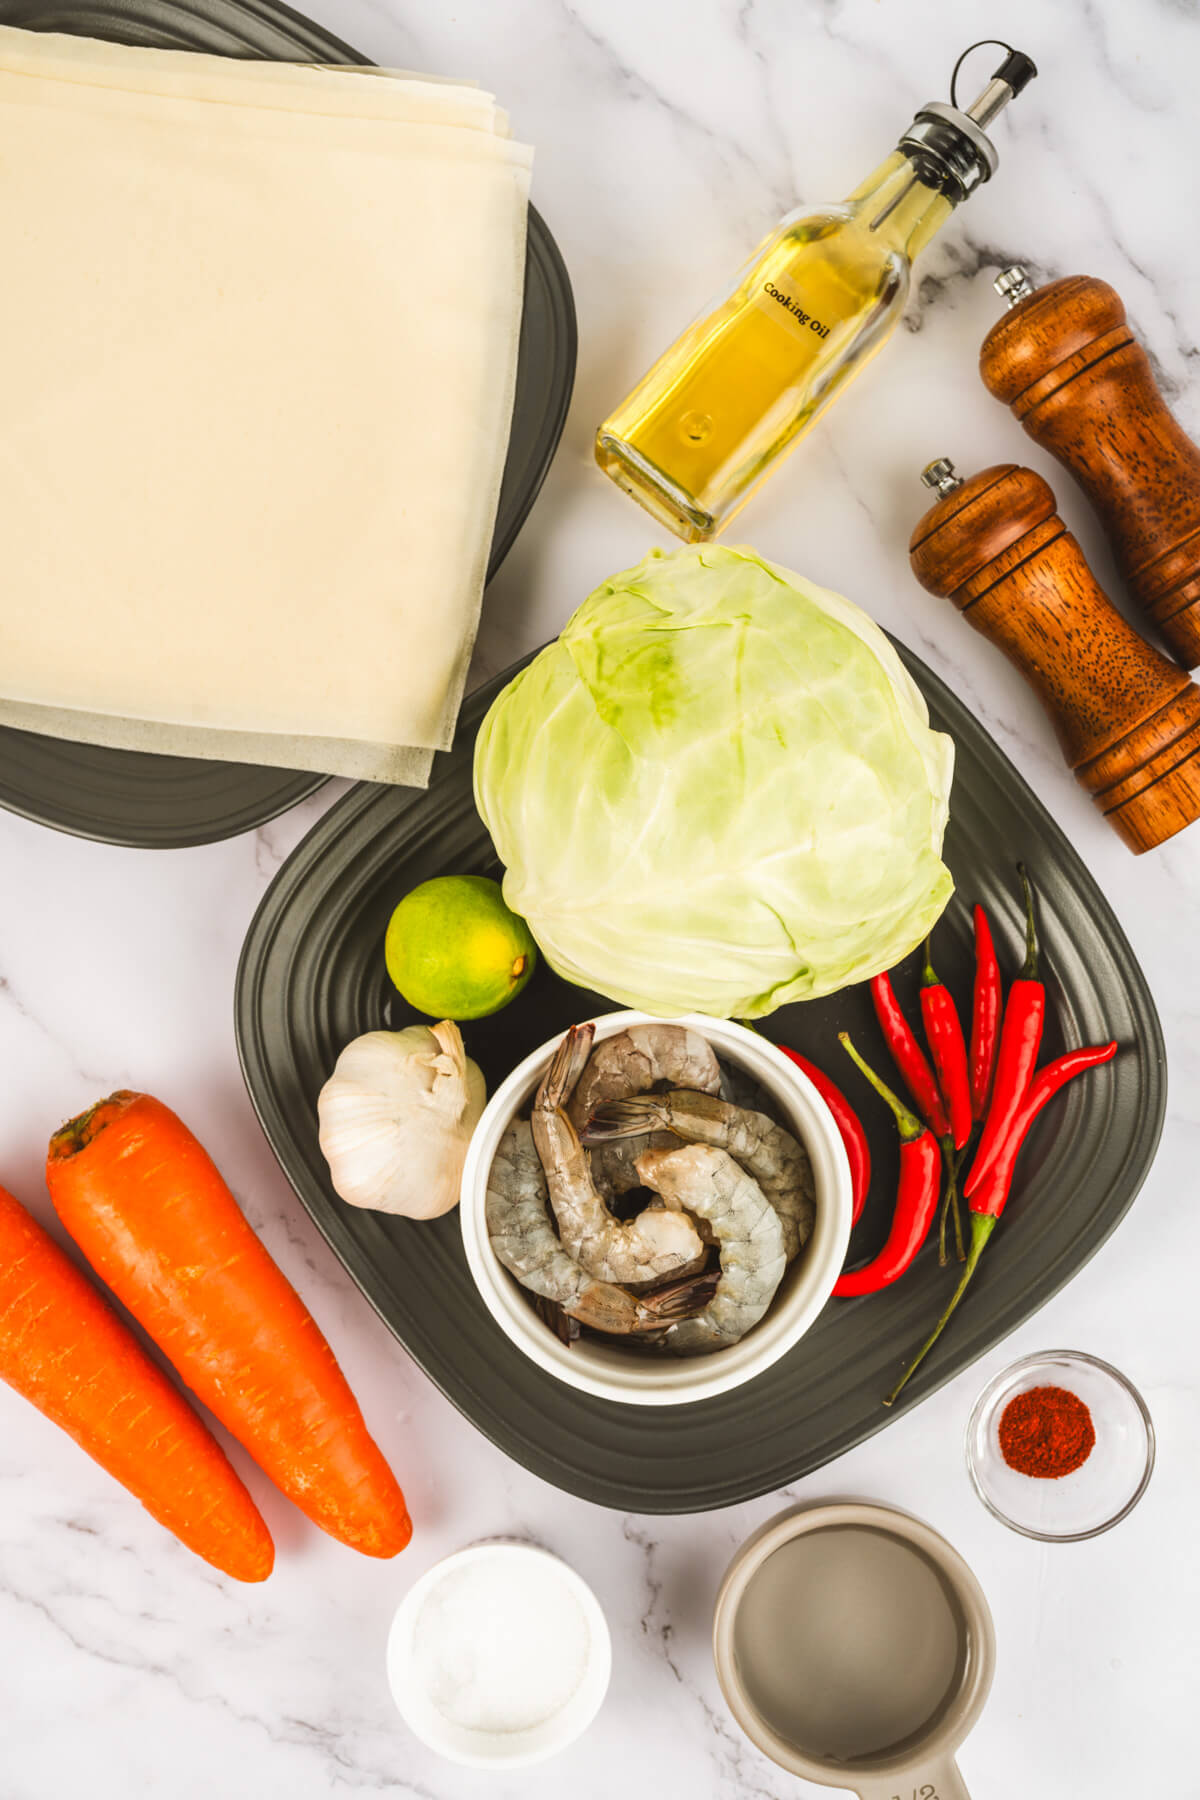
- Shrimp
- Paprika
- Salt
- Black Pepper
- Spring Roll Wrappers
- Cabbage
- Carrot
- Garlic
- Bird’s Eye Chili
- Granulated Sugar
- Lime Juice
- Water
Buy fresh or frozen (and thaw) large or extra large shrimp. Peel and devein them but leave the tails on. Adjust the number of Bird’s Eye Chilies for more or less heat, or simply add red chili flakes to the dipping sauce for a lower the spice level. For a gluten free version, use rice roll wrappers.
Feel free to replace the carrots and cabbage with red bell pepper and daikon radish. If fresh lime juice is not available, use fresh lemon juice instead.
How to Make Shrimp Spring Rolls
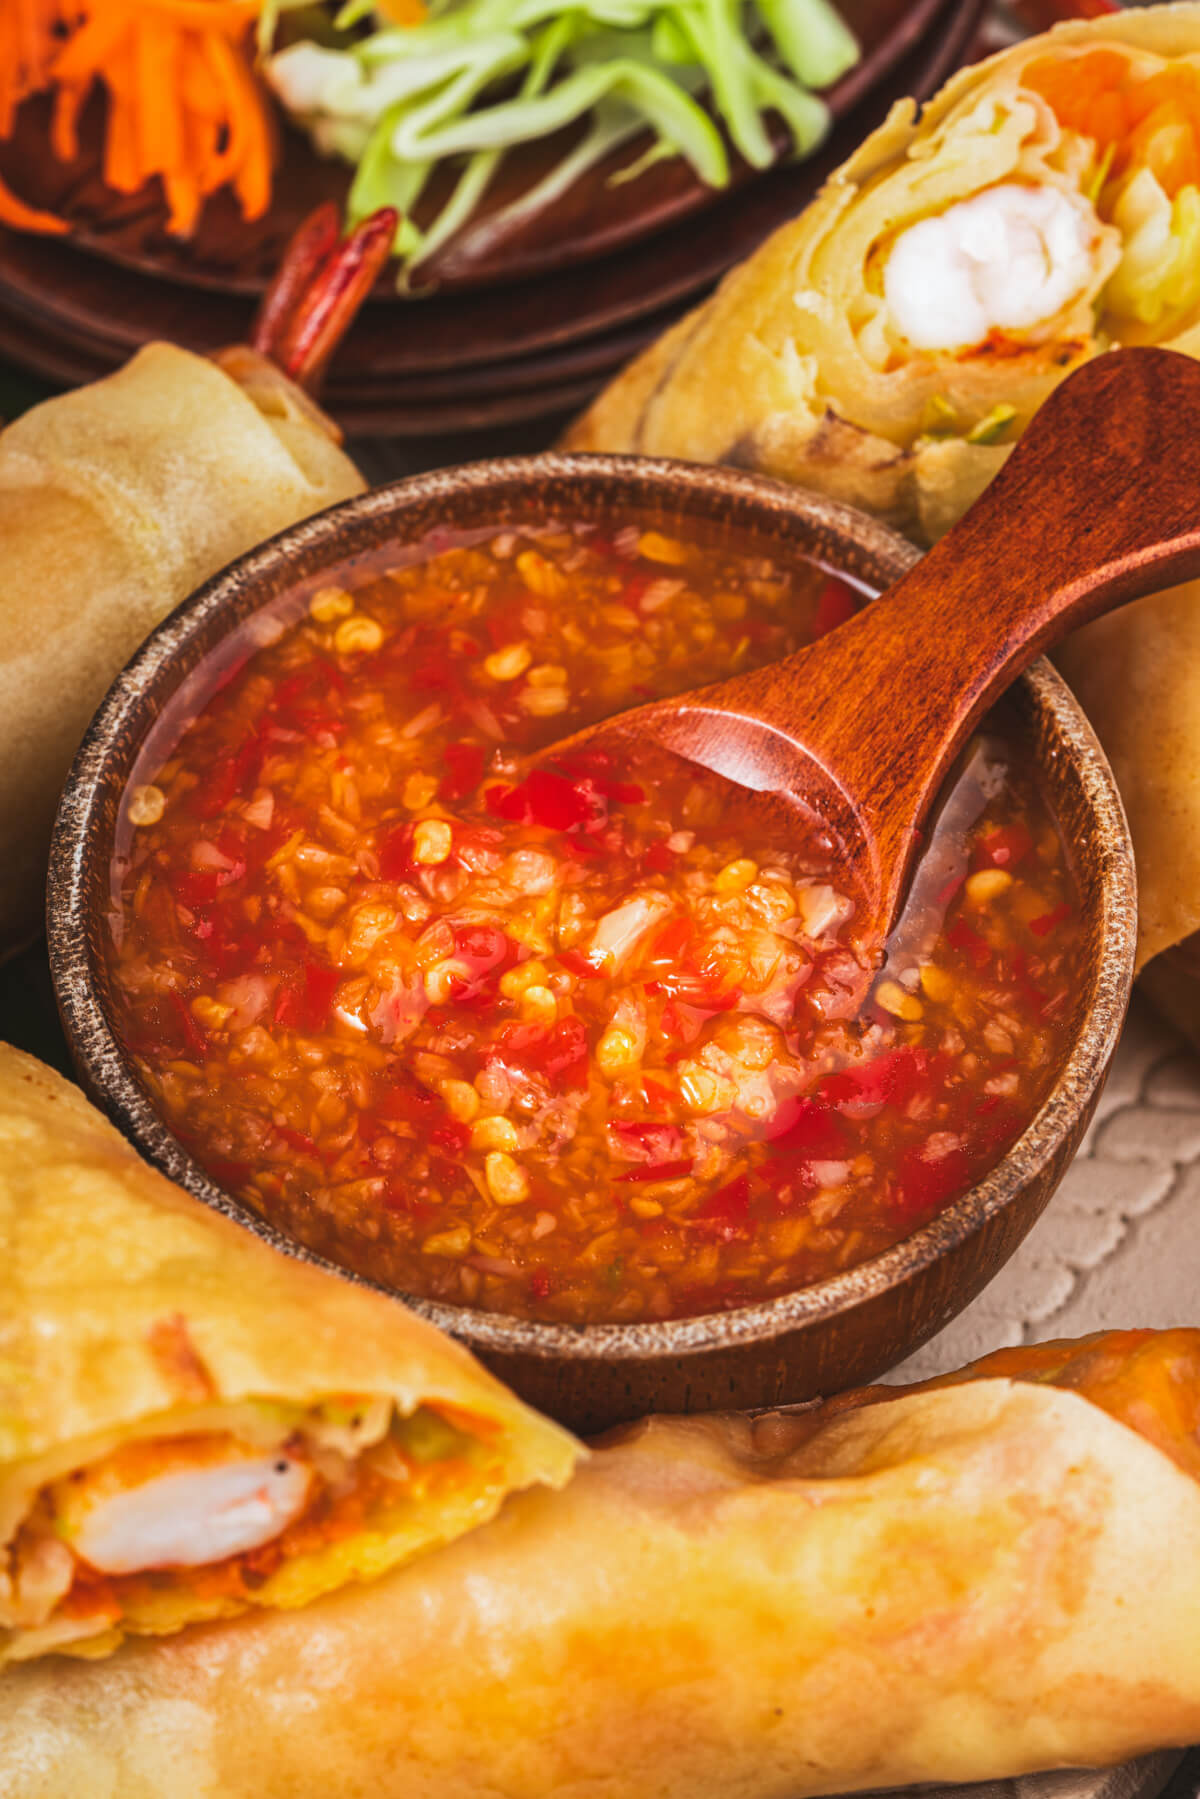
Pro tip: Make the Sauce before you start the shrimp, so it has time to cool to room temperature. Begin by blending garlic and chili in a food processor. Place them in a saucepan, along with sugar, lime juice, and warm water. Stir well and bring to a boil then reduce the heat to medium and cook for 7-8 minutes or until the sauce thickens. Remove from heat and allow to cool.
Marinate the Shrimp
Marinating the shrimp makes them extra delicious and incredibly tender. Begin by placing peeled and deveined raw shrimp in a large mixing bowl. Add paprika and season with salt and pepper then mix well and cover with plastic wrap. Allow shrimp to marinate for 15 minutes.
After marinating, make 4 small cuts on the underside of each shrimp. This is so that they remain straight while they cook.
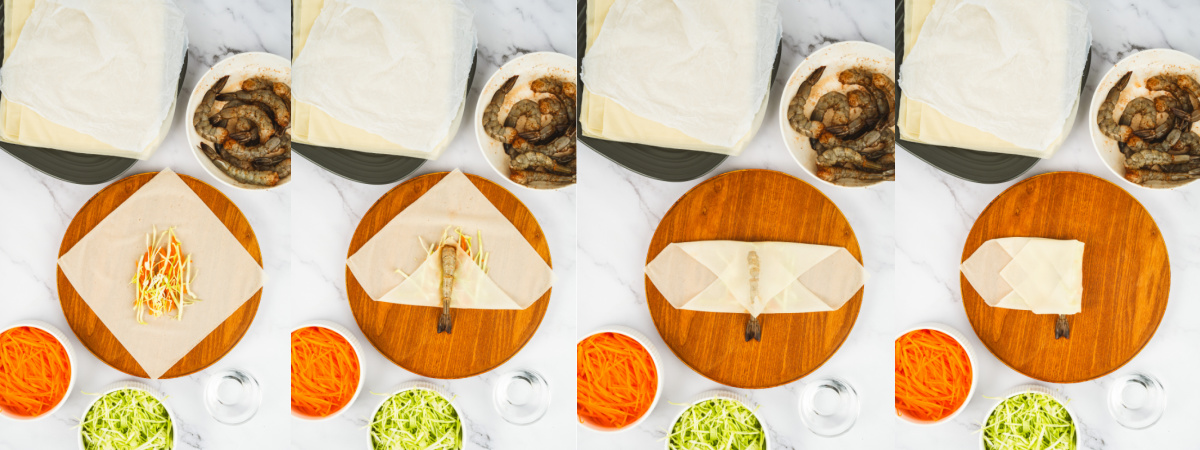
Wrap the Shrimp
To begin wrapping shrimp, lay one spring roll wrapper in a diamond shape on a clean working space. Next place 1 teaspoon shredded cabbage and 1 teaspoon shredded carrot vertically in the centre of the wrapper.
Fold the bottom edge of the wrapper over the vegetables then place a shrimp at the centre of the folded area, with its tail hanging off the bottom edge. Fold the top edge of the spring roll wrapper down to cover the shrimp. Finally, fold the right edge toward the centre and roll toward the left.
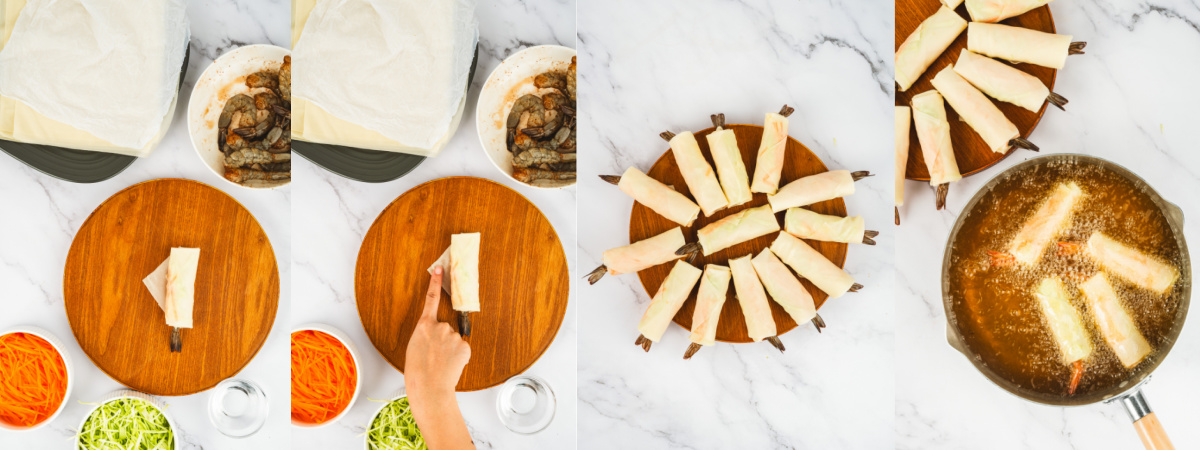
Lightly moisten the end of the left corner with water to seal the spring rolls. Place the spring roll seam-side down on a plate. Repeat with remaining shrimp and wrappers.
How to Fry Shrimp Salad Rolls
To begin the first fry, heat a neutral tasting oil in a frying pot or Dutch oven to 350℉ (180℃). Once it reaches temperature, carefully add the shrimp spring rolls and deep fry for about 2 minutes until golden brown. Fry in batches if necessary, do not overcrowd the pan.
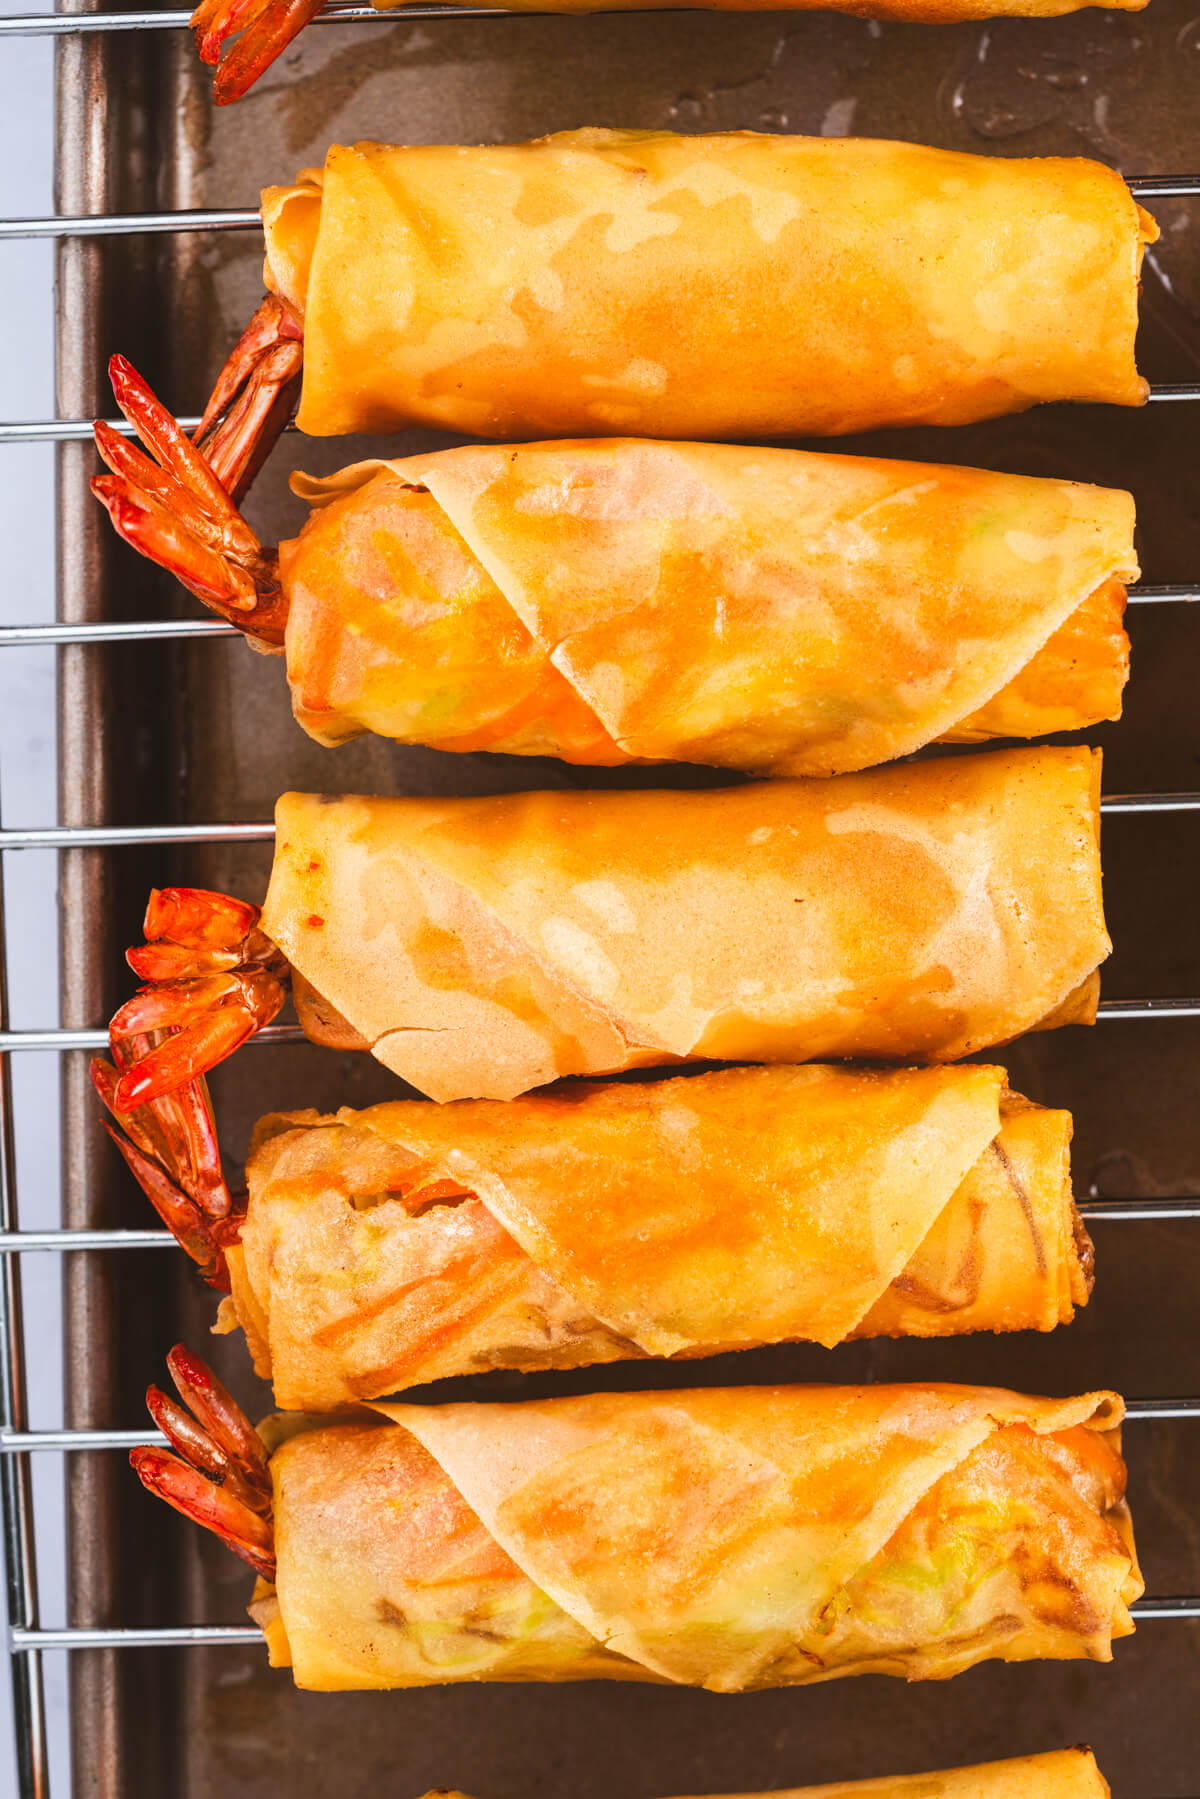
Remove the shrimp spring rolls and transfer to a wire rack to drain excess oil then increase oil temperature to 390℉ (200℃) for the second fry.
Fry the spring rolls again for just 5 seconds, moving them in the pan constantly. Immediately remove them from the oil and transfer to the wire rack to drain excess oil. Allow to cool briefly before serving hot with dipping sauce.
Recipe Tips and Tricks
- Prevent Dry Wrappers: Keep the spring roll wrapper covered with a clean damp kitchen towel to avoid cracking. Cracked spring roll wrappers will cause leakage of fillings when frying.
- Why cut the shrimp’s underside? This prevents the shrimp from curling up when frying. Curling of shrimp when cooked is due to muscle contraction so sliding a few cuts on the belly will help to break the muscle fibers.
- Can I cut the shrimp before marinating it? Yes, you can. Cutting after the shrimp are marinated reduces the risk of shrimp tearing while you massage them in the marinade.
- Why second frying? This step enhances crispiness!
- Sauce alternatives: If you don’t want to make the sauce, use store-bought Thai sweet chilli sauce, kewpie mayo, spicy Soy Ginger, Plum Sauce, or even Peanut Butter dipping sauce.
Leftovers and Reheating
Store leftovers in an airtight container in the refrigerator for up to 3 days or freeze for up to 1 week. To reheat, thaw at room temperature for 15 minutes before reheating in an air fryer or oven at 350℉ (180℃) for 7 minutes.
Make Ahead Instructions: Assemble and freeze rolls before frying (not refrigerated as the veggies will weep). Fry directly from frozen following the same frying steps (no need to thaw).
Hi! I’m Bernice Hill, the heart and soul behind Dish ‘n’ the Kitchen. It is my pleasure to share easy to follow recipes that are delicious, nutritious, and approachable for the whole family.
If you make this Shrimp Spring Rolls recipe, I’d love to hear about it in the comments section or in a recipe rating. Be sure to follow me on Facebook and Pinterest for my latest recipes. Also, if you do make this recipe please, share your photos and tag me on Instagram. I hope you like this recipe!
Shrimp Spring Rolls (Chả Giò Tôm)
Crispy on the outside, juicy on the inside, these stuffed Shrimp Spring Rolls, or Chả Giò Tôm are the ultimate appetizer. Loaded with plump shrimp and crunchy vegetables, they're fried to golden perfection. Dip them into homemade Thai chili sauce for the ultimate balance of balance of sweet, spicy, and tangy flavours.
Ingredients
- 13 large Shrimp; peeled and deveined
- ½ teaspoon Paprika
- Salt and Black Pepper to season
- 13 sheets Spring Roll Wrapper
- 1 cup Shredded Cabbage
- 1 cup Shredded Carrot
FOR THE DIPPING SAUCE
- 1 Bulb Garlic
- 3 medium-sized Bird’s Eye Chili
- ¼ cup Granulated Sugar
- ¼ cup fresh Lime Juice
- ½ cup Water
Instructions
MARINATE THE SHRIMP
- Place peeled and deveined shrimp in a large mixing bowl. Add paprika and season with salt and pepper.
- Mix well and cover with plastic wrap. Allow shrimp to marinate for 15 minutes.
- After marination, make 4 small cuts on the shrimp’s underside.
WRAP THE SHRIMP
- Place a spring roll wrapper in a diamond shape on a clean working space.
- Place 1 teaspoon shredded cabbage and 1 teaspoon shredded carrot vertically in the centre of the wrapper.
- Fold the bottom edge of the wrapper over the vegetables.
- Place a shrimp at the centre of the folded area, with its tail hanging off the bottom edge.
- Fold the top edge of the spring roll wrapper down to cover the shrimp. Then, fold the right edge toward the centre and roll toward the left.
- Lightly moisten the end of the left corner with water to seal the spring rolls. Place the spring roll seam-side down on a plate.
- Repeat with remaining shrimp and wrappers.
FRY THE SHRIMP
- Heat oil in a frying pot or Dutch oven to 350℉ (180℃).
- Carefully add the shrimp spring rolls and deep fry for about 2 minutes until golden brown. Do not overcrowd the pan.
- Remove the shrimp spring rolls and transfer to a wire rack to drain excess oil.
- Increase oil temperature to 390℉ (200℃) for a second fry.
- Fry the spring rolls again for just 5 seconds, then immediately take out from the oil. Make sure to move them constantly when second frying for even crisping. Transfer to the wire rack and drain excess oil.
FOR THE SAUCE
- Blend garlic and chili in a food processor.
- In a saucepan, combine the blended garlic and chili with sugar, lime juice, and water. Stir well and bring to a boil.
- Once boiled, reduce heat to medium and cook for 7-8 minutes or until the sauce thickens.
- Remove from heat and allow to cool to room temperature.
Nutrition Information:
Yield:
13Serving Size:
1Amount Per Serving: Calories: 189Total Fat: 8gSaturated Fat: 3gUnsaturated Fat: 6gCholesterol: 33mgSodium: 509mgCarbohydrates: 18gFiber: 1gSugar: 2gProtein: 10g
Nutritional calculation was provided by Nutritionix and is an estimation only. For special diets or medical issues please use your preferred calculator.