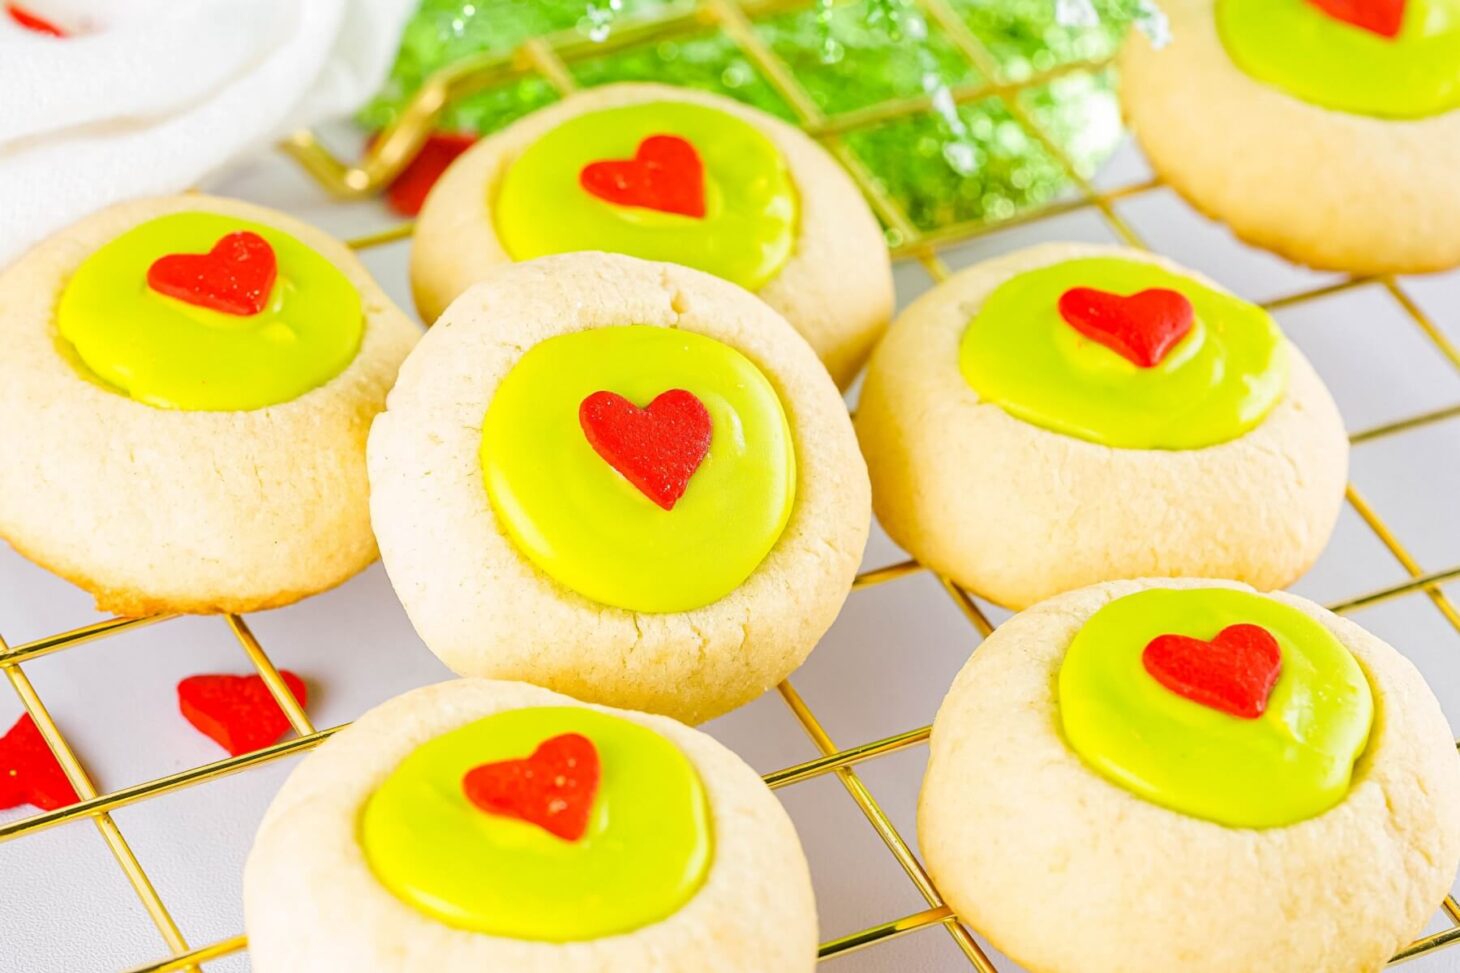
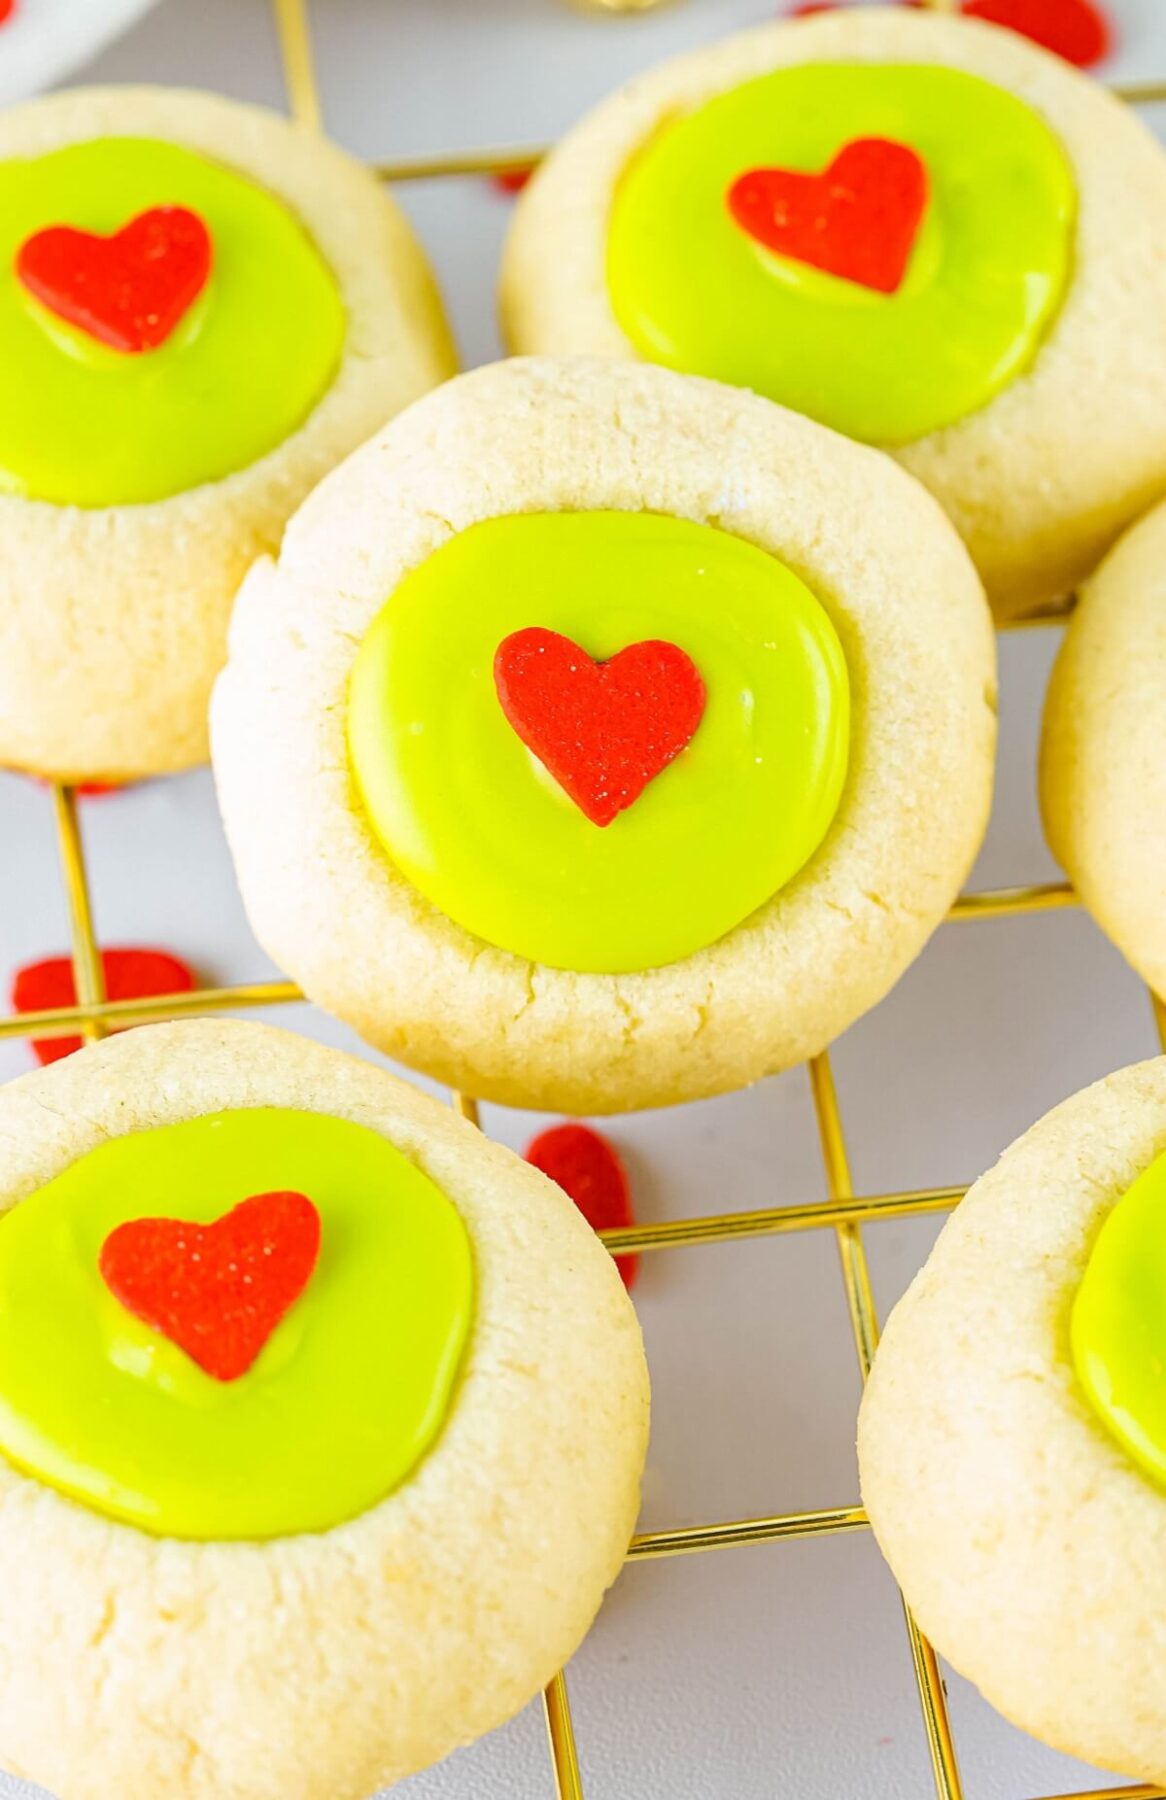
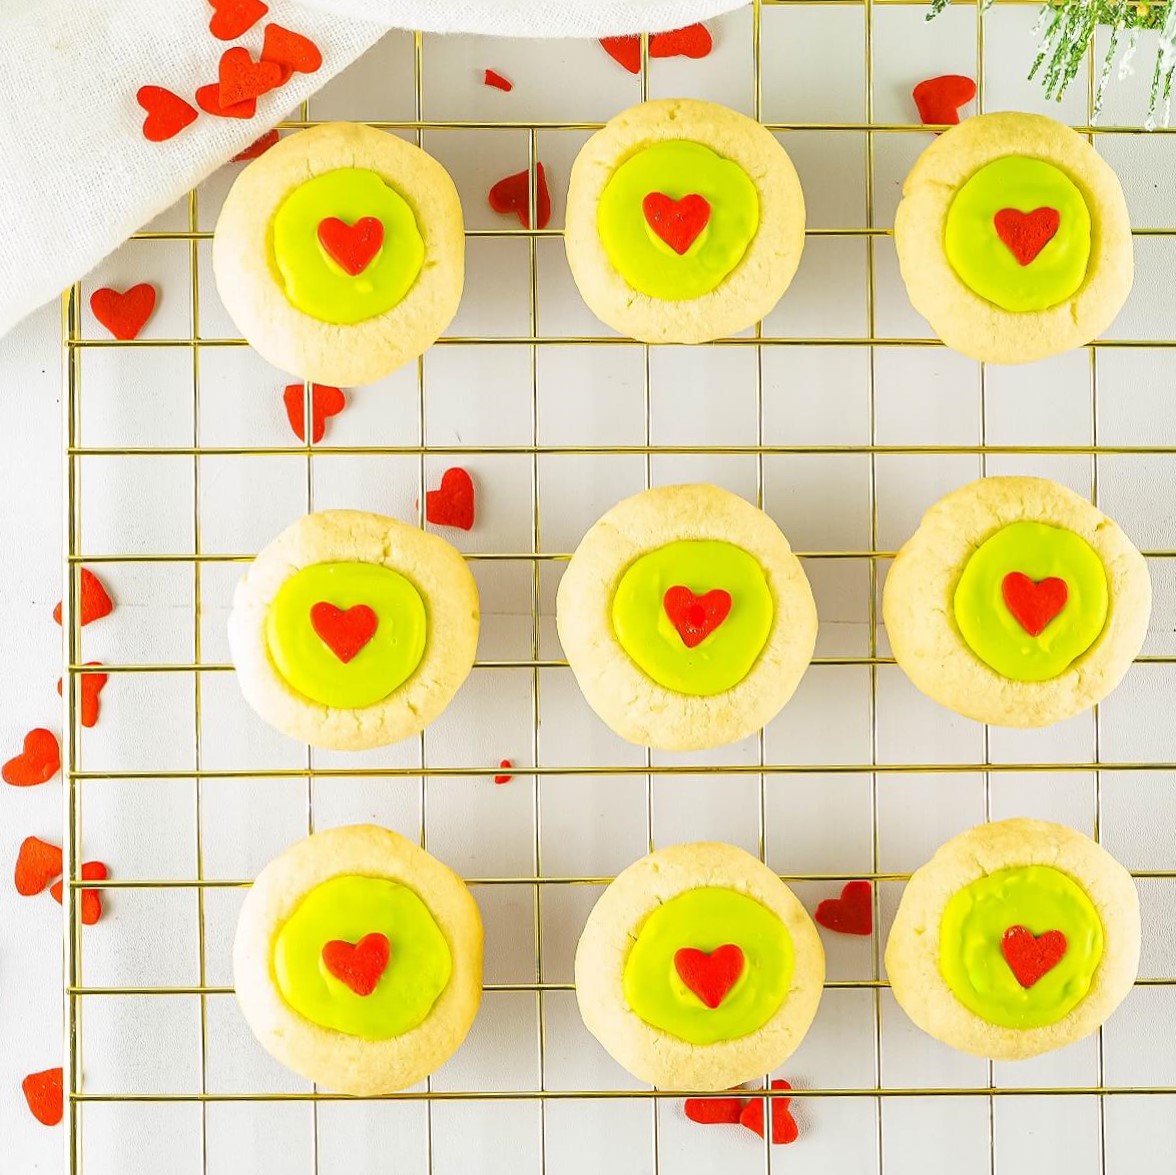
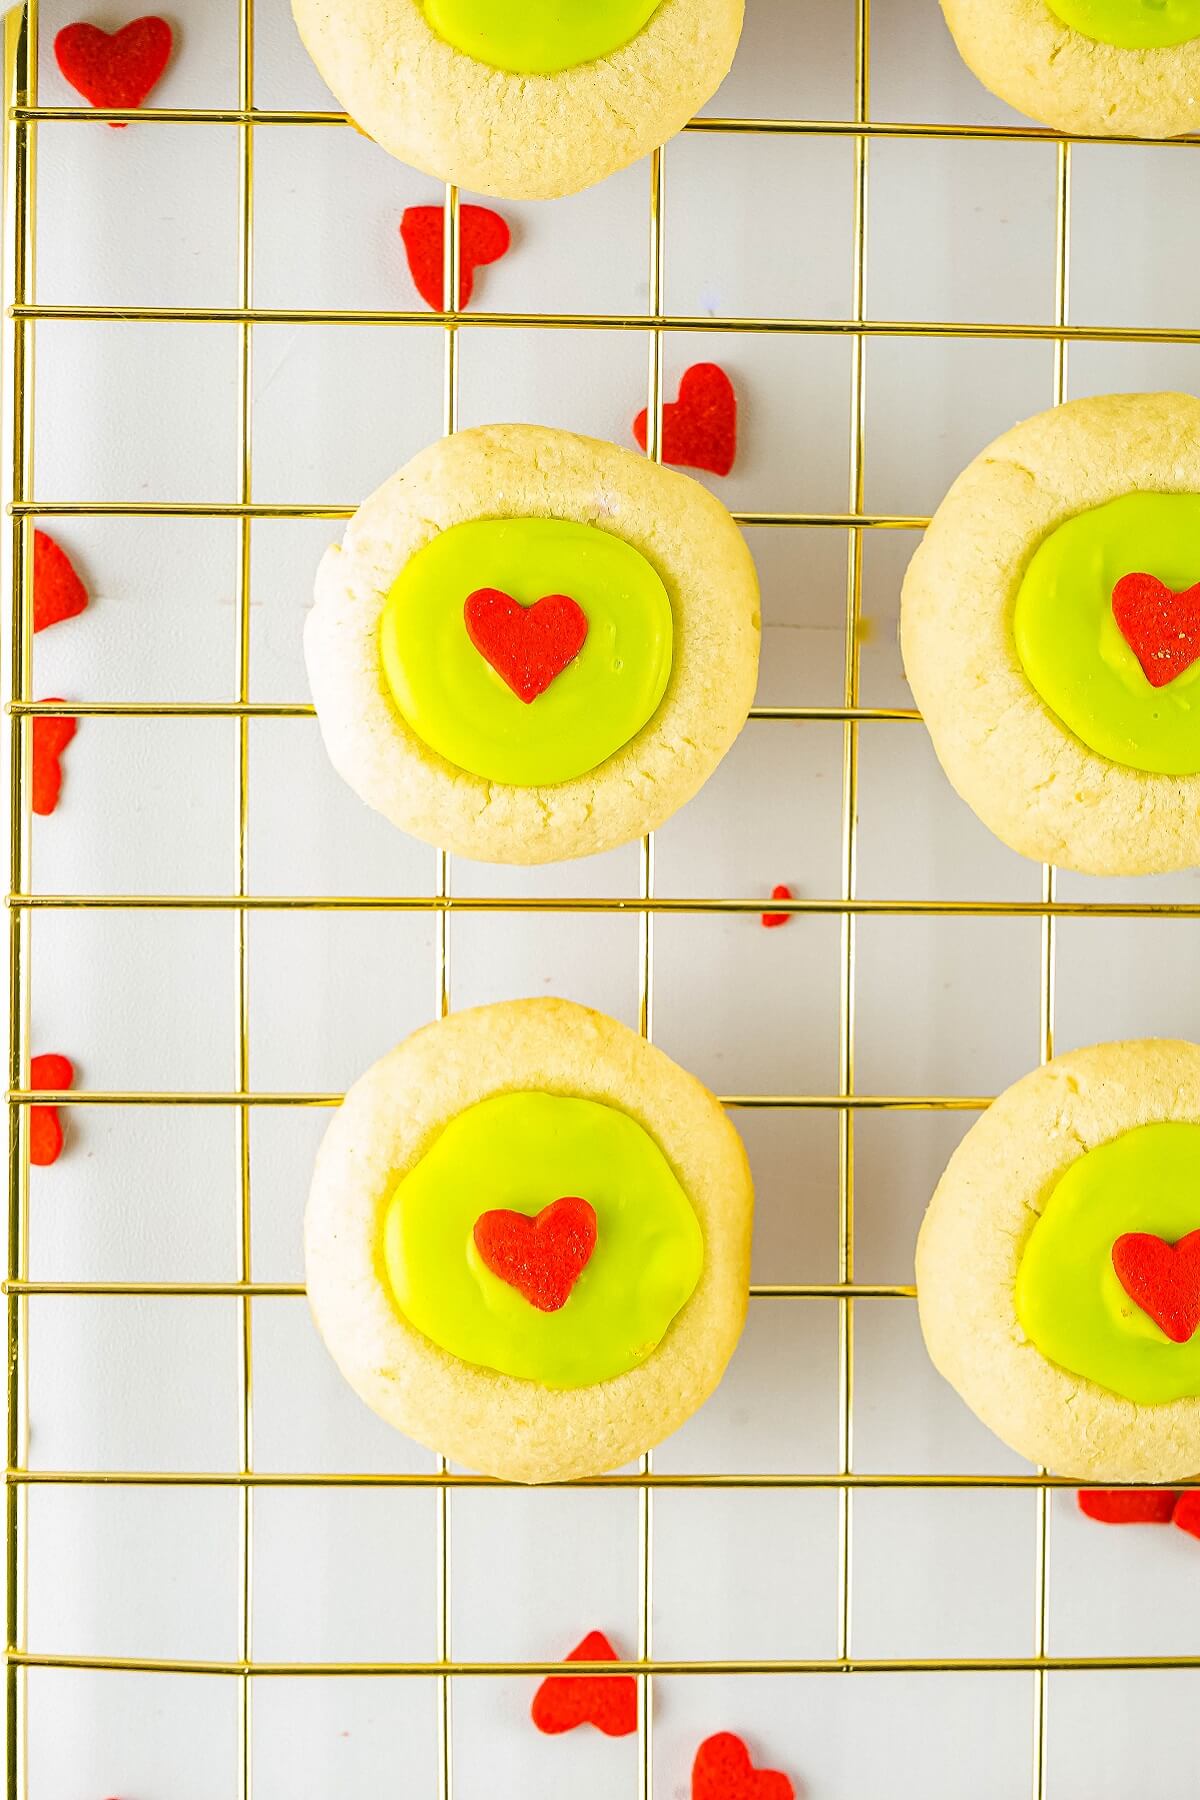
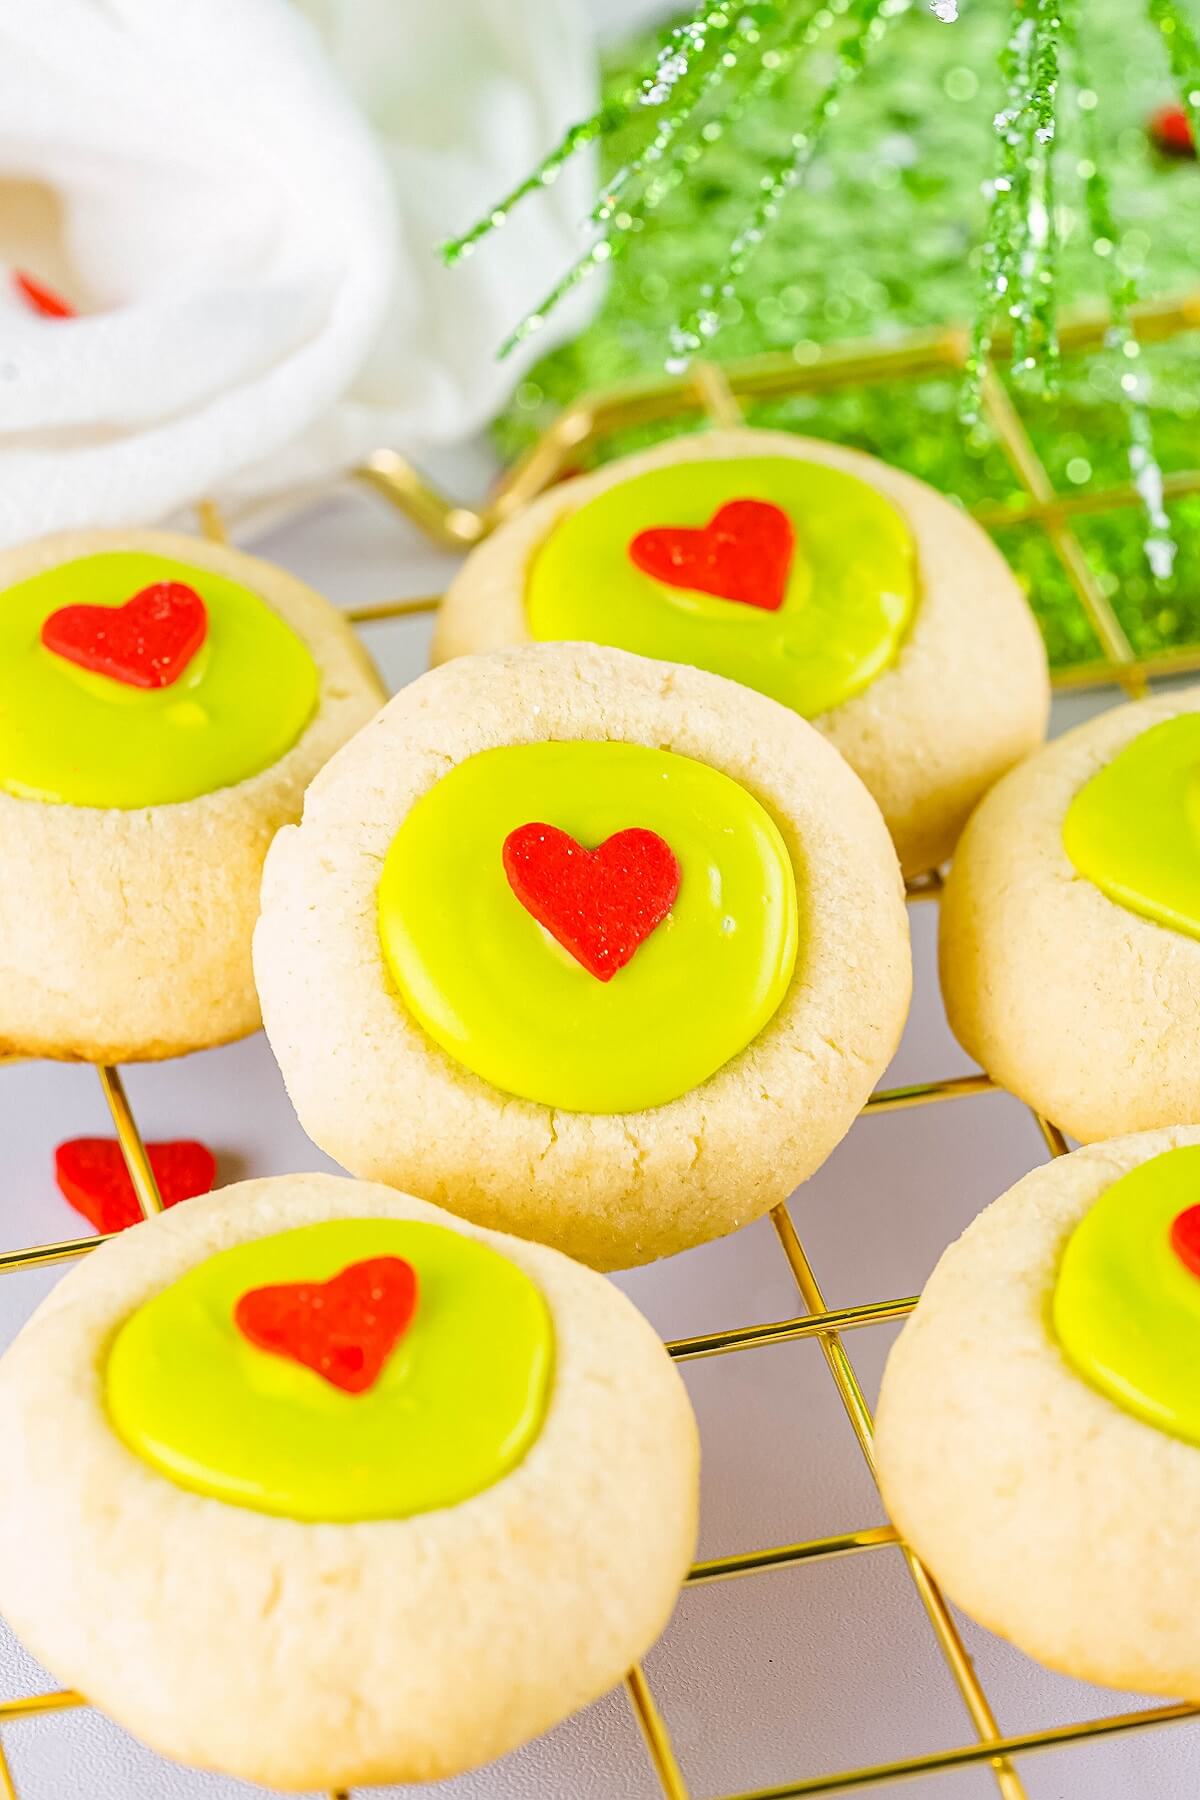
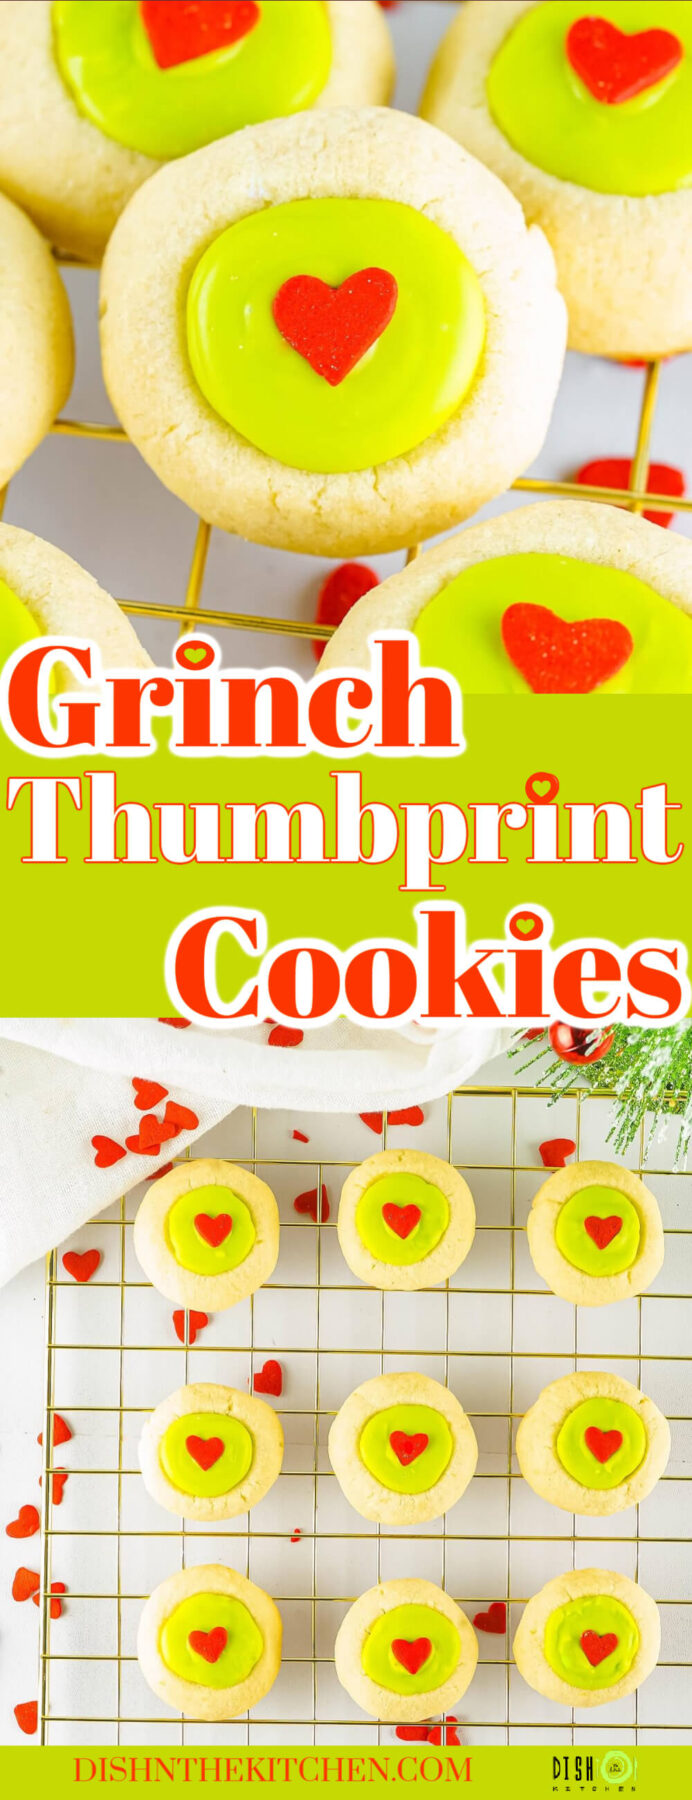
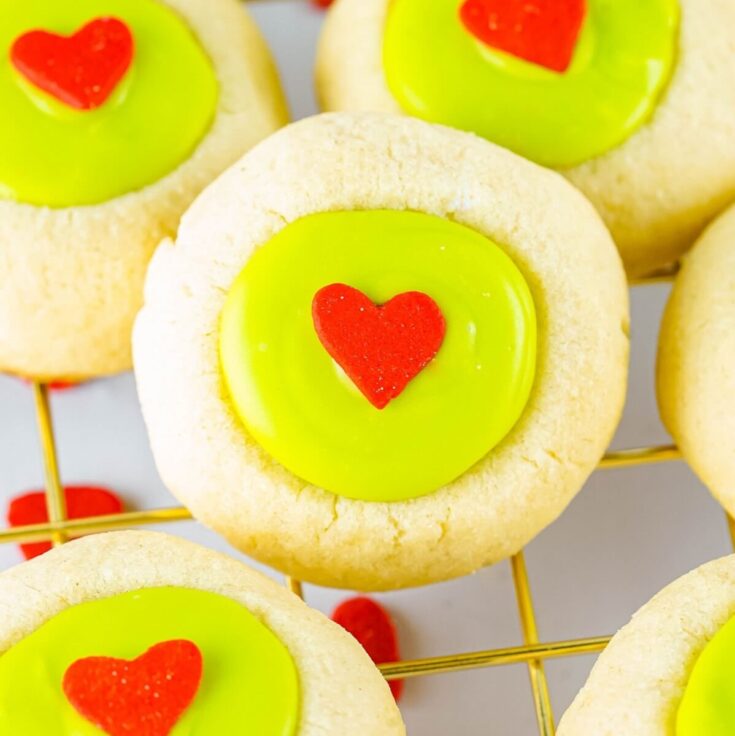
These Grinch Cookies are delightful buttery thumbprint cookies with a creamy, candy filled center and a whole lot of heart. Find your Christmas spirit when you gift these sweet treats to family and friends.
Holiday baking exchanges, or baking socials are great ways to acquire a variety of sweet treats. Get social and bake up some ‘sturdy’ cookies that can withstand a bit of jostling. Ancho Chili Chocolate Cookies are perfect to send in the mail, while Lemon Herb Shortbread make a unique exchange cookie.
Want to save this recipe?
Enter your email below and get this post sent straight to your inbox. Plus, I’ll send you my weekly newsletter featuring the newest and best Dish ‘n’ the Kitchen recipes every week!
Grinch Cookies
Are you ‘Team Grinch’ or ‘Team Elf’ during the holidays?! I come from a long line of elves so it may come as no surprise that I am mostly team Grinch. However, once I start baking and giving, my elf ancestry shines through and my heart…well, it grows three sizes!
So this year I’m baking up these sweet little Grinch Cookies, thumbprint cookie style. The vanilla scented dough has the perfect buttery flavour and texture while the filling is a fun bright green candy.
The crowning glory of these cookies are the red heart sprinkles, smack in the green centre of the cookie. They are a symbolic emblem for everything Grinch! If you can’t find them in stores or online, make these Grinch candy buttons at home. It’s easier than you think!
These fun cookies make a great addition to any cookie platter or cookie exchange. They make great gifts or you can ‘be a grinch’ and keep them all to yourself. I suggest dipping them in a hot mug of Grinch Hot Chocolate for an extra fun treat.
The Classic Thumbprint Cookie
Thumbprint cookies have been around for a long time! If you haven’t had the pleasure of eating one, they are delicious. Thumbprint cookies consist of a simple cookie dough and some sort of filling. The dough and filling can be any flavour, so these cookies exist in an almost infinite amount of varieties and combinations.
My first experience with them were my mom’s ‘jam jams’ which as you can guess, were filled with jam. That is still the most classic flavour to me. Another family favourite (and one for all of you Bailey’s Irish Cream fans out there!) are these Rockin’ Bailey’s Thumbprint Cookies. They have a chocolate cookie dough with chocolate and Bailey’s ganache filling.
What is your favourite Thumbprint Cookie flavour combination?
The Grinch Baking Trend
I’m not usually one to jump on a food trend but, being a Grinch, I just had to play along. There are so many recipes for Grinch Cookies, cupcakes, Rice Krispie Squares, bonbons, popcorn, fruit kabobs, and even cocktails!
Any treat with the signature bright green colour and red heart sprinkles is automatically recognized as ‘Grinch’ themed. It seems there may be a few more ‘Team Grinch’ people than I originally thought!
Why is this such a popular trend? I think it’s because there are so many great lessons to learn from watching the Grinch story. Lessons about love, giving, and sharing really strike at our heart-strings, especially around the Christmas season. Maybe the people of Team Elf, who love Christmas all year long, are really on to something…
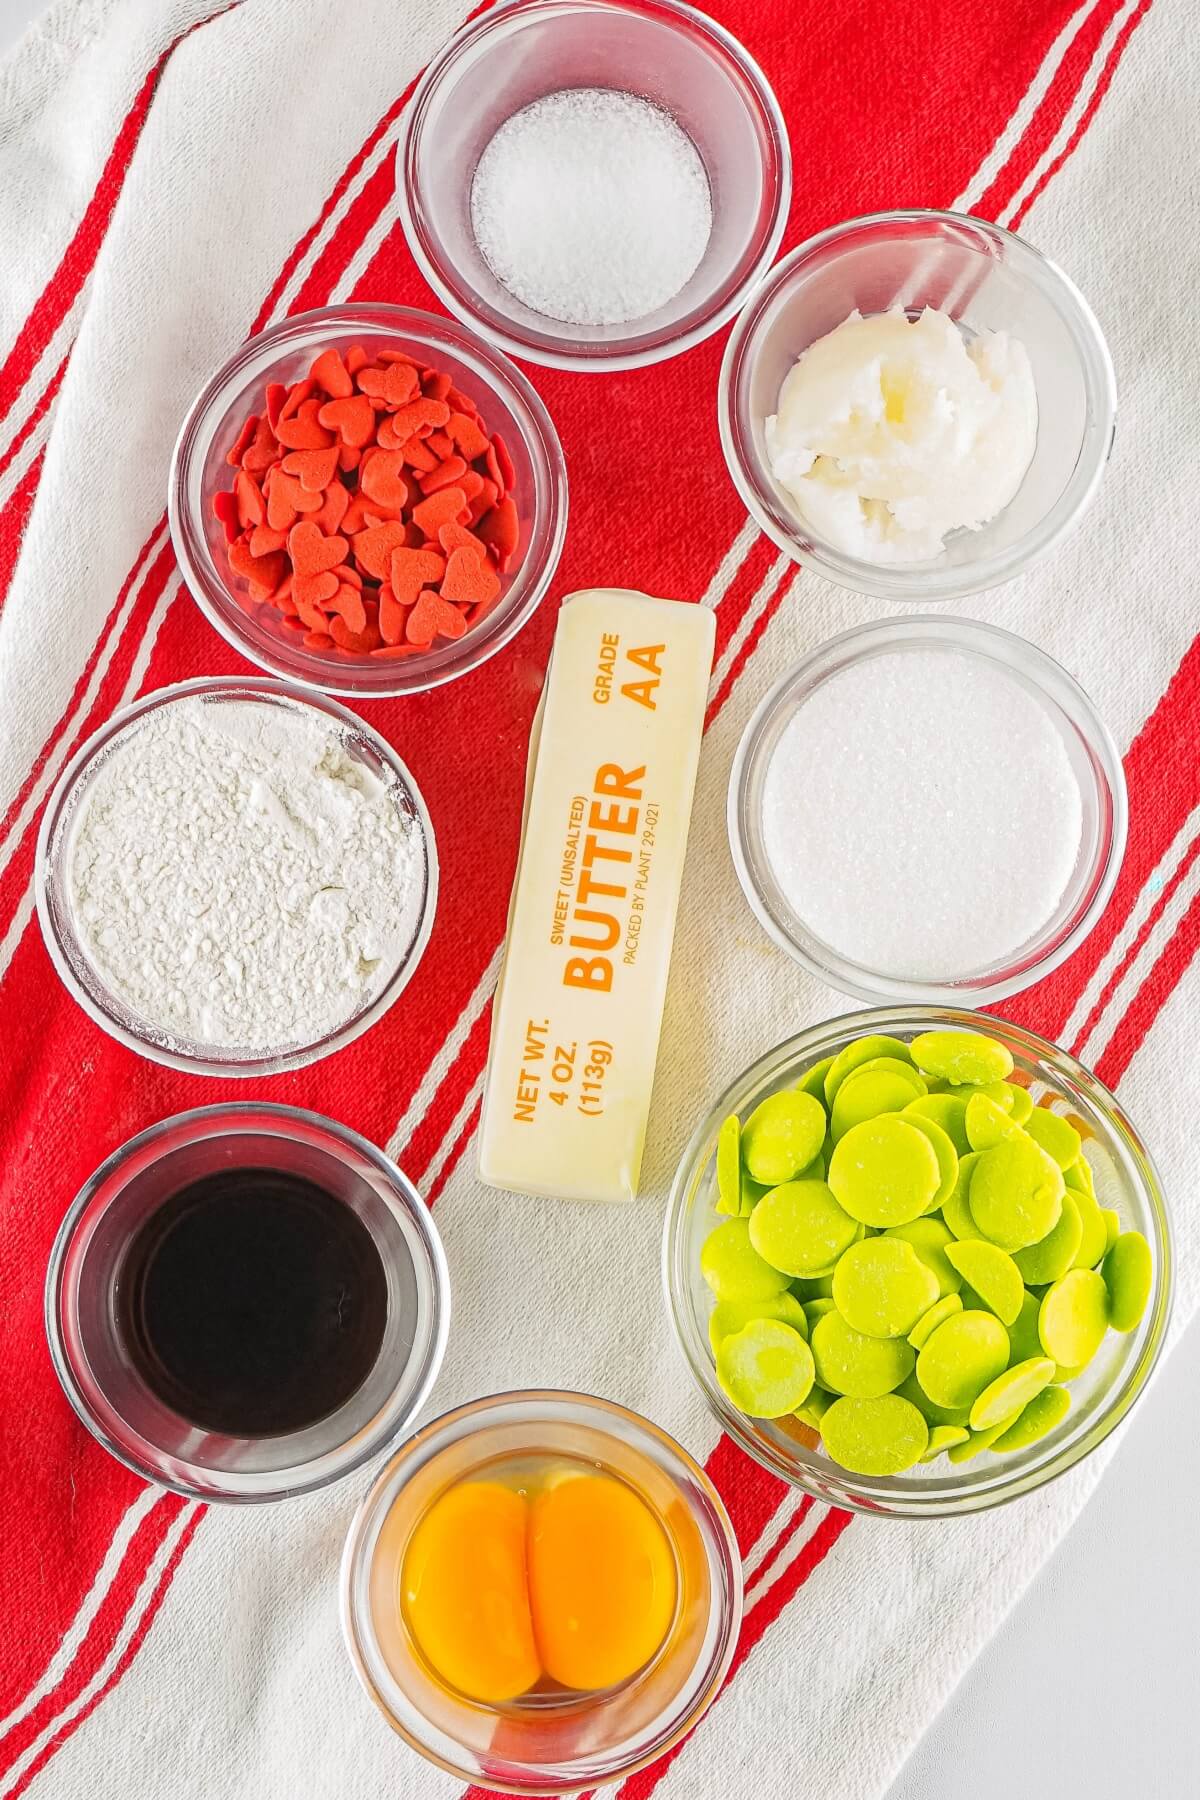
Ingredients for Grinch Cookies
- Flour
- Sugar
- Butter
- Salt
- Eggs
- Vanilla Extract
- Green Candy Melts
- Coconut Oil
- Red Heart Sprinkles
In addition to the common cookie ingredients, this great recipe calls for Green Candy Melts and Red Heart Sprinkles. You can find them online, at Bulk Barn, or in a specialty baking or craft store. It may be helpful to buy them early in the season, as they can be difficult to find closer to Christmas.
If you can’t find the green candy melts, you can try to get the signature green color by using white wafers tinted with a bit of yellow and green gel food coloring.

Neon Green Candy Melts, or wafers, are technically not chocolate as they do not contain any cocoa solids. However, they melt and taste very similar to white ‘chocolate’.
How to Make Grinch Cookies
Preheat oven to 350 F and line a standard baking sheet with parchment paper.
Next, in the bowl of a stand mixer fitted with a paddle attachment, cream the butter and sugar together until they are light and fluffy. With the mixer on low speed, add the egg yolks, salt, and vanilla. Beat for another minute.

Add in the flour and mix until just crumbly. Turn the dough onto a clean work surface and knead with your hands until the dough stays together in a ball. The dough should be fairly dry, but stick together after you knead it.
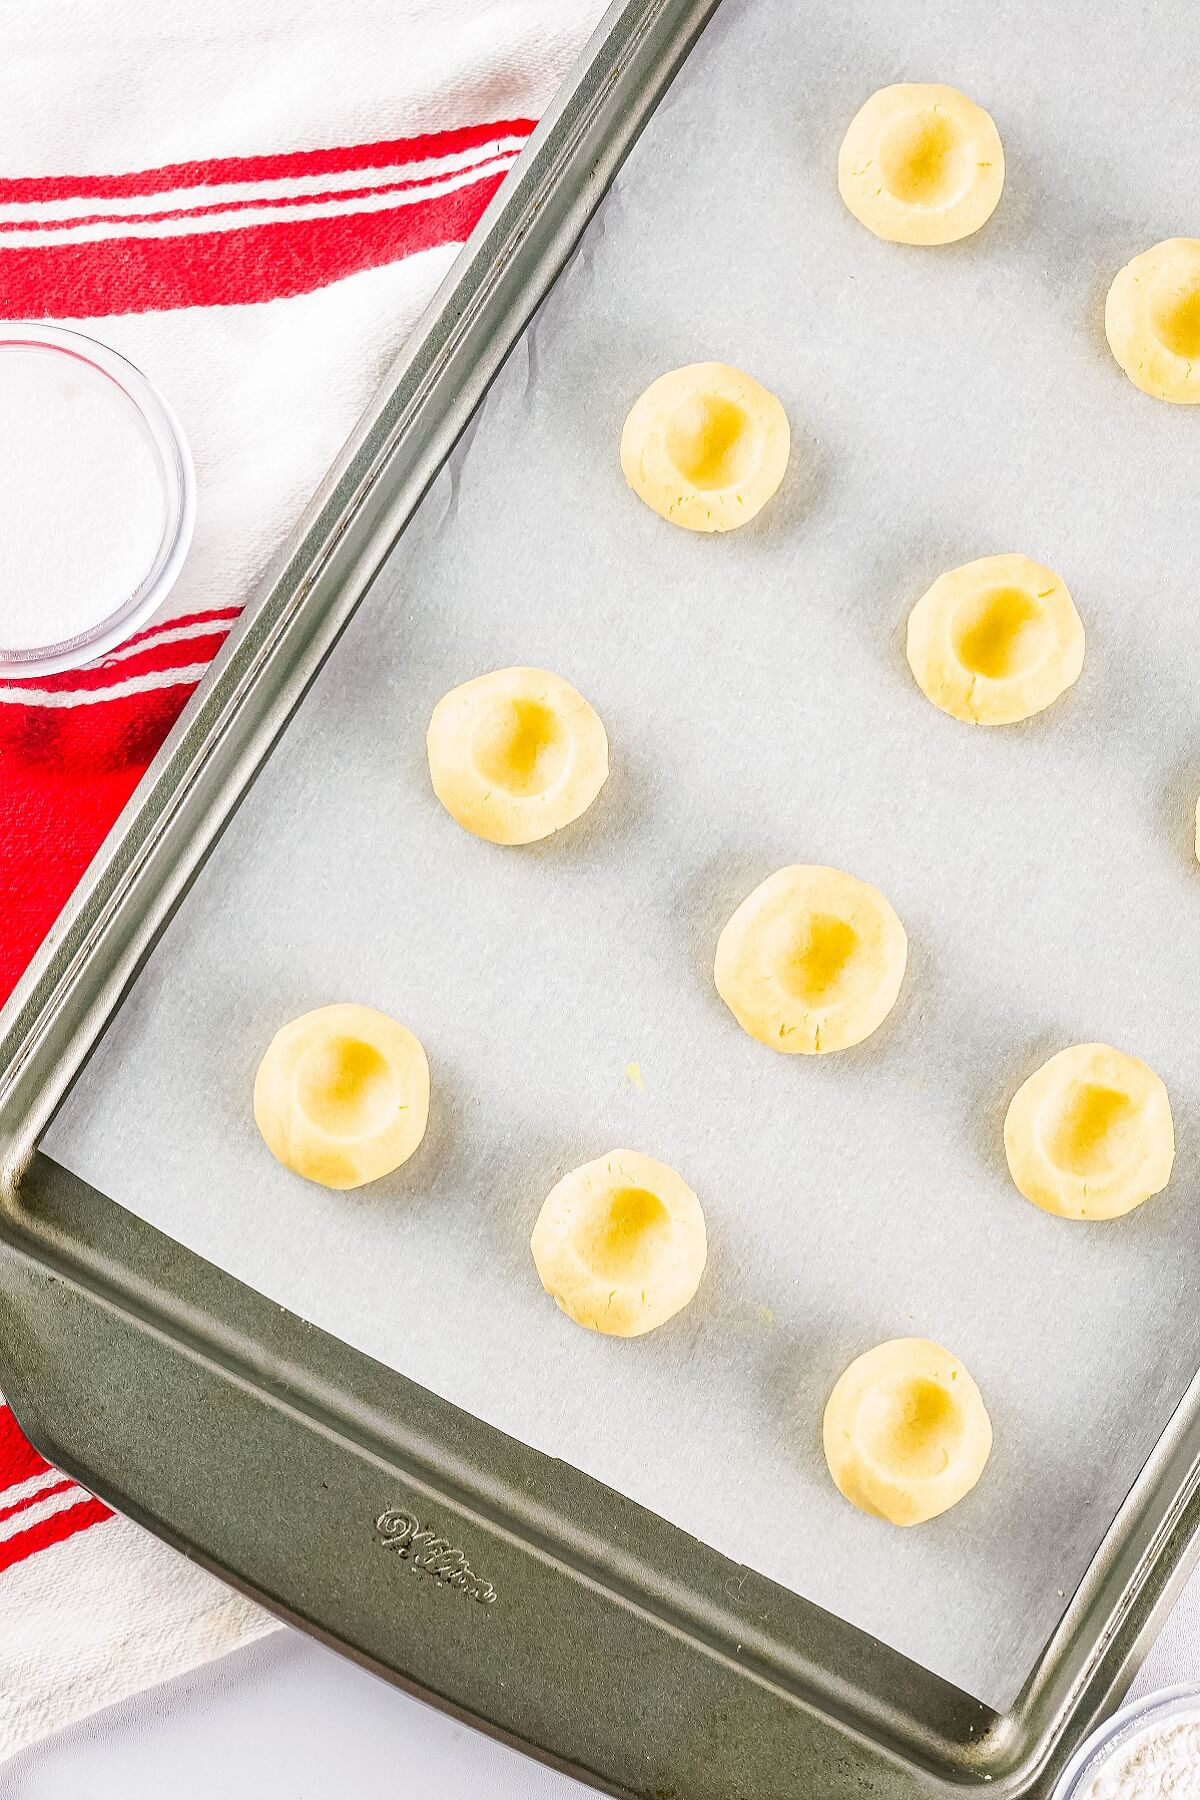
Divide and roll the dough into 1/2 inch balls (about one tablespoon worth of dough). Place each ball on the prepared baking sheet. Next, use your thumb or the handle end of a wooden spoon to make a deep indentation in the middle of each ball.
Bake the cookies at 350 degrees for 8-10 minutes or until they have very lightly golden brown bottoms. If the cookies expand and the holes aren’t as deep after baking, just press slightly with the wooden spoon handle when they come out of the oven. Allow cookies to cool completely on the pan before filling.
The Green Candy Melt Filling
For the candy centers, place the candy melts in a medium microwave safe bowl. Microwave for 30 second increments, removing and stirring the candy until it is entirely smooth and creamy.
Add the coconut oil to the melted candy and stir well. Transfer the melted candy to a piping bag and snip off the tip. Next, fill the cavity of each cookie, starting in the middle, then working around the edges.
Tap each cookie lightly on the counter to ensure the candy center flattens out. Immediately place one small red heart sprinkle in the middle of the candy while it’s still soft. Chill for 5 minutes or until hardened.
Cookie Storage
The cookies will keep in an airtight container in the fridge for 4-5 days. They also freeze well, making them a great ‘bake ahead’ cookie for the holidays.
Hi! I’m Bernice Hill, the heart and soul behind Dish ‘n’ the Kitchen. It is my pleasure to share easy to follow recipes that are delicious, nutritious, and approachable for the whole family.
If you make these Grinch Cookies with Heart, please be sure to leave a comment and/or give this recipe a rating! Be sure to follow me on Facebook and Pinterest for my latest recipes. Also, if you do make this recipe please tag me on Instagram, I’d love to see what you guys are making! Thank you so much for reading my blog.
Heart Filled Grinch Cookies
These Grinch Cookies are delightful buttery thumbprint cookies with a creamy candy filled center and a whole lot of heart. Find your Christmas spirit when you gift these sweet treats to family and friends.
Ingredients
- 2 cups flour
- 1 cup unsalted butter; room temperature
- 2/3 cup sugar
- 1/2 teaspoon salt
- 2 egg yolks
- 1 Tablespoon vanilla extract
- 12 oz. Neon Green Candy Melts
- 1 Tablespoon coconut oil
- large red heart sprinkles
Instructions
- Preheat the oven to 350 F and line a standard baking sheet with parchment paper.
- In the bowl of a stand mixer fitted with a paddle attachment, cream the butter and sugar together until they are light and fluffy.
- With the mixer on low speed, add the egg yolks, salt, and vanilla. Beat for another minute.
- Add in the flour and mix until just crumbly. Turn the dough onto a clean work surface and knead with your hands until the dough stays together in a ball.
- Divide and roll the dough into 1/2 balls (about one tablespoon worth of dough). Place each ball on the prepared baking sheet.
- Use your thumb or the handle end of a wooden spoon to make a deep indentation in the middle of each ball.
- Bake at 350 degrees for 8-10 minutes or until they have very lightly golden brown bottoms. If the cookies expand and the holes aren't as deep after baking, just press slightly with the wooden spoon handle when they come out of the oven.
- Allow cookies to cool completely on the pan.
FOR THE CANDY CENTERS:
- Place the candy melts in a medium microwave safe bowl. Microwave for 30 second increments, removing and stirring the chocolate until it is entirely smooth and creamy.
- Add the coconut oil to the melted candy and stir well.
- Transfer the melted candy to a piping bag and snip off the tip.
- Fill the cavity of each cookie, starting in the middle, then working around the edges.
- Give each cookie a small tap on the counter to ensure the candy flattens out.
- Immediately place one small red heart sprinkle in the middle of the candy.
- Chill for 5 minutes or until hardened.
Nutrition Information:
Yield:
36Serving Size:
1Amount Per Serving: Calories: 130Total Fat: 6gSaturated Fat: 4gTrans Fat: 0gUnsaturated Fat: 2gCholesterol: 24mgSodium: 34mgCarbohydrates: 18gFiber: 0gSugar: 10gProtein: 1g
Nutritional calculation was provided by Nutritionix and is an estimation only. For special diets or medical issues please use your preferred calculator.