
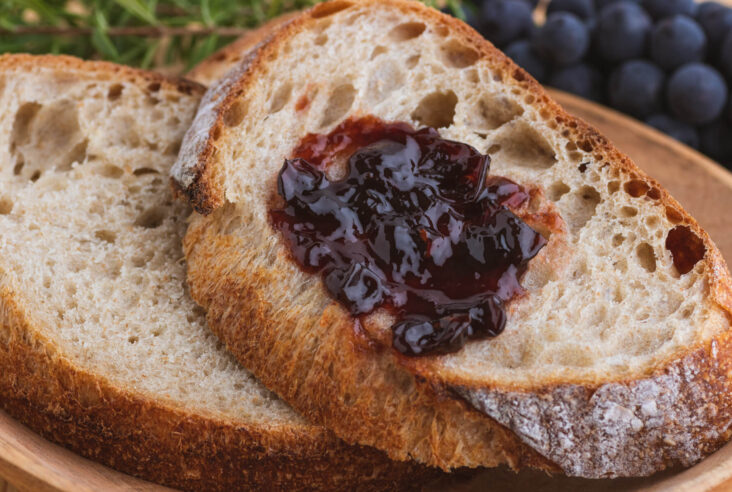
How to Make perfectly sweet and sour ruby red Nanking Cherry Jelly and what to do if it doesn’t work the first time.
I love making jams and jellies! If you would like to try to preserve your own, check out these recipes for Strawberry Rhubarb Jam and Easy Amaretto Sour Cherry Jam. Once you start preserving, you just can’t stop!
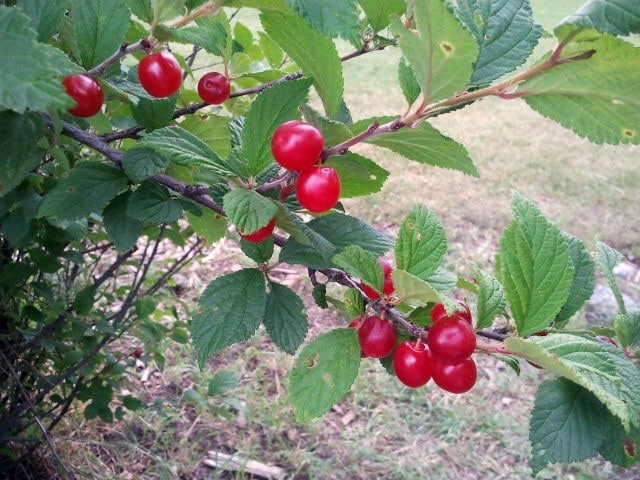
Picking Nanking Cherries
I think it’s true what they say about chefs fingers being impervious to pain. They are able to reach into a saute pan and flip over meat with their bare hands with barely a flinch and eventually they lose the burning sensation all together.
However, as I sit here typing this my delicate little fledgling chef fingertips are throbbing in pain. I’ve just finished making my Nanking Cherry Jelly for the second time. Yes, two days in a row and I don’t think my fingers can take anymore.
No matter how many fancy canning gadgets and ‘helpers’ I buy, I always end up using my bare hands to get those lids on nice and fast. No other tool is faster than my hands, unfortunately.
Let’s rewind back to three days ago shall we? Back when I still had all my fingerprints. Kid number two and I went geocaching and found more than we bargained for. Bushes FULL of Nanking Cherries in a public location just ready to be picked.
We marveled at our good fortune and returned the next day with a 4 L pail. It was 30°C in the sun and we picked until the pail was overflowing and my arms were bleeding from so many scratches. Kid number two was not impressed with me.

Want to save this recipe?
Enter your email below and get this post sent straight to your inbox. Plus, I’ll send you my weekly newsletter featuring the newest and best Dish ‘n’ the Kitchen recipes every week!
How to Make Nanking Cherry Jelly
We returned home and later that night I gently washed the very ripe cherries and boiled them in a pot for about 15 minutes so they would release their ruby juices.
I folded up four layers of cheesecloth and got hubby to pour the cherries and their juices through the cloth and into a bowl. Together we gathered the cherries in the cheesecloth, then hung them so more juice could be strained into the bowl overnight.


The next morning, I came downstairs to find just shy of 8 cups of Nanking Cherry juice had dripped into the bowl. Since my recipe was for 6 cups only I decided to set aside the rest so that I could make syrup later.

Prepare Canning Equipment
I washed and set the jars upside down in a tray of water in the oven, set at 225°F. The washed lids and rings went into a pot of boiling water along with the tongs and measuring cup.
I sterilize everything that will touch the jelly or jars during the process of filling the jars in this manner for ten minutes.
Prepare the Cherry Juice
Meanwhile I measure out the sugar (7 cups) and add the pectin and 2 tbsp lemon juice to the Nanking Cherry juice in the pot. Mistake number one. I’ve never used liquid pectin before but I HAVE made jam before.
Instead of reading the instructions I assumed the liquid pectin goes in before you heat up the juice. Apparently it does not. Had I read the instructions I would have added the liquid pectin after the juice had boiled.
After the mixture came to a rolling boil, I added all of the sugar at once, then brought it back up to a boil. The boil has to be fierce for about a minute or longer.
The best way to know if your jelly is going to set is to take some out in a tablespoon at this stage and when it cools it will either set or it won’t.
When it reaches the correct temperature ( a fierce boil), remove the pot from the heat and stir for a while, skimming the foam off the top. Then the real work begins.
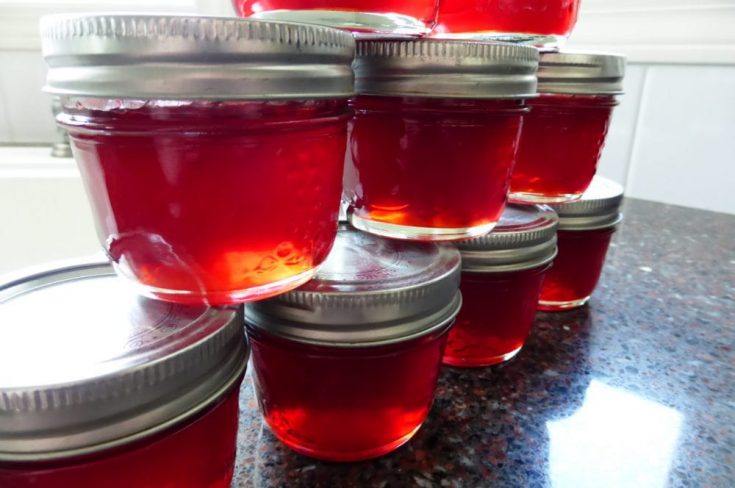
Filling the Jars
Grab the little jars, two at a time out of the 225°F oven. Use the sterilized glass measuring cup to start filling the jars, careful to not get any jelly on the rims.
Once jars are full (minus 1 cm of head space) take the lids out of the pot of boiling water with the tongs. Try to be quick so the jelly stays as hot as possible for proper sealing. Place the lids on the jars, then twist on the rings.
I had a lot of jelly and it took a while to fill the jars. Mistake number two; not reheating the jelly soon enough. I did think to reheat the jelly to the proper temperature but by then I was almost done filling jars. Coincidentally, the large jar that I filled right after I had re-heated the jelly was the only one out of the whole batch that set.
How to Know if the Jars Seal
After the jars were filled, I went about all my regular daily business (coffee and computer) keeping my ears trained to listen for the sound of jars sealing. There is almost no better sound in the world. It’s like when you open up a new can of tennis balls…Anyway about 2/3 of the jars sealed which meant I either 1) tightened the rings too tight or 2) let the jelly cool down too much. All these tips are good to have in hindsight.

How to Rescue Runny Nanking Jelly
Hours later I moved one of the cooled jars to find that my jelly was still mostly liquid and my heart sank. All that work and expectation just went out the window. The jelly might have too but I am extremely stubborn and I was determined to have cherry jelly made from scratch.
So I looked on the internet and found an article about how to fix runny jelly. Okay. I can do this, AGAIN!
This morning I carefully scraped all of the un-set jelly out of every jar into the jelly pot, washed all the jars, lids, and rings and sterilized everything again.
I added half a package of powdered pectin at the beginning when the half jelly was cool. Then I added a cup and a half sugar after it had boiled. I let that jelly boil more fiercely than ever before and filled half of the jars. Then I reboiled the remaining jelly and filled the rest of the jars.
Now I am sitting here with coffee typing this post and listening to the odd ‘pop’ of jars being sealed. Music to my ears.
Know When to Give Up
Meanwhile, I decided to make the rest of the scant 2 cups of nanking cherry juice into a syrup for pancakes. This is where the irony sets in (pun intended).
I boiled up the juice with a cup of sugar and about half a cup of amaretto. I let it simmer for about 20 minutes and then shut the heat off and forgot about it until after dinner.
When I went back to have a look…they damn syrup had set!! So, my jelly was like syrup and my syrup was like jelly. Some days you can never win.
Other Cherry-licious Recipes from Dish ‘n’ the Kitchen
Sour Cherry Cheesecake Hand Pies
Pin Nanking Cherry Jelly HERE.

If you make this Nanking Cherry Jelly recipe, please be sure to leave a comment and/or give this recipe a rating! Be sure to follow me on Facebook and Pinterest for my latest recipes. Also, if you do make this recipe, please tag me on Instagram, I’d love to see what you guys are making! Thank you so much for reading my blog.
Nanking Cherry Jelly
How to Make perfectly sweet and sour ruby red Nanking Cherry Jelly and what to do if it doesn't work the first time.
Ingredients
- 6 cups fresh cherry juice
- 7 cups granulated sugar
- 2 tbsp lemon juice
- 1 box granulated pectin
Instructions
- Pre-heat oven to 225 F. Place a plate in the freezer. Wash and set jars upside down in a tray with about an inch of water in it . Place in oven for ten minutes.
- Add corresponding washed lids and rings to a pot with enough water to cover them all. Boil for 5 minutes and keep hot until ready to use.
- Add cherry juice, box of powdered pectin, and lemon juice to a large pot.
- Measure out the sugar to have it ready.
- Bring cherry juice to a boil and add sugar all at once. Stir well.
- Bring to a good rolling boil for about a minute. Test a drop of jelly on the cold plate to see if it sets. If it doesn't, boil longer and keep on testing on a freezing cold plate until it does. This could take anywhere from 5-20 minutes.
- Remove the pot from the stove and skim off the foam for a few minutes.
- Fill each jar to within 1 cm of the top, taking care not to get any jelly on the rims (a funnel is useful here).
- Place lid on jar, then tighten lid on until it is just on. Do not over tighten the lid.
- Allow jelly to set for a few hours before moving. If they do not set, repeat process or store in the fridge.
Nutrition Information:
Yield:
36Serving Size:
1Amount Per Serving: Calories: 174Total Fat: 0gSaturated Fat: 0gTrans Fat: 0gUnsaturated Fat: 0gCholesterol: 0mgSodium: 7mgCarbohydrates: 45gFiber: 1gSugar: 43gProtein: 0g
Nutritional calculation was provided by Nutritionix and is an estimation only. For special diets or medical issues please use your preferred calculator.
The first batch did not set, so I doubled the Pectin. That meant reheating the liquid, boiling it and then adding the pectin. That worked. I also used liquid Certo, not power. Additionally, I added almond flavoring – yummy outcome. This is excellect as the topping for cheesecake.
Hi Dianne. The recipe specifies pectin crystals, not liquid. They require different methods. I’m glad you didn’t give up. Enjoy that jelly.
Mine didn’t set! I’ve made it before and it did set. When you say to do it again do you mean to simply boil it longer than put in jars with new lids? It already has the sugar, lemon juice, and pectin…. Please help!
Oh dear, sometimes that just happens! As I describe in the post, I reboiled/resealed everything. You can add more powdered pectin if you like, just be sure to throw a plate in the freezer before you start everything. Then, use the freezer test described in step 6 to test whether or not the jelly will set.
I love that the jelly didn’t set but the syrup did. Of course that happened! Sometimes when I make smoothies, the pectin in the fruit causes my smoothie to set, but then I make runny jams. I shake my fist at the universe.
Lol…is that why smoothies do that?! so weird!
I have 2nd-year Nanking cherries loaded with green fruit. I’m hoping to have enough for jelly. Thanks for the post. Looks delicious (and so pretty)!
I’m so jealous! I have to forage for mine 🙂
Do let me know how it turns out!
Of course you should 🙂
But what did it taste like???
Oh, haven’t tried the jelly yet but the ‘syrup’ OMG!! I should put amaretto in all my jams and jellies 🙂
The result looks fantastic. Great photos. I hope your hands have recovered! 🙂
They were pretty sensitive yesterday but seem fine today.And yes! The jelly set the second time 🙂